5.16. Stream Scheduler
This section describes the Stream Scheduler panel which can be used to build a series of actions based on existing streams in the current testbed.
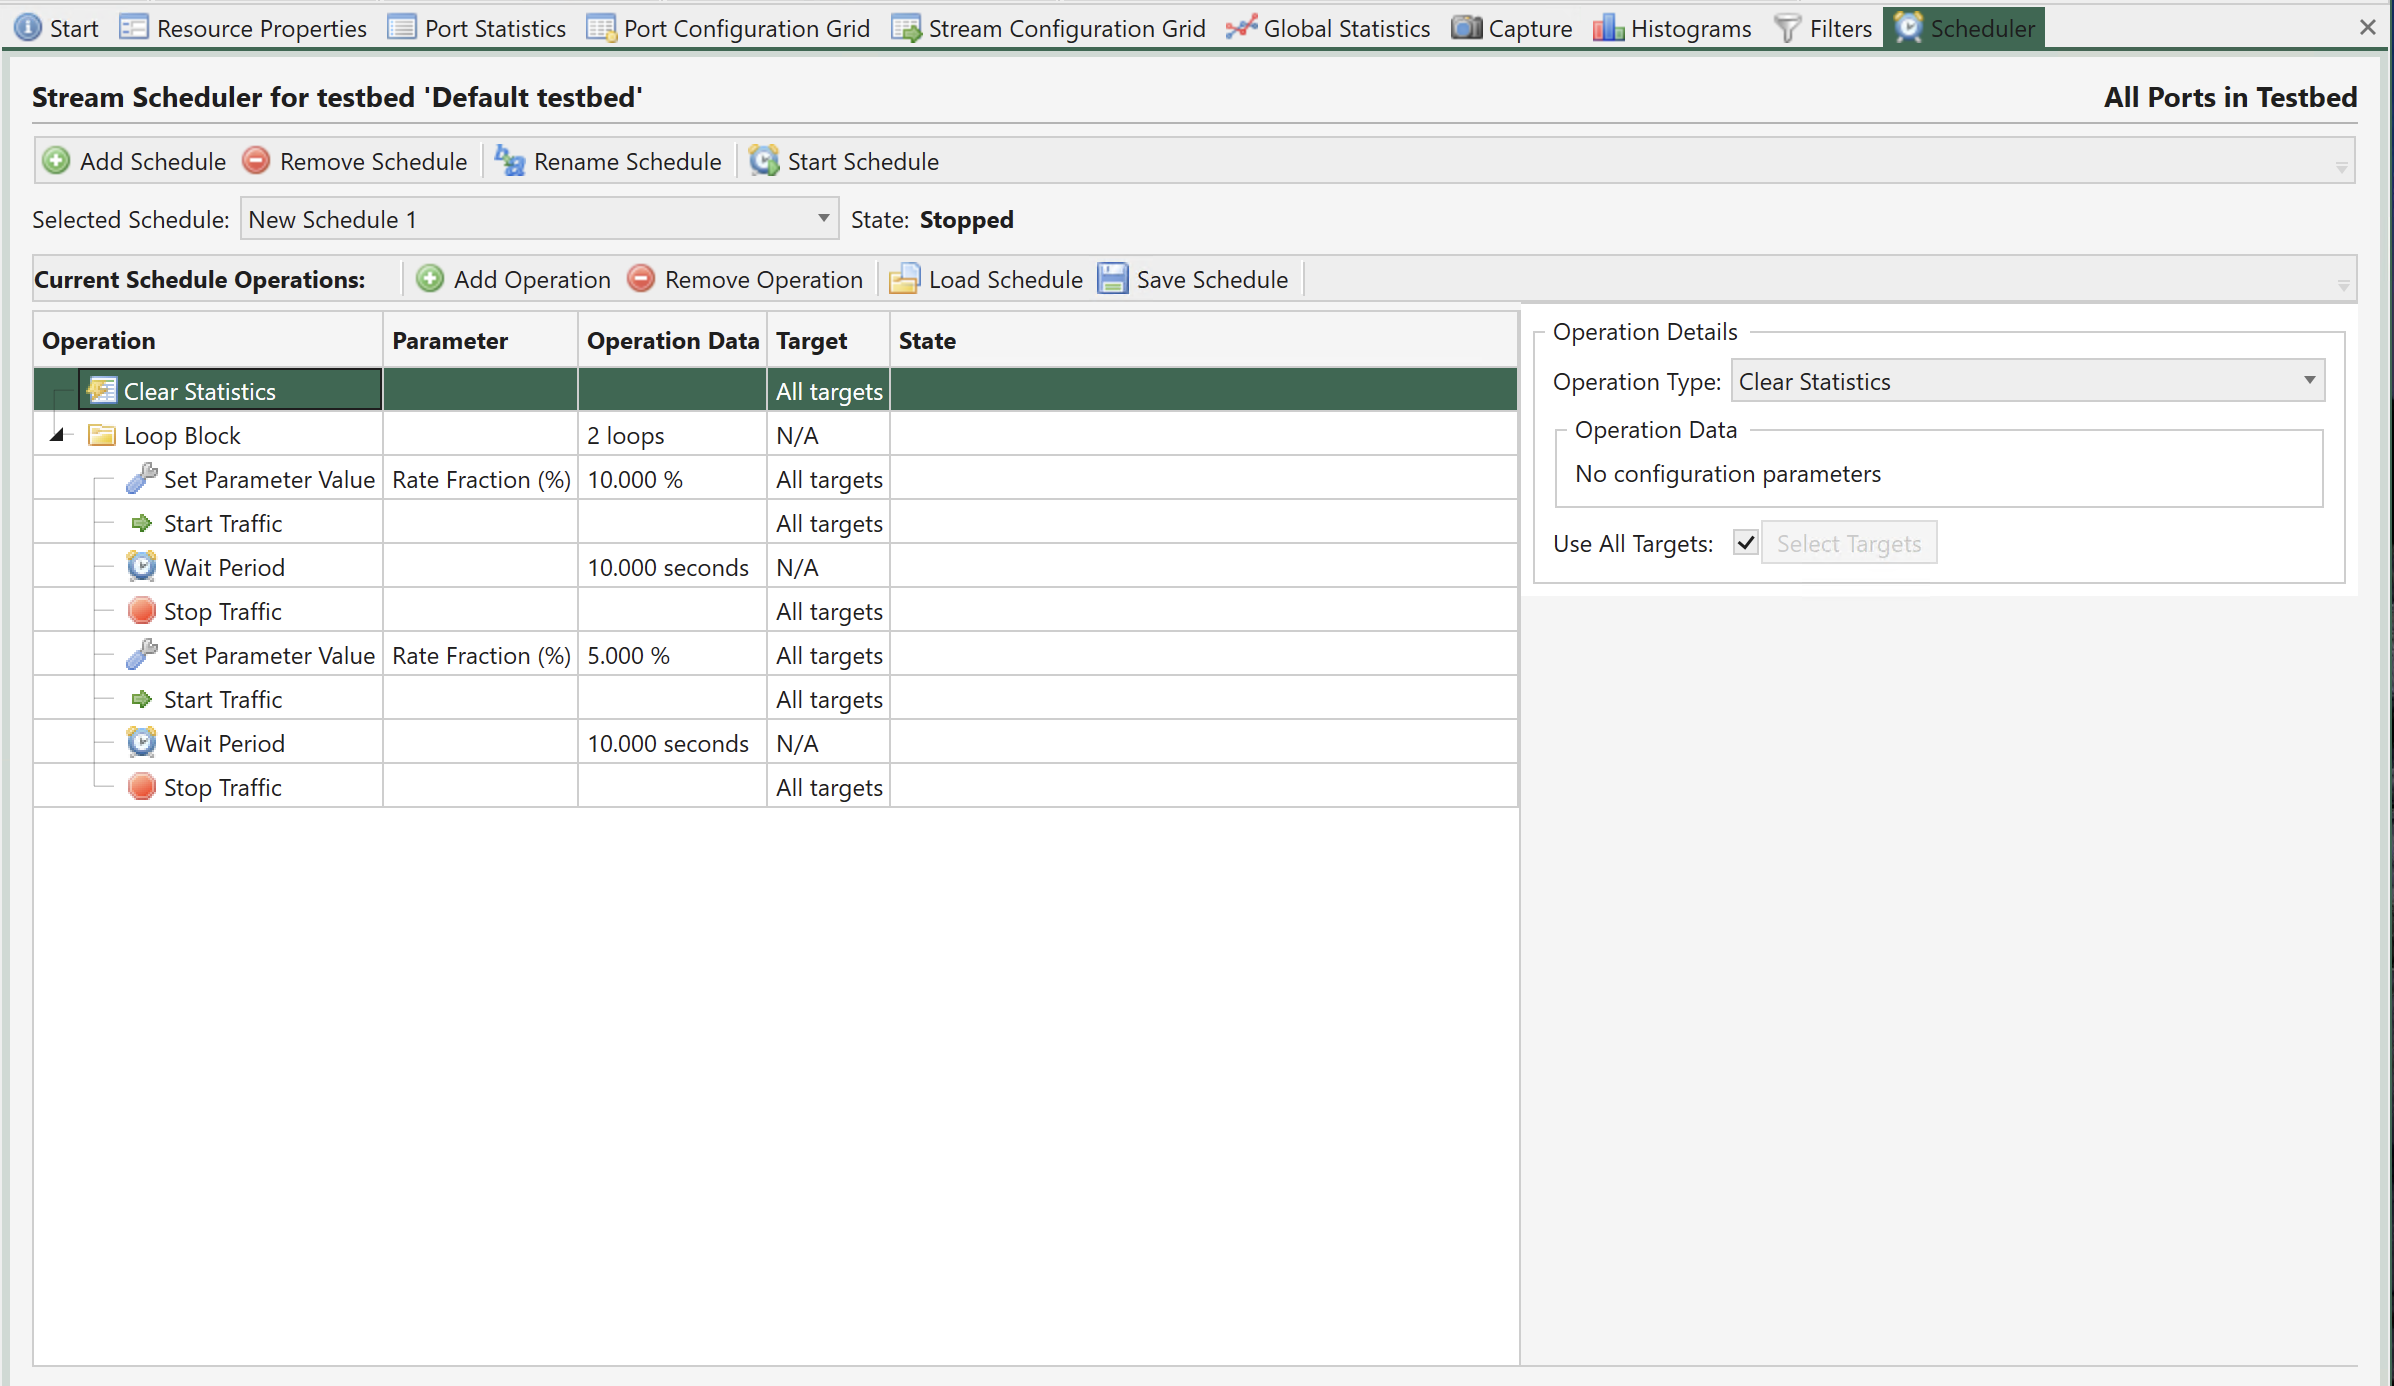
Fig. 5.141 Stream Scheduler
5.16.1. Overview
The Stream Scheduler works closely together with the currently selected testbed and works exclusively with the streams defined on the used ports.
Schedules
Each testbed can contain several schedules. A schedule is simply a collection of operations that will be executed sequentially (although with some looping support as described below).
Operations
As stated above a schedule is basically a collection of operations that will affect the traffic generation. The following operations are supported:
Operation Name |
Target Type Explanation |
Explanation |
|---|---|---|
Set Parameter Value |
Port or stream |
Set the value of a supported stream or port parameter, such as a stream rate. |
Wait Period |
None |
Pause the scheduling for a specified number of seconds, typically to let the traffic run for a specified period of time. |
Start Traffic |
Port |
Start the traffic on selected port(s). |
Stop Traffic |
Port |
Stop the traffic on selected port(s). |
Clear Statistics |
Port |
Clear all statistics counters on all ports used in the current testbed. |
Loop Block |
None |
Enable specifying a block of operations that can be repeated for a specified number of times. |
Enable Stream |
Stream |
Enable selected stream(s). |
Disable Stream |
Stream |
Disable selected stream(s). |
Suspend Stream |
Stream |
Suspend the selected stream(s). |
Custom Port Command |
Port |
Send a custom command to the port(s) selected as targets for the command. This command can be any port-level script command. See this link for details. |
Custom Stream Command |
Stream |
Send a custom command to the stream(s) selected as targets for the command. This command can be any stream-level script command. See this link for details. |
Note
Note on custom commands: The scheduler will perform a certain level of consistency checking on the normal commands but it will not be able to perform any consistency check on any custom commands.
Targets
Some operations can be performed on selected targets, which are either streams or ports. These operations can either apply to all valid targets or you can select exactly which targets you want the operation to operate on.
Valid targets are ports included in the current testbed or streams defined on those ports. Certain operations, such as the Wait Period operation, are not associated with any specific targets as they apply to the schedule as a whole.
Common Scenarios
This section explains how to perform common schedule operations.
Creating Simple Schedule
First you should setup a simple configuration consisting of two ports, each with a single stream paired to each other (you can use the Stream Wizard for this). Then you can perform the following actions in order to define a simple schedule for your streams:
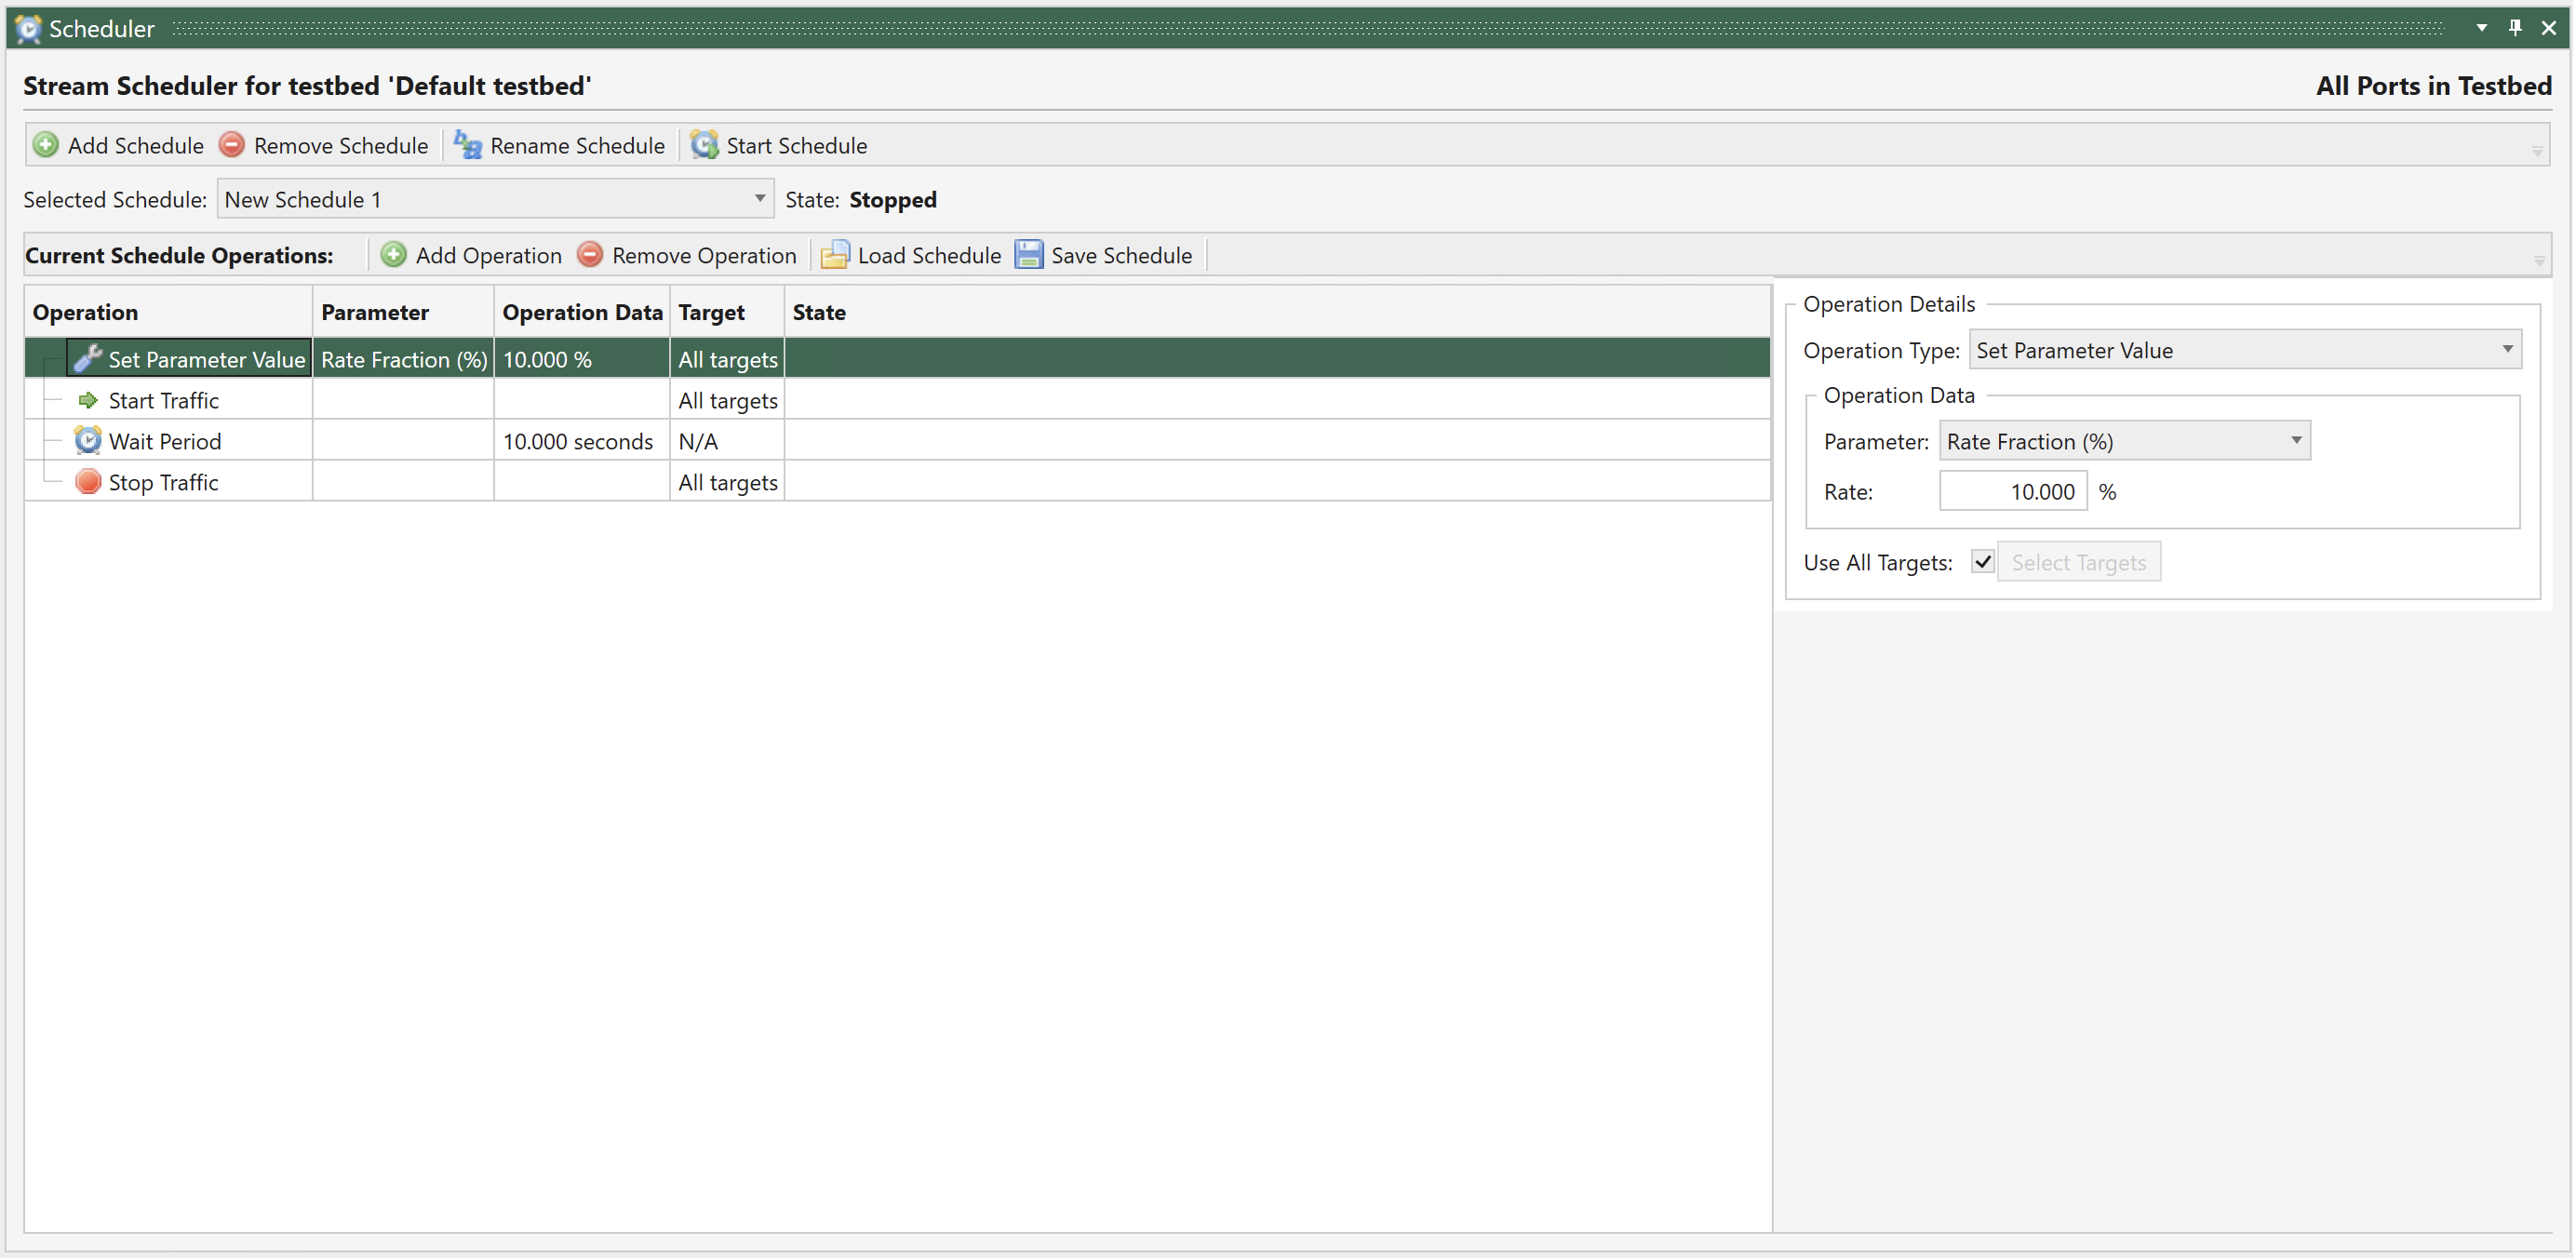
Fig. 5.142 Create simple schedule
Bring up the Scheduler panel by selecting it in the lower panel strip. Push the little “paper-pin” in the upper right corner to prevent it from auto-hiding.
Add a new schedule by clicking the Add Schedule in the upper panel toolbar.
Click the Add Operation button in the schedule operations toolbar and select the Clear Statistics operation in the list.
Also add the following operations in the specified order:
Set Parameter Value
Start Traffic
Wait Period
Stop Traffic
You should just use the default value for each operation for now.
Press the Start Schedule button in the upper panel toolbar. The schedule will now perform the specified operations and stop after that.
Changing Traffic Rate
This section explains how to change the traffic rate of the streams after a while. Your streams will start with a 10% rate but after 10 seconds their rate will drop to 5%. The section will extend the schedule defined in the last section.
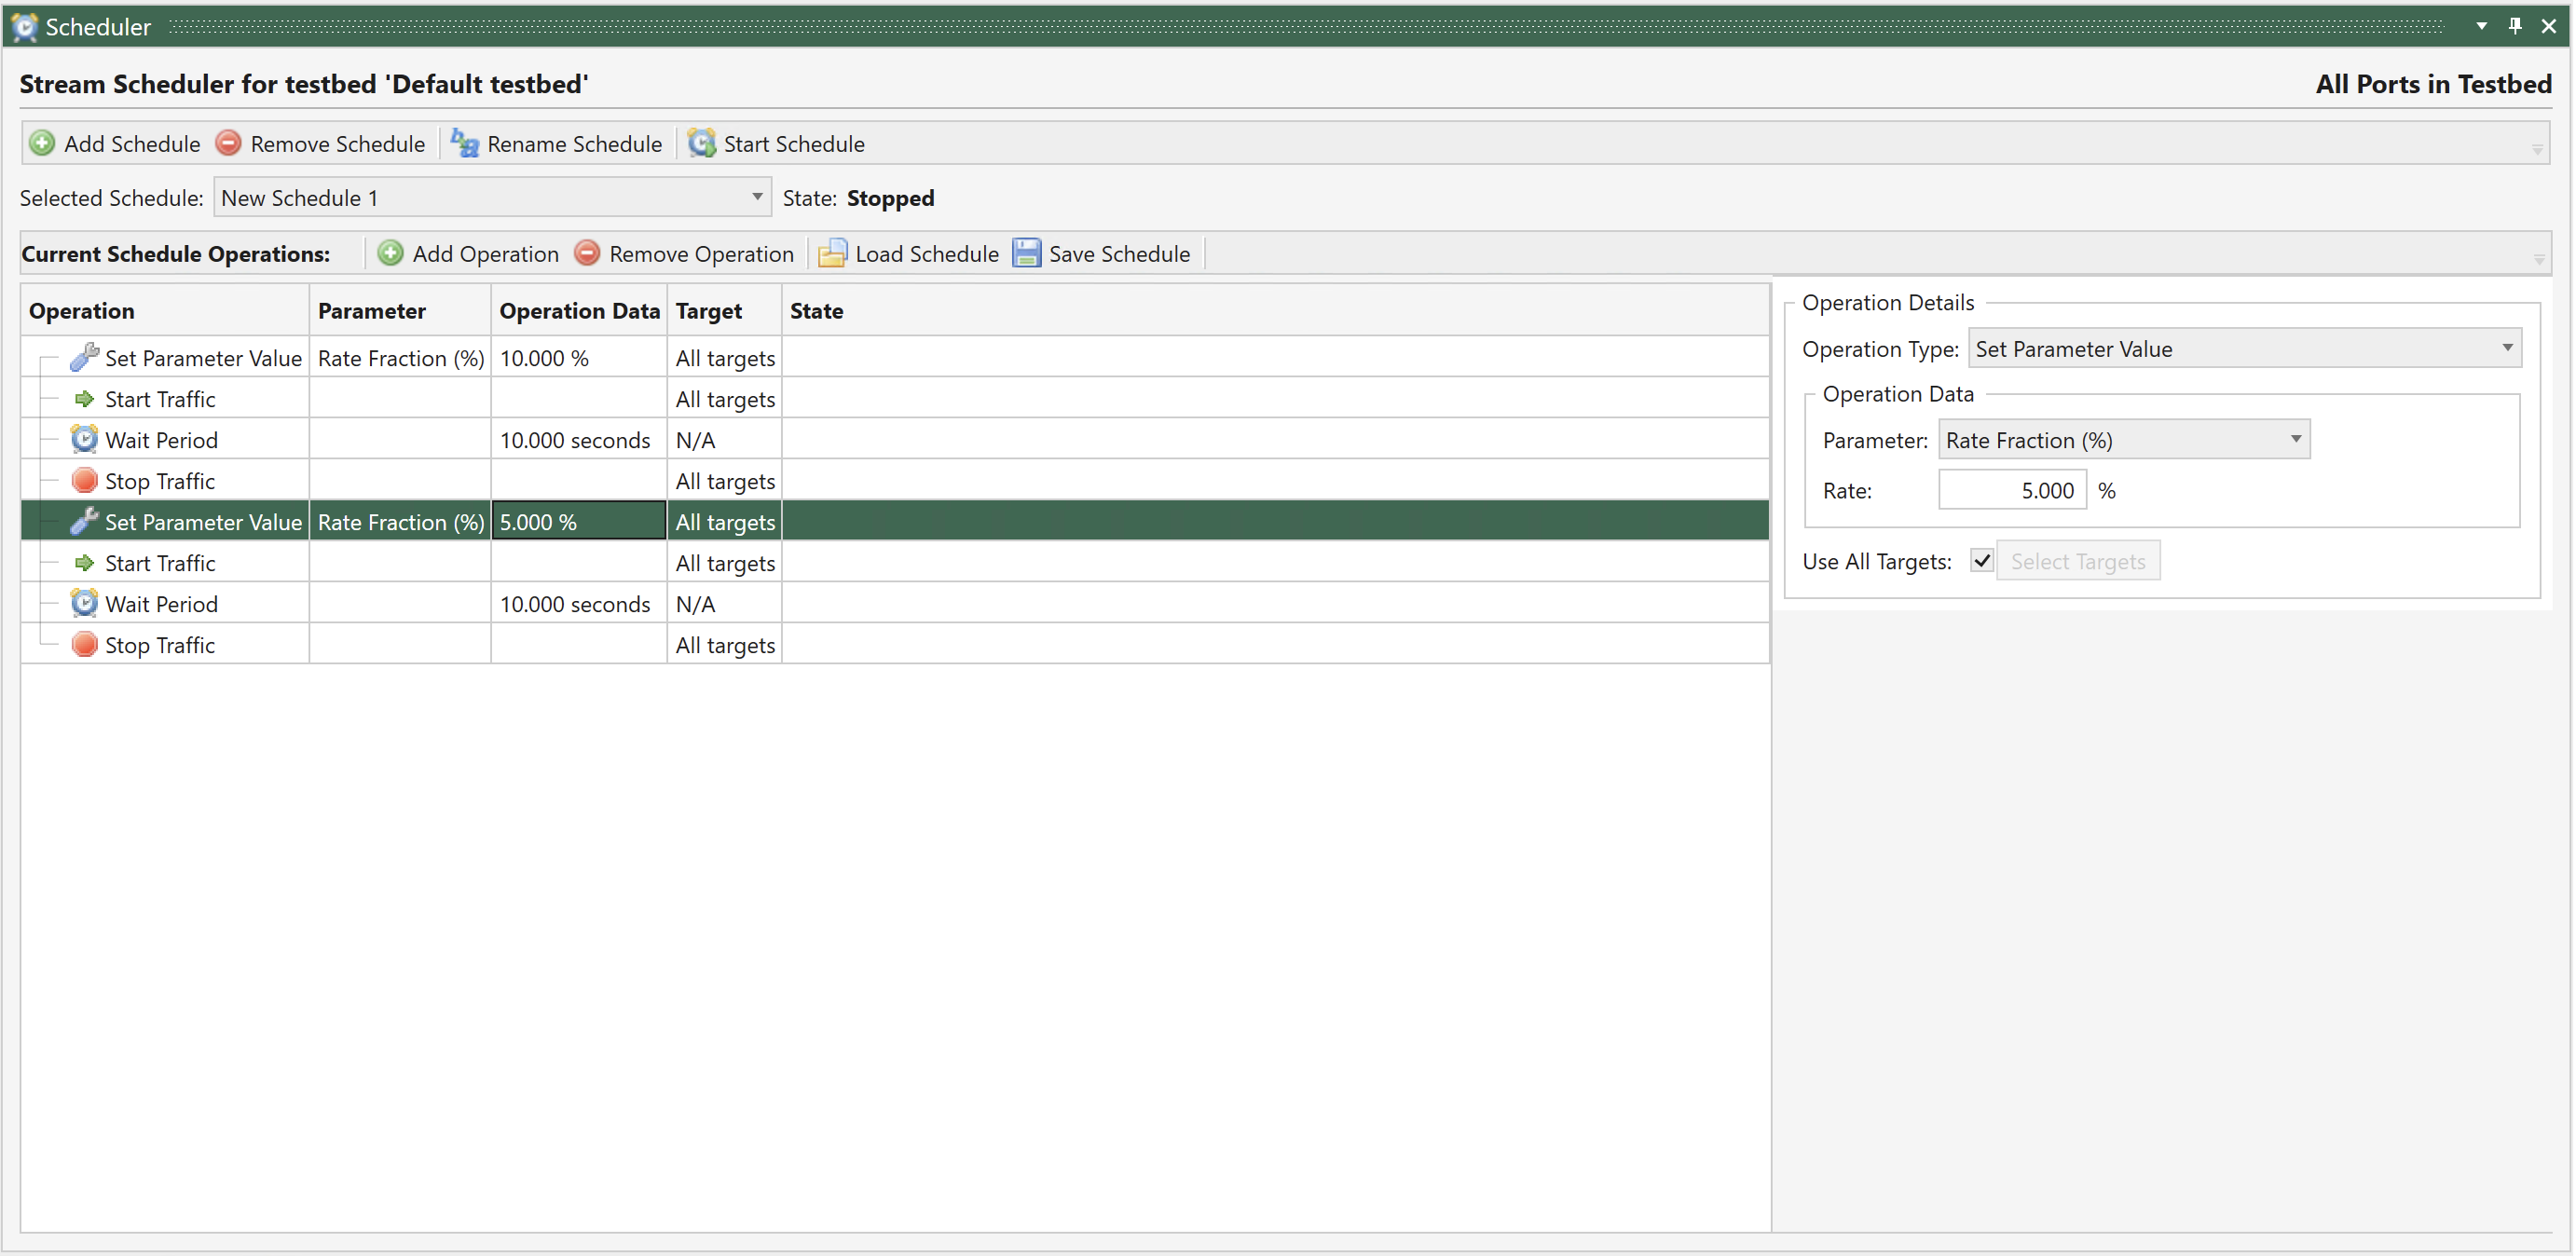
Fig. 5.143 Change traffic rate
Perform the following actions:
Select the last Stop Traffic operation and insert these additional operations after it:
Set Parameter Value
Start Traffic
Wait Period
Stop Traffic
We need to stop the traffic while changing the rate value as the Xena tester does not support rate changes while the traffic is running.
Select the second Set Parameter Value operation and change the Rate value to 5% as shown in the image to the right.
Press the Start Schedule button in the upper panel toolbar. The schedule will now again perform the specified operations and stop after that. If you want to follow the progress of the rate you can use the Statistics Charting panel for that.
Changing Operations Order
This section explains how you can insert a new operation and move it to the desired location. Perform the following actions:
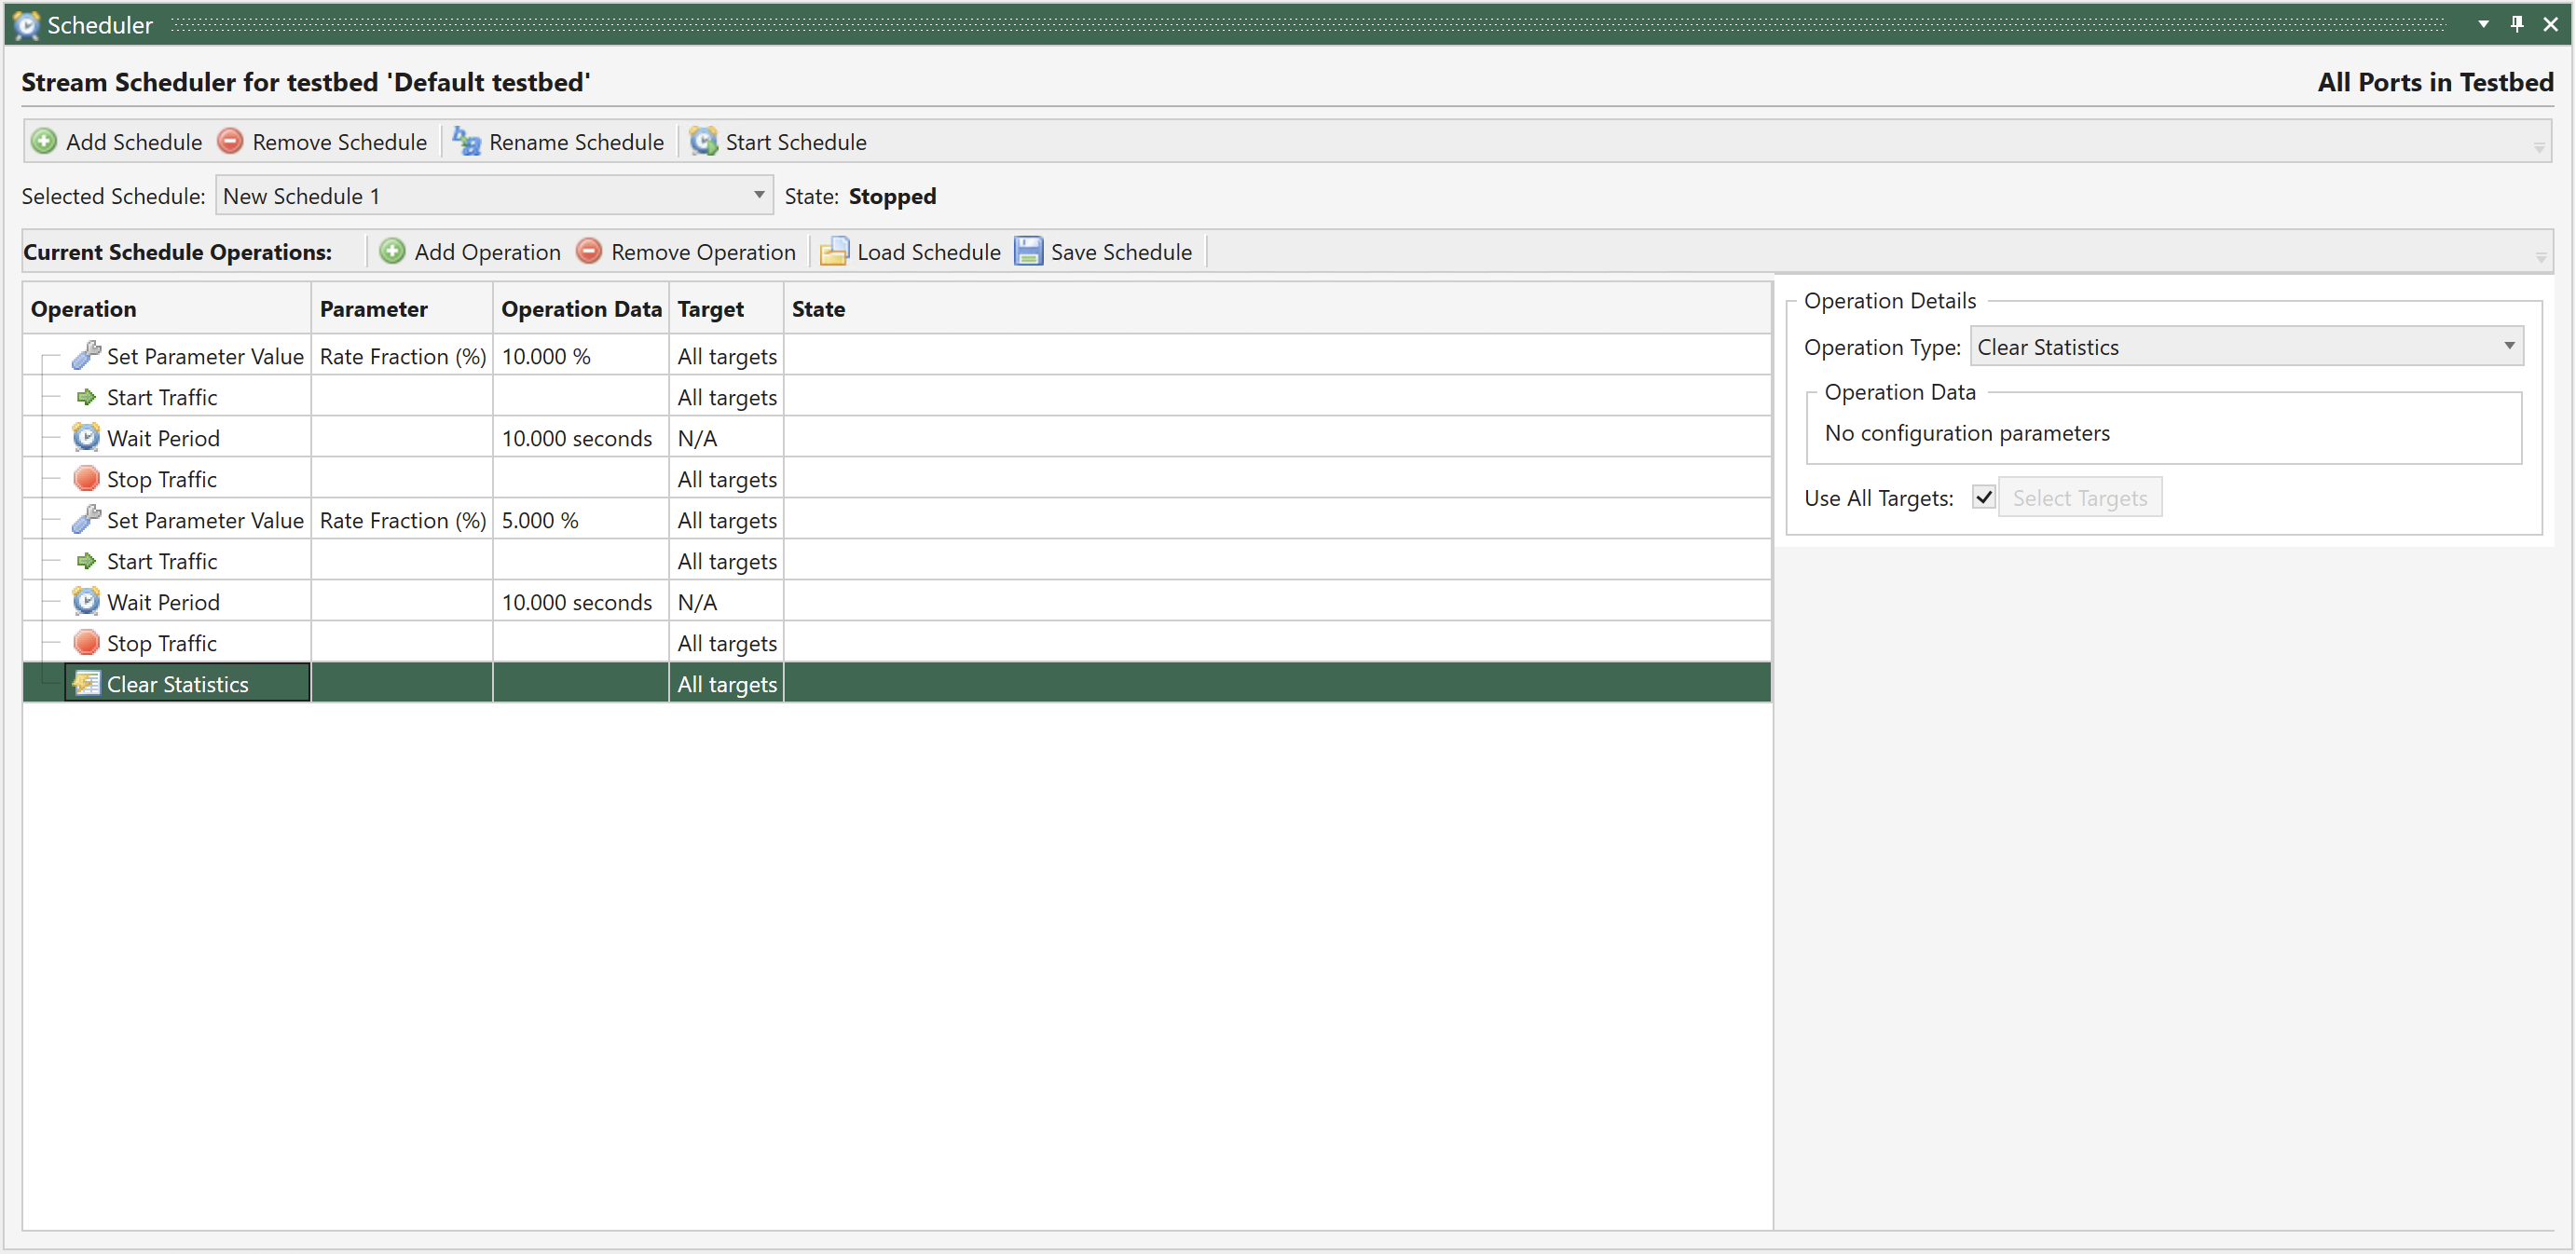
Fig. 5.144 Changing operation order
Add a single Clear Statistics operation to the end of the list.
Drag the new operation to the top of the list until you see a guideline on top of the upper-most operation (see screenshot).
Drop the operation at the new location.
Now all statistics counters will be cleared before traffic is started for the first time.
Adding Loop Section
It is possible to repeat a group of operations for a specified number of times by adding a Loop Block operation. This operation can contain a number of other operations which will be executed sequentially the specified number of times.
Perform the following actions to add a loop block with a repeat count of 2 and to move most of your existing operations into it:
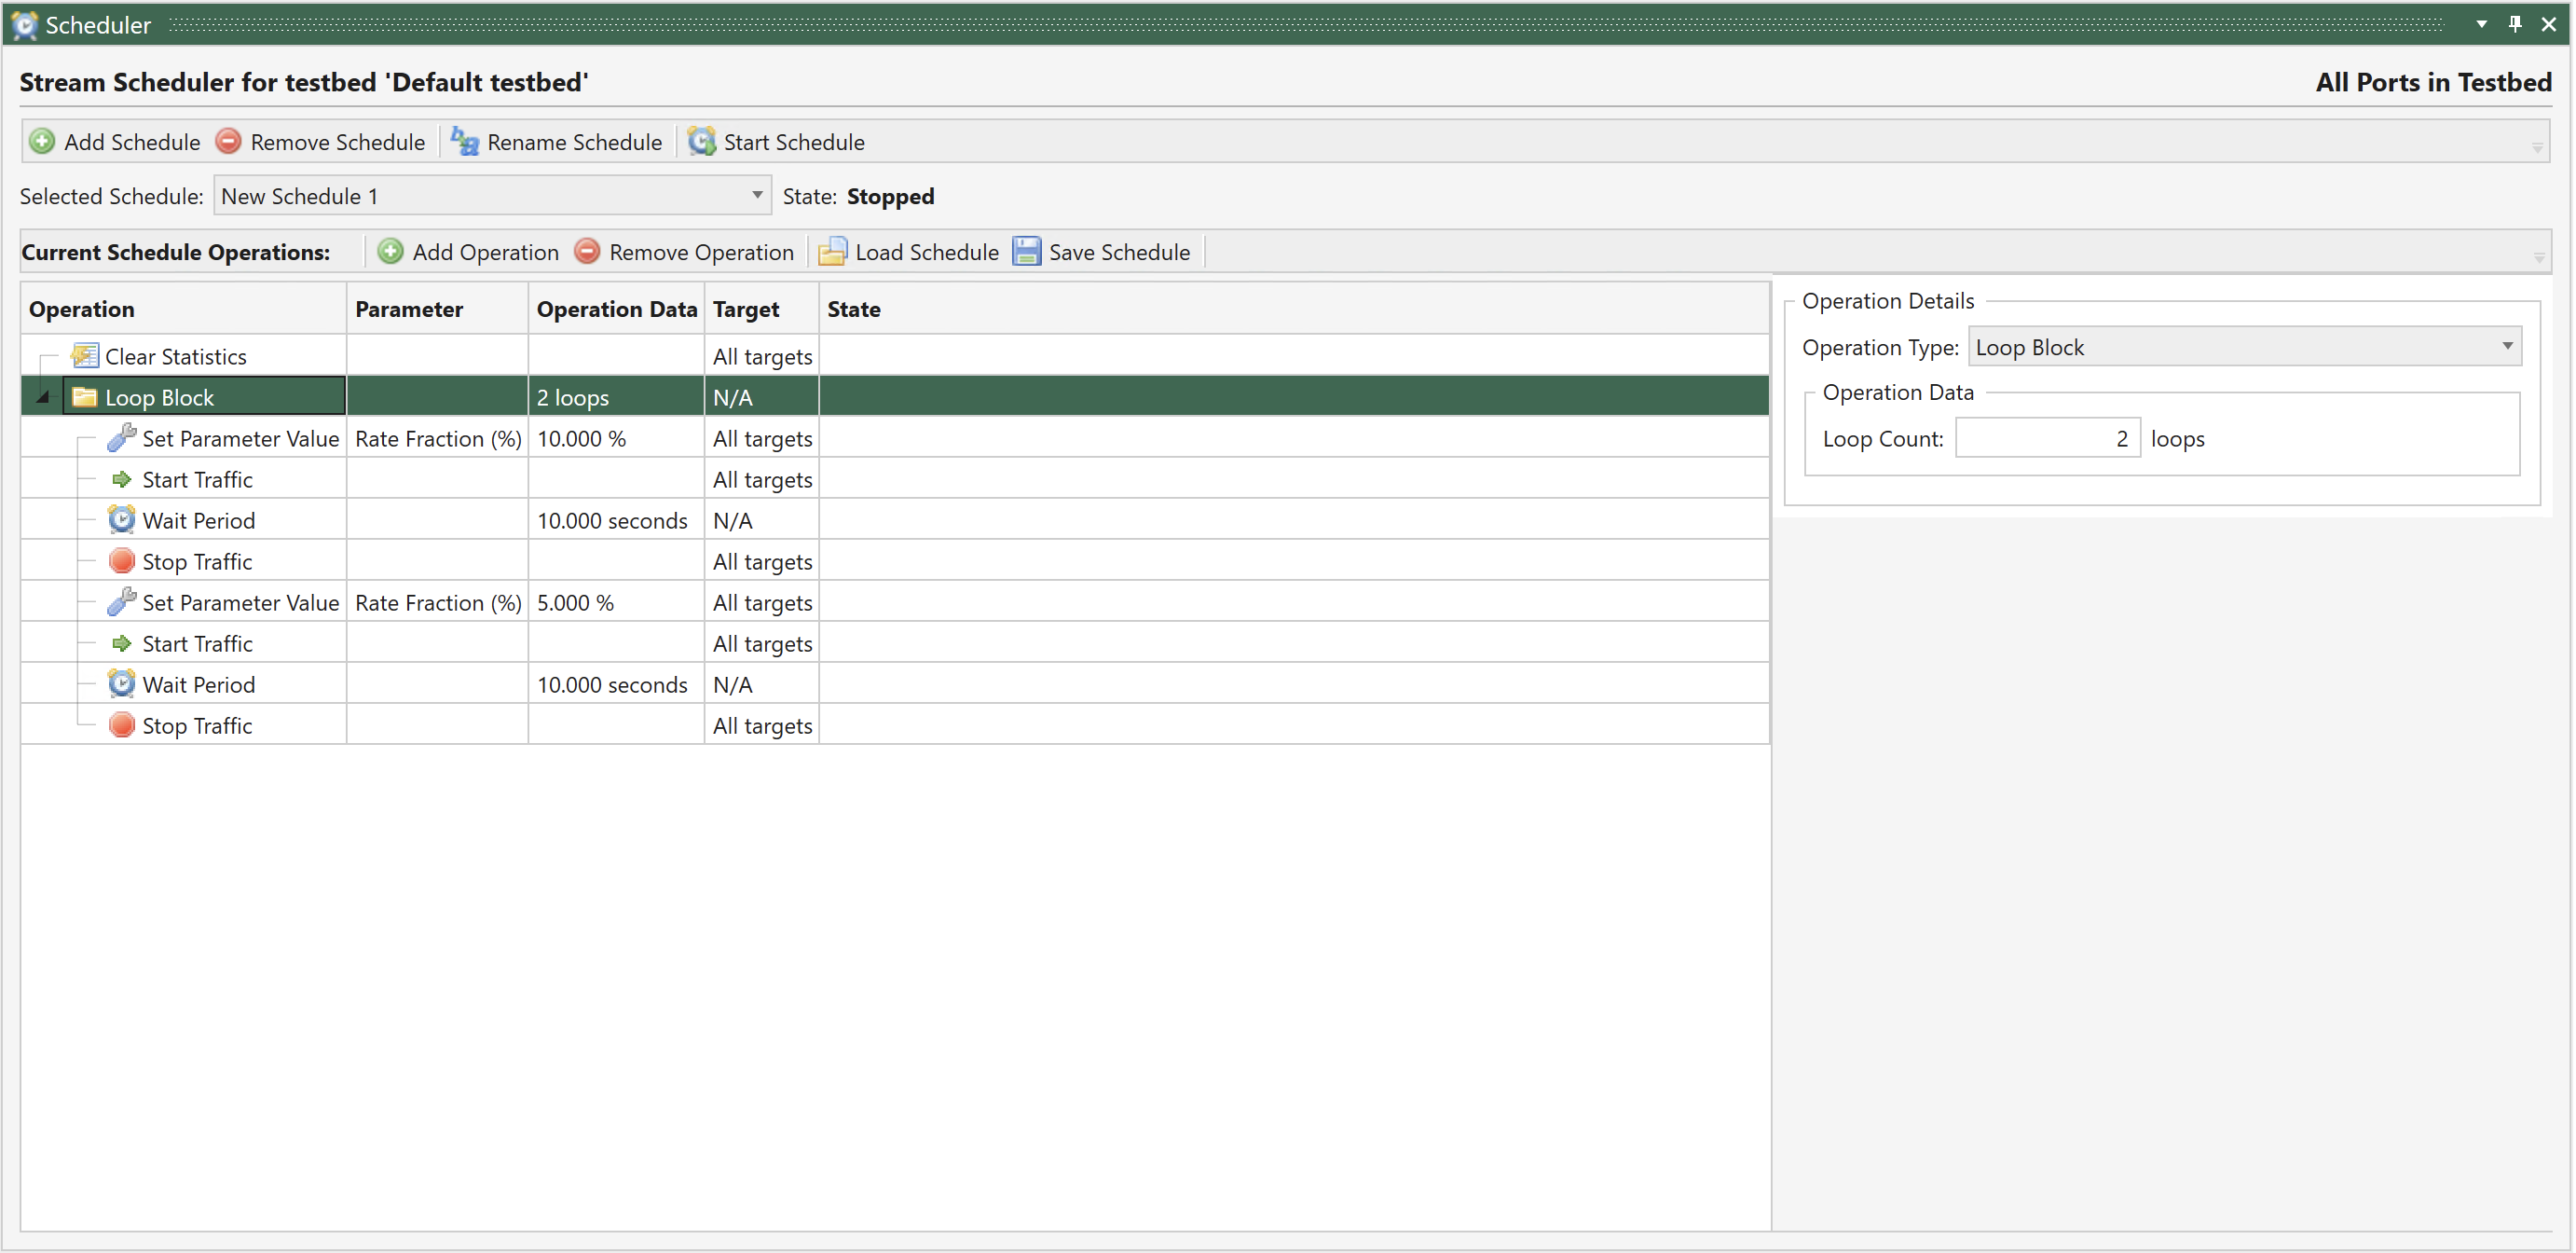
Fig. 5.145 Add loop section
Add a Loop Block operation to the end of the list.
Using the mouse drag and move the loop operation just below the top-most clear operation.
Drag the operation just below the loop block on top of the loop block so that it is shown indented compared to the loop operation.
Drag each of the other operations to the bottom of the previous operation as shown in the screenshot until they are all indented under the loop block.
Start the schedule and observe that all the operations in the loop block are executed twice.
Note
Loop blocks can be nested so that one loop block can contain another loop block.