4.2. Step-By-Step Guide
Add Chassis
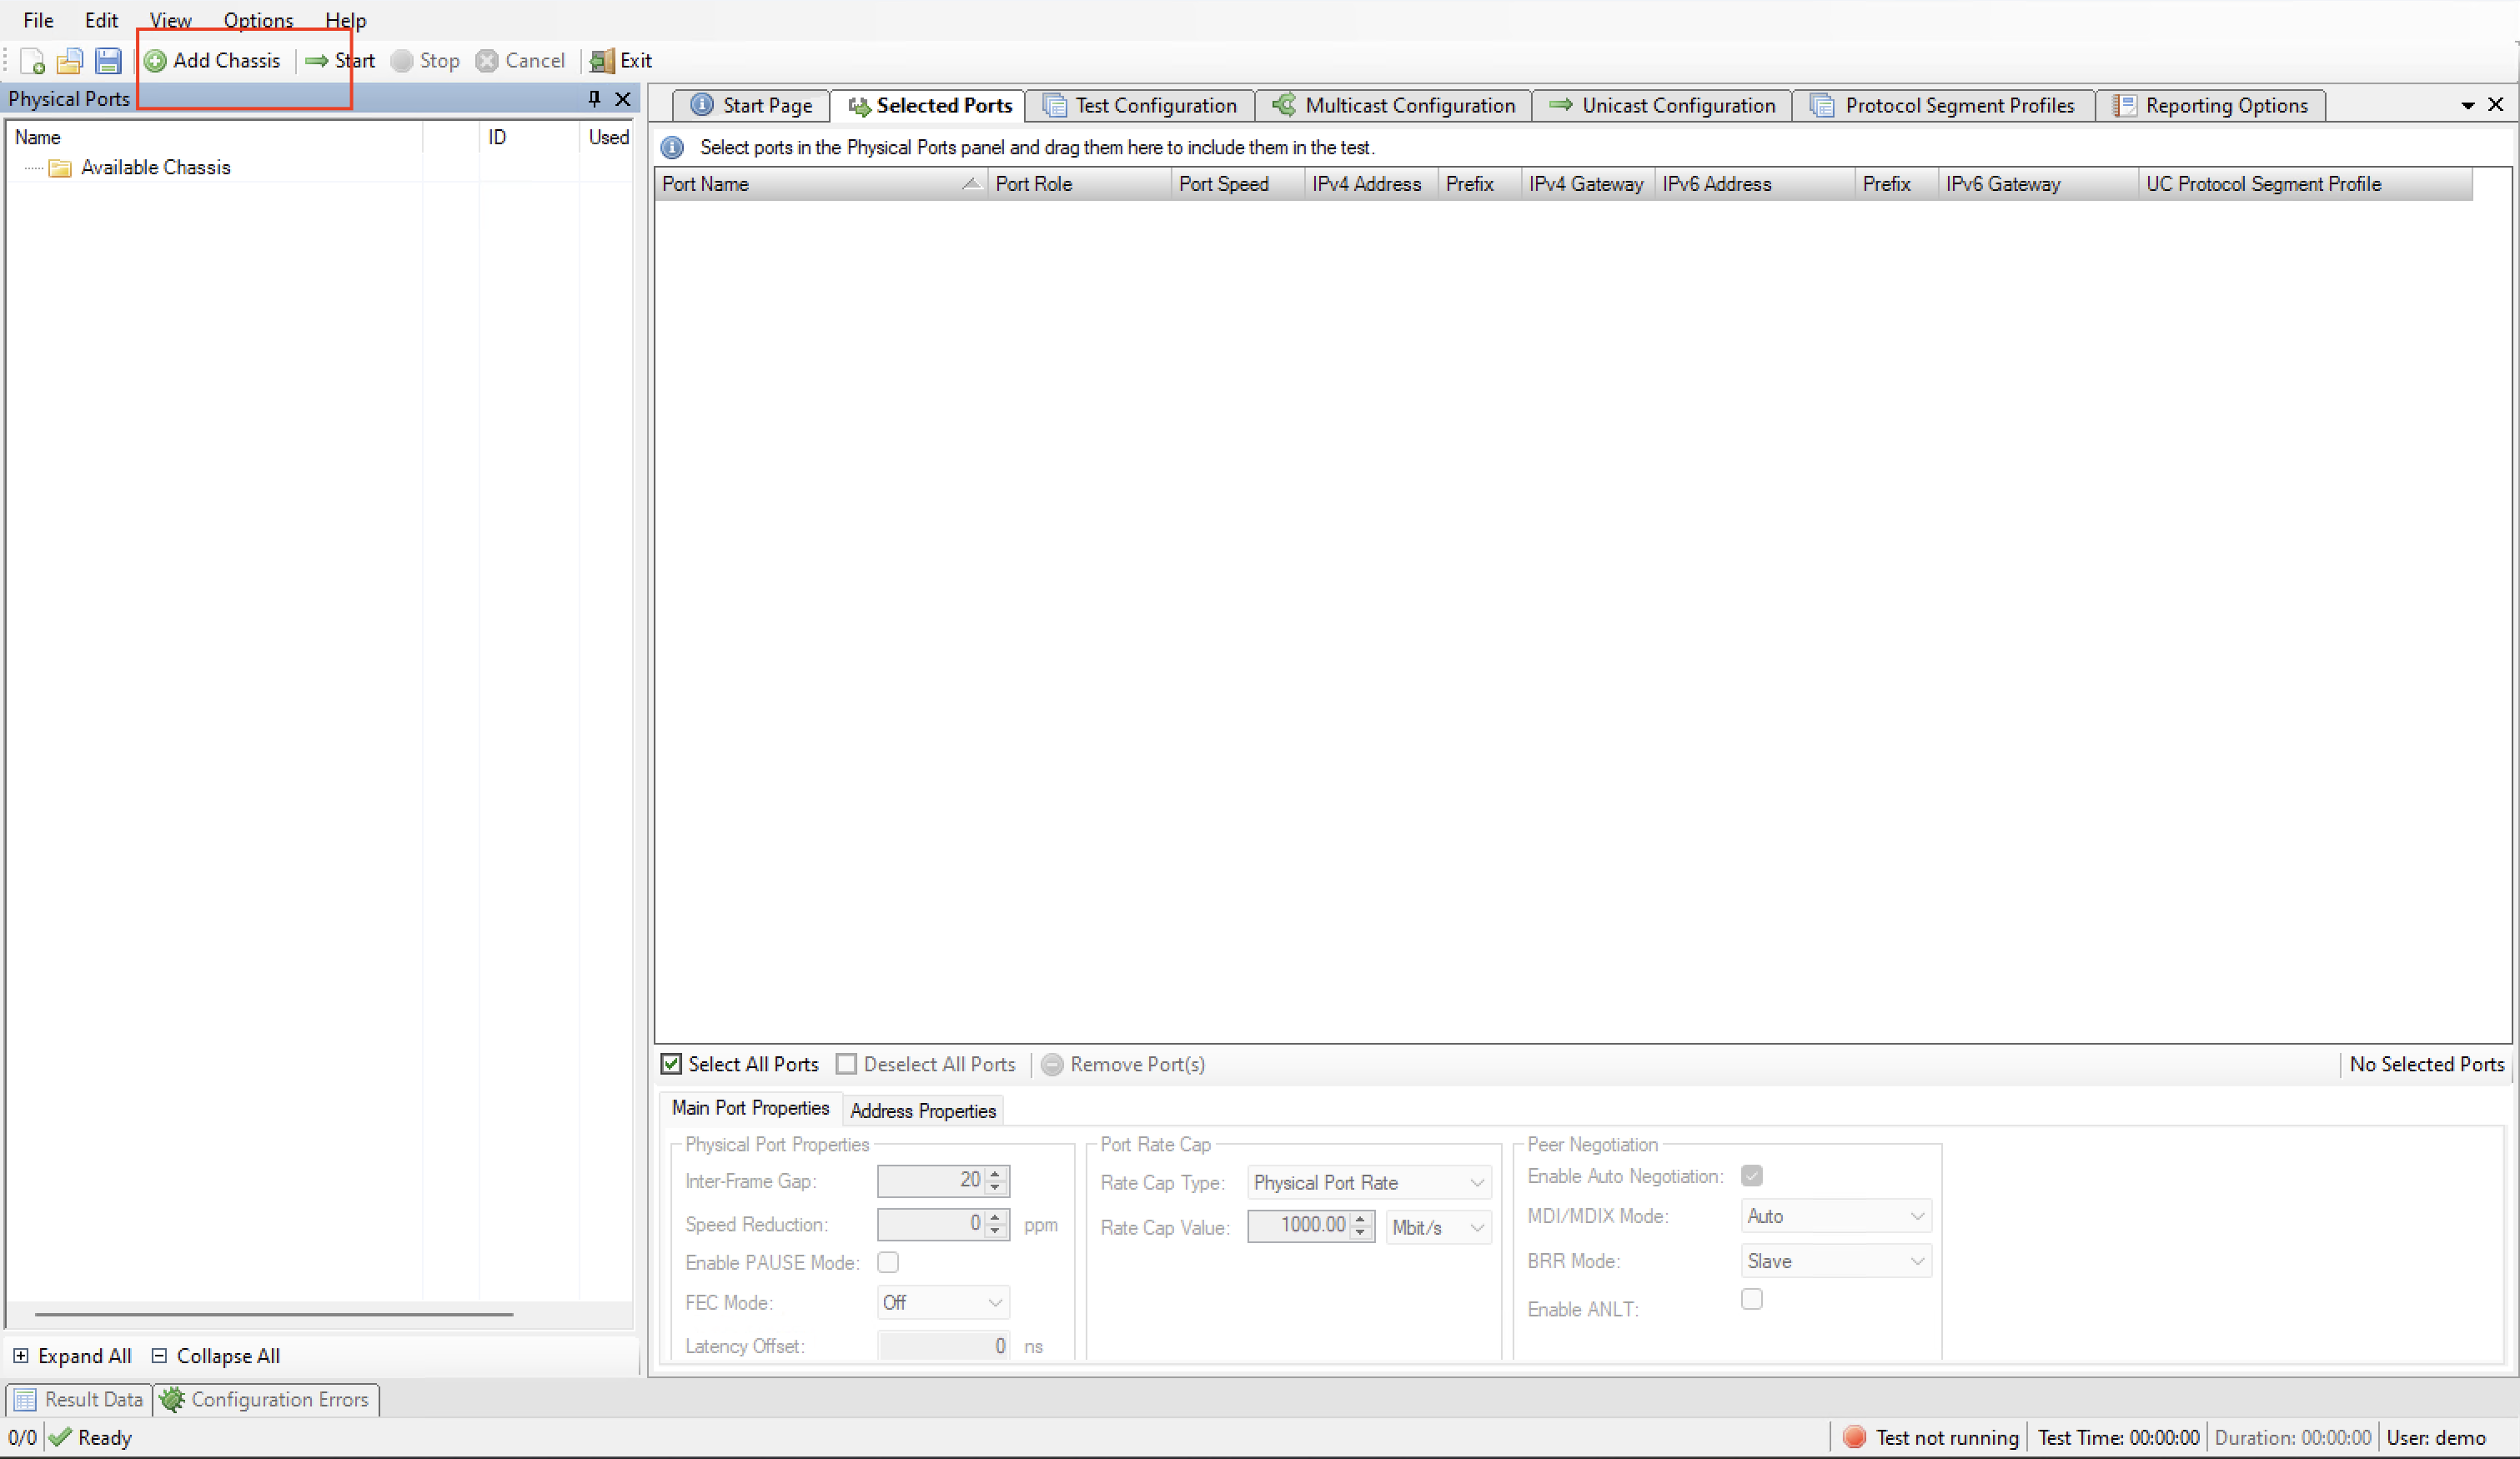
Click the Add Chassis button.
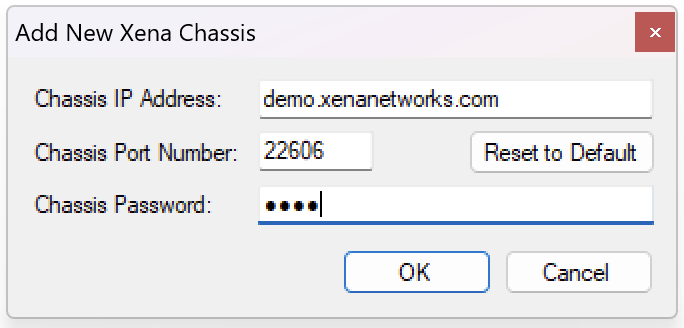
Enter the IP of the Management port under Chassis Address. Use xena as default Chassis Password.
Add/Configure Port/s
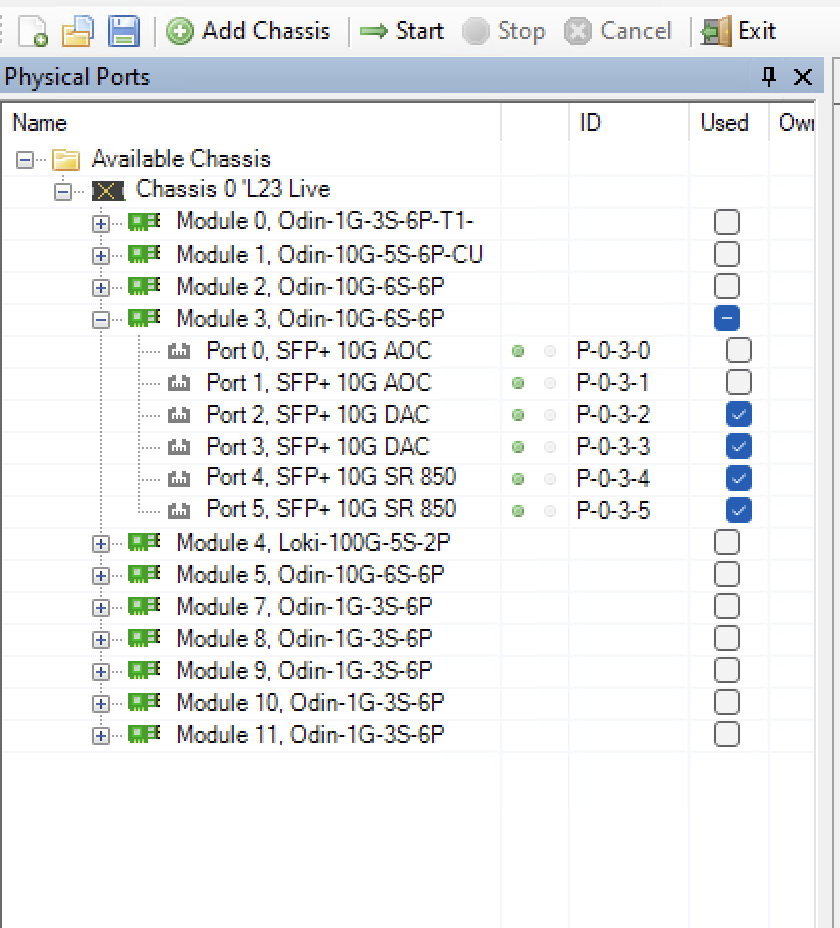
Select the Port(s) you need to use.
Choose the Port/s you want to configure.
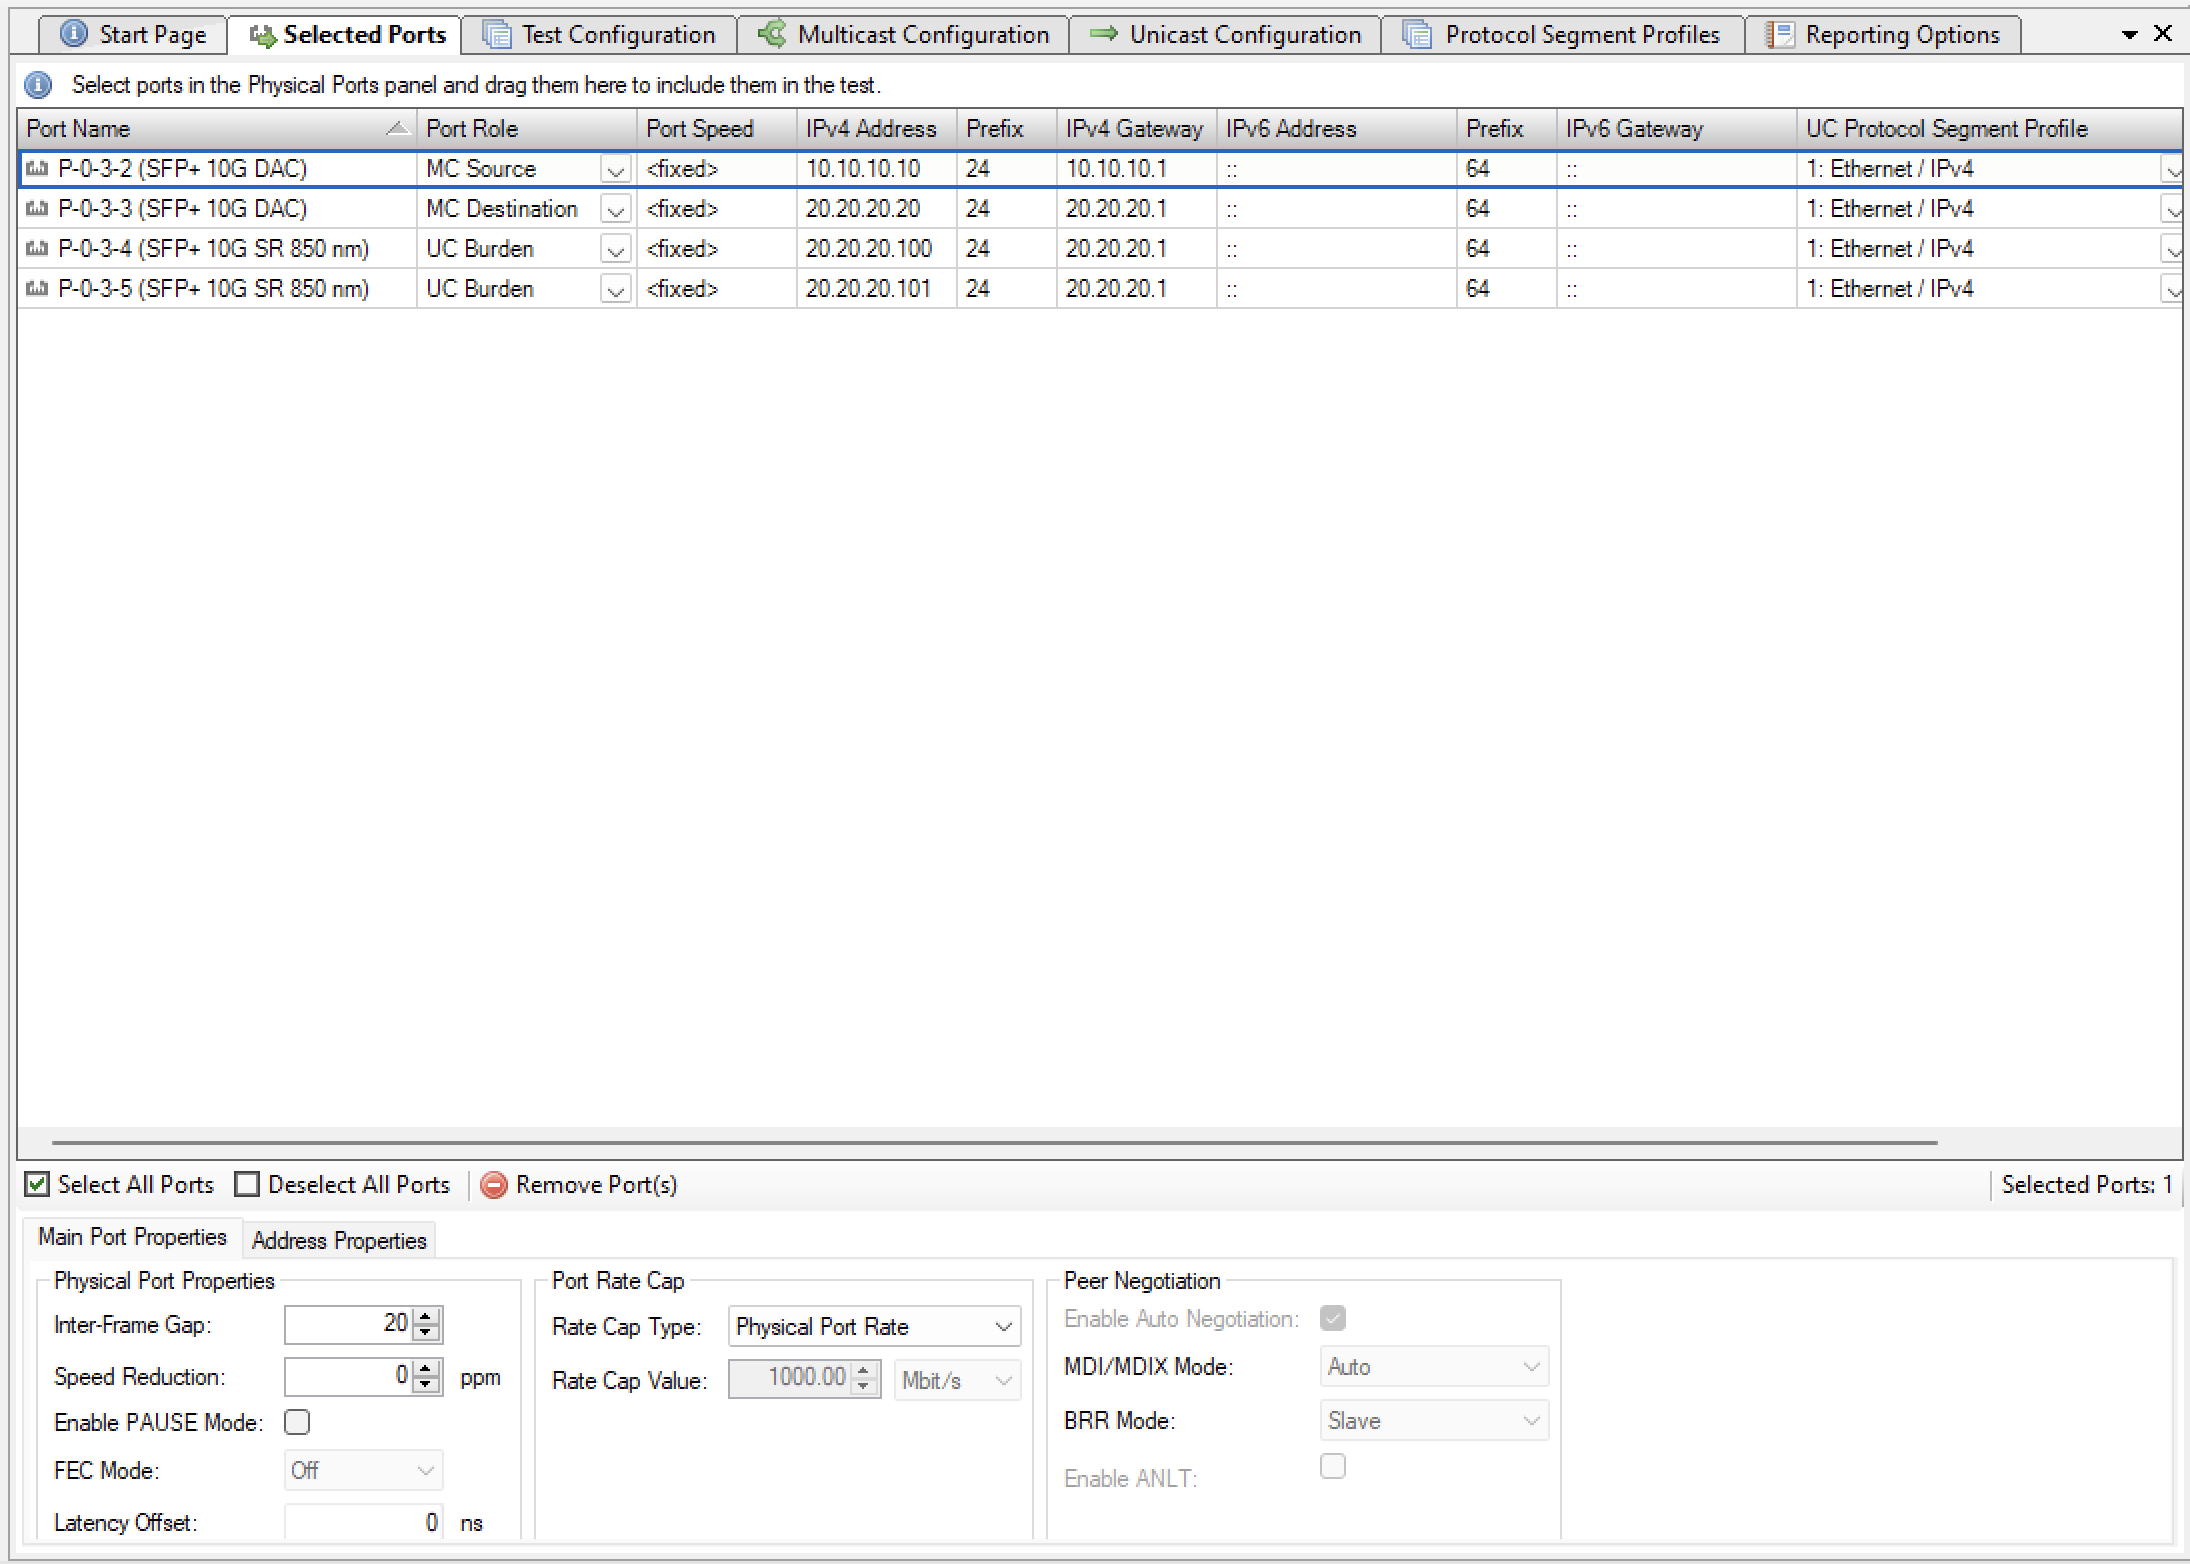
Port Roles
The following rules apply when assigning roles to ports:
There must be exactly one Multicast Source (MC Source) port. The MC Source port is the port that acts as the multicast server and transmits the multicast traffic to the multicast groups. There must be at least one Multicast Destination (MC Destination) port. The MC Destination ports act as the multicast clients and will receive the traffic sent to the multicast groups. If the selected tests require burdening traffic there must be at least two Unicast Burdening (UC Burden) ports. Burdening ports are used to emulate additional unicast traffic to burden the DUT.
Physical Port Properties
Inter-Frame Gap
Set to 20 -> 12B (Minimum allowed by Ethernet at 100% load)
(12+8B Preamble equals 20B)
Can be set to 16B to achieve >100% load for port pressure testing
Values range between 16B-20B
Adjust PPM
Specifies an optional speed reduction on the transmit side of the port, expressed as a ppm value.
Enable PAUSE mode
This means enable Flow Control on this port
Latency offset
Used to automatically eliminate transceiver + cable latency.
See also
Check Selected Ports Panel for details.
Protocol Segment Profiles
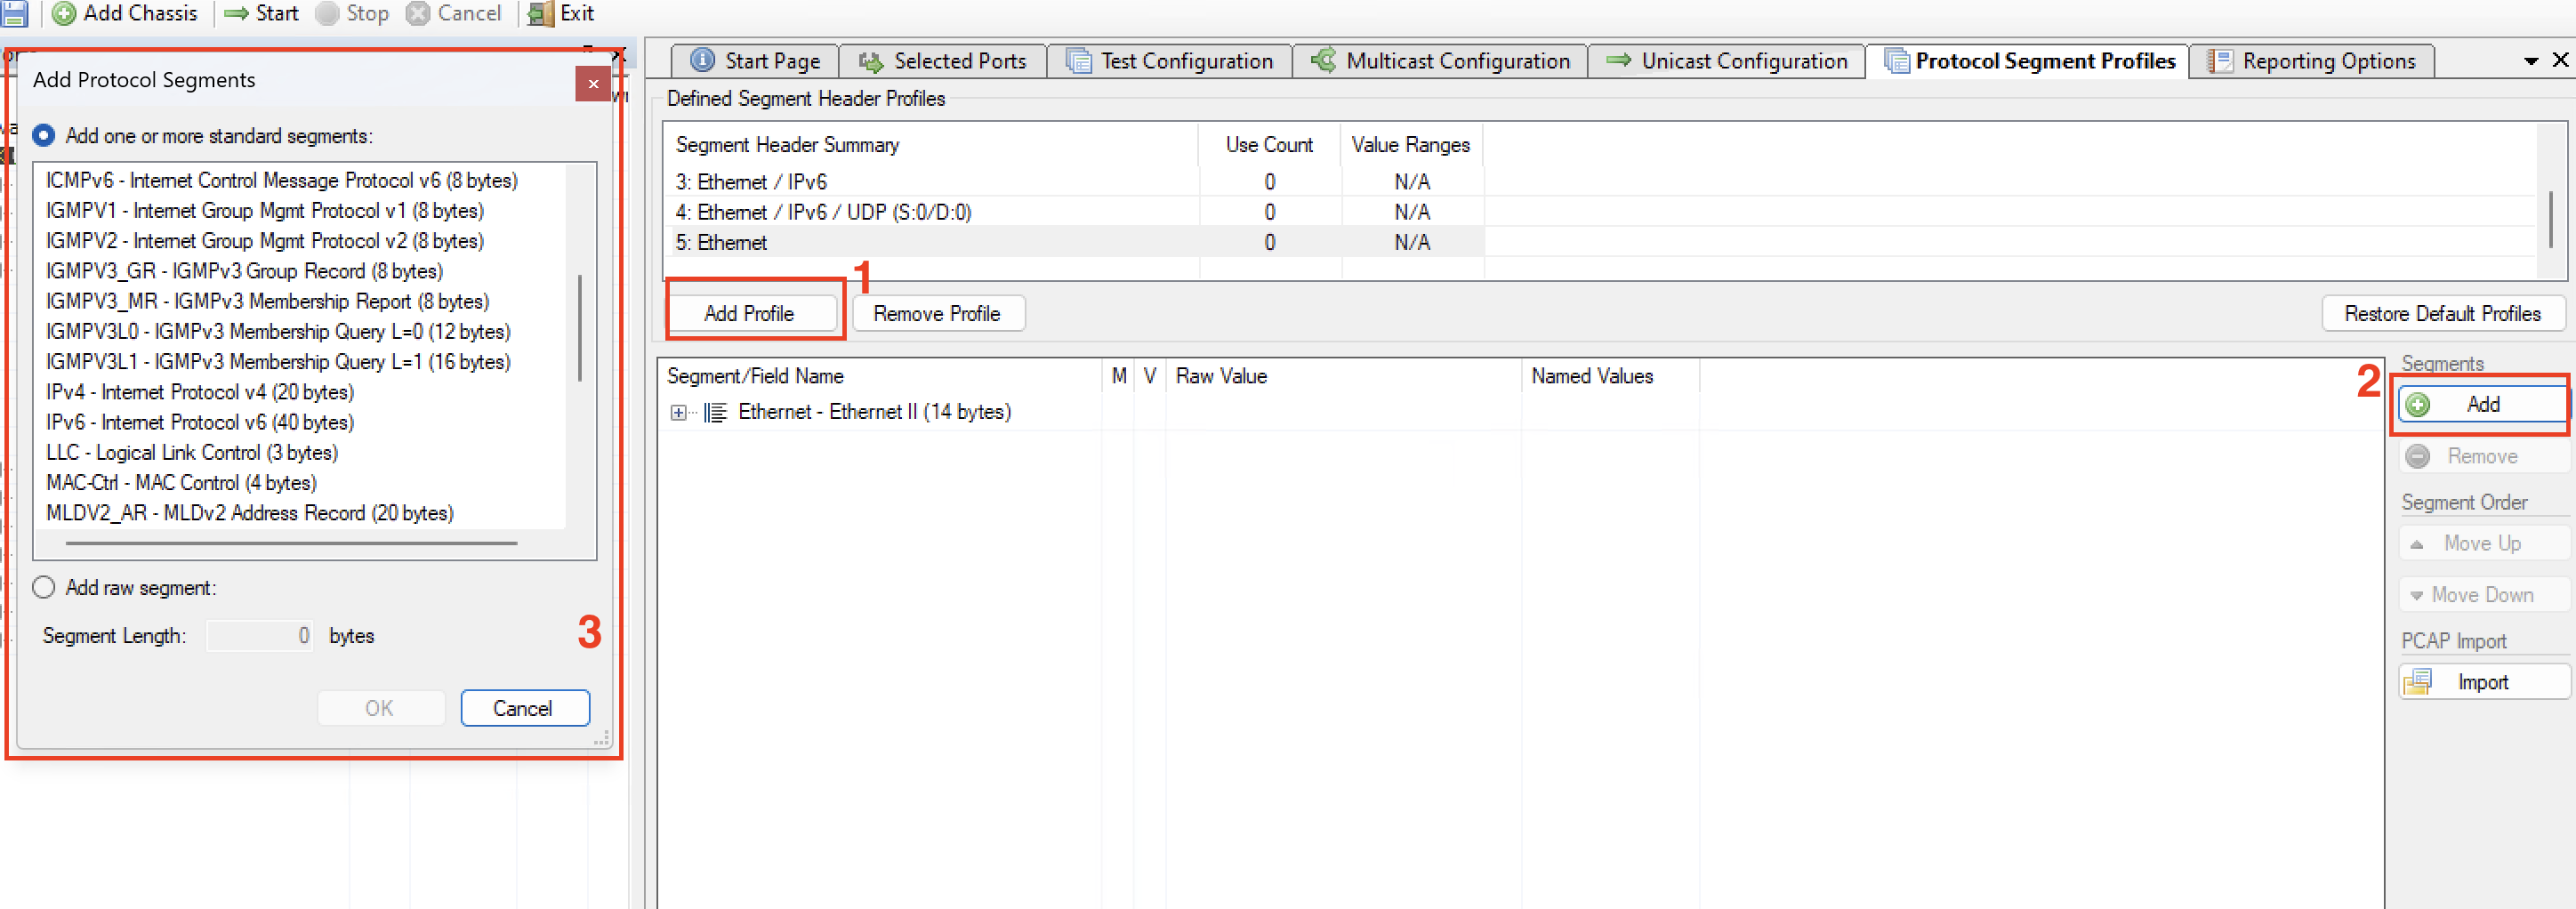
Add new profile.
Add additional headers.
Choose Segment.
See also
Check Protocol Segment Profile Panel for details.
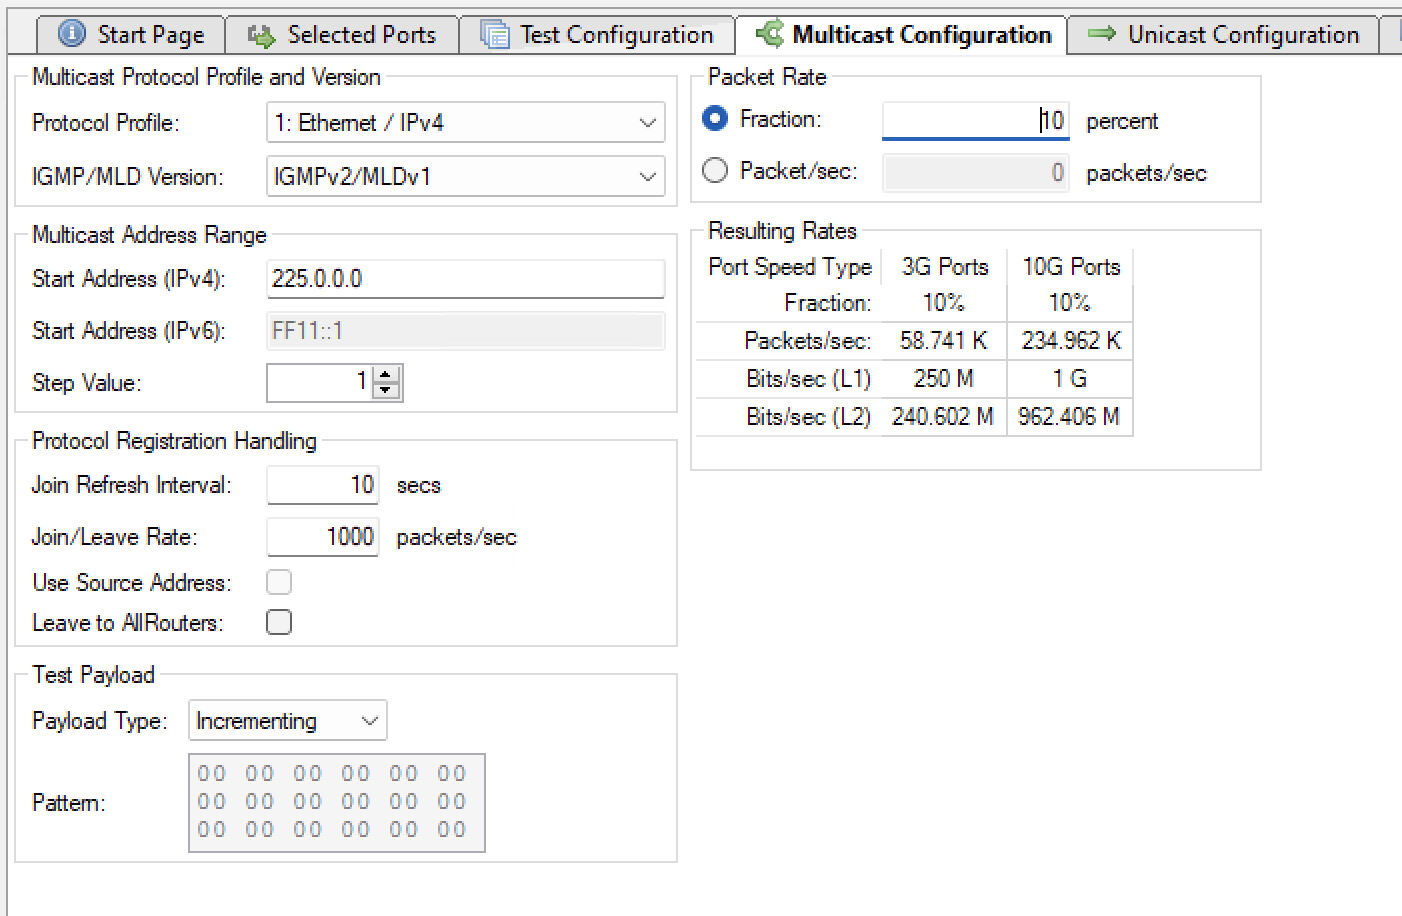
Multicast Configuration
Multicast configuration applies all multicast traffic.
See also
Check Multicast Configuration Panel for details.
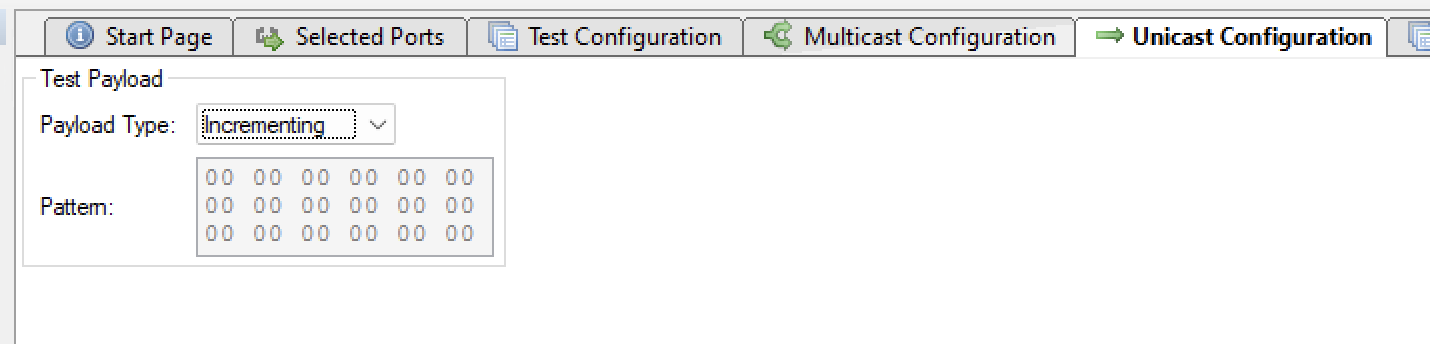
Unicast Configuration
Unicast configuration applies only unicast traffic.
See also
Check Unicast Configuration Panel for details.
Test Configuration
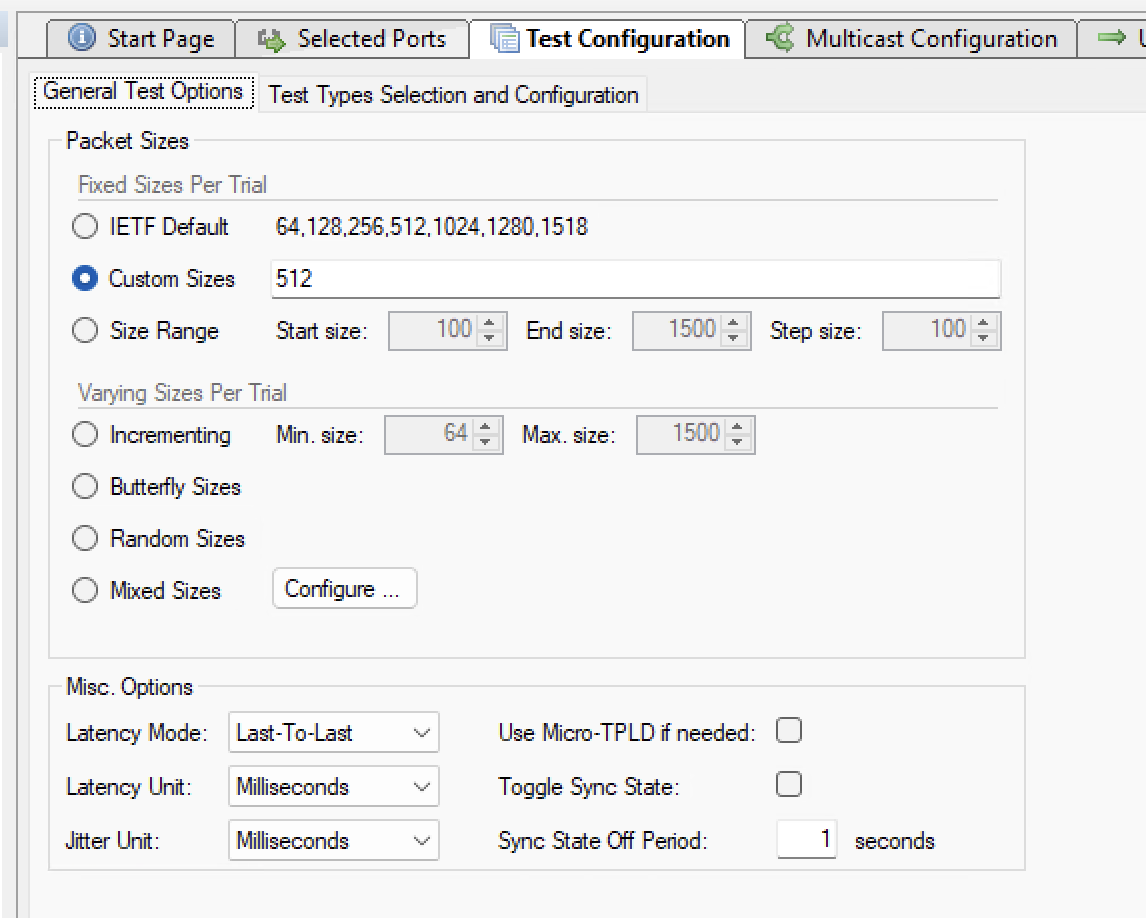
Configure the frame sizes you want to use for the test. This applies to both multicast and unicast traffic.
See also
Check General Test Options for details.
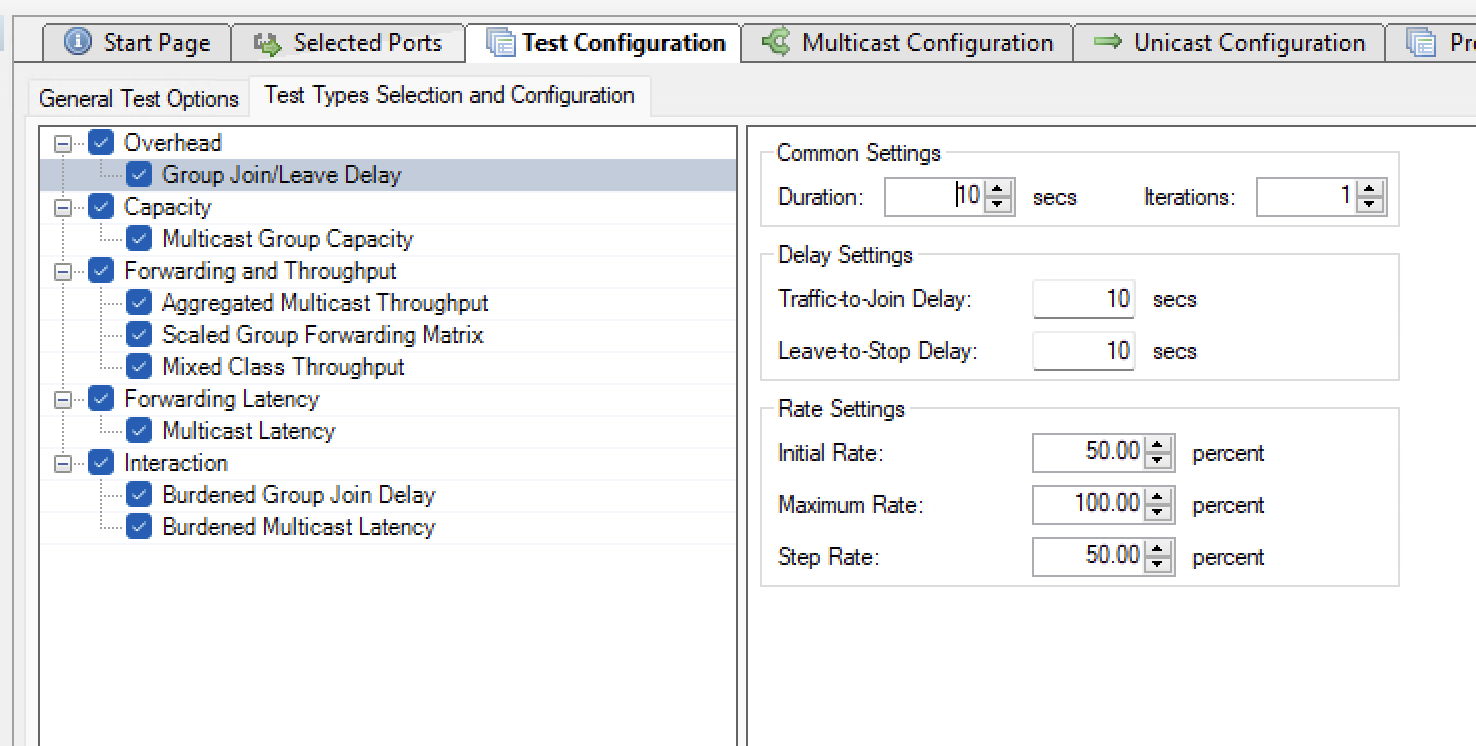
Select and configure the test you want to run.
See also
Check Test Type Selection and Configuration for details.
See also
Check Available Tests to understand what each test does.
Reporting
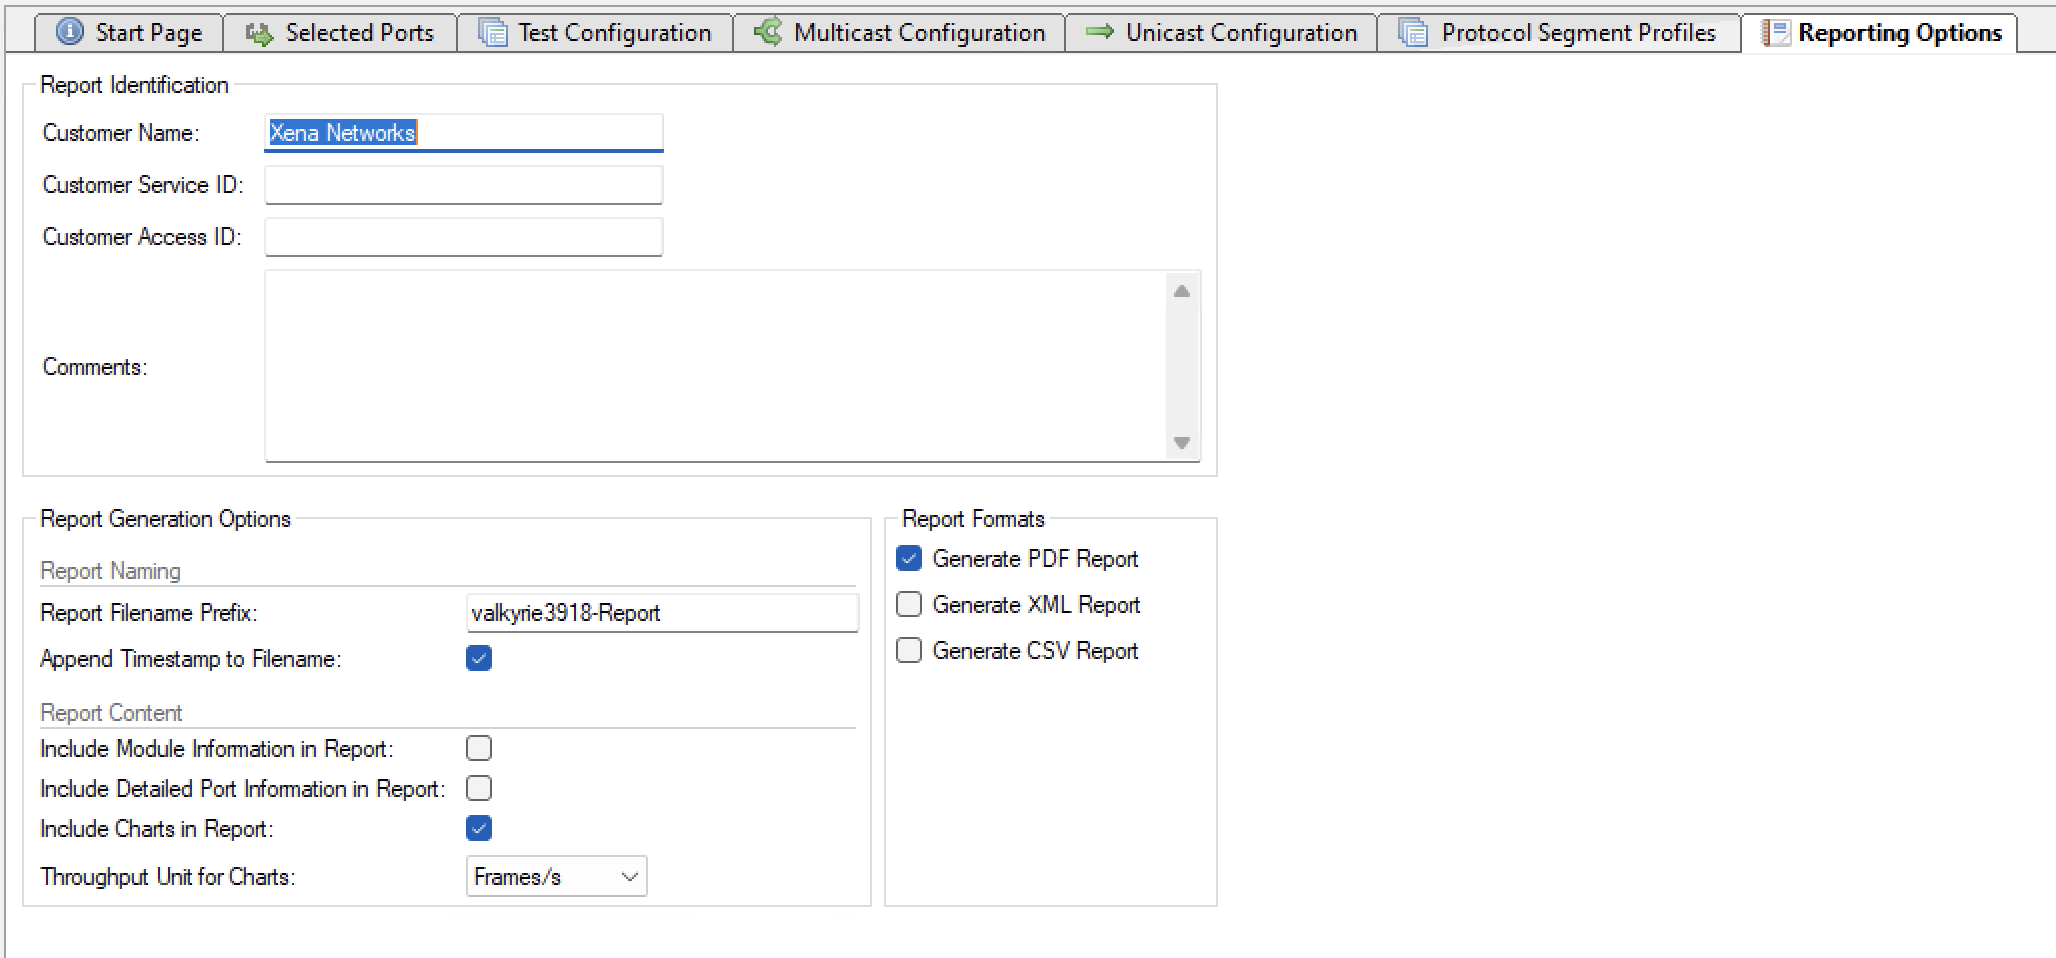
Select the report format you want to generate.
See also
Check Reporting Options Panel for details.
Save and Start
Start the test. Xena3918 will automatically reserver the ports and ask you to save the test configuration.