4.3. Layer-3 Tests
This section describes various Layer-3 (IP) tests.
IPv4 Point-to-Point Test
This example will describe how a simple pair-based bidirectional test using IPv4 transport with two test ports is created and executed.
Start the Xena2544 application. Select the menu option to ensure that you start with a new configuration.
Add a chassis to the test configuration.
Change to the Test Configuration tab. In the Topology and Frame Content subtab set the Topology property to Pairs and the Direction property to Bidirectional. Leave all other properties in this subtab and the other two subtabs at their default values.
Change to the Selected Ports tab. Locate two ports in the Physical Ports panel which you want to use in the test and drag them to the Selected Ports tab. Note that these two ports should be able to communicate with each other using IPv4 transport.
Set the Port Group property for the first port to East. Set the same property for the other port to West.
Set the two ports as each others peer using the Port Peer property.
Set the Protocol Segment Profile for each port to the Ethernet / IPv4 profile.
Configure each port with an appropriate IP address and prefix. Also add the address of the associated IP gateway if the two ports are located in separate IP subnets.

Fig. 4.10 IPv4 protocol segment profile
Press the Start button in the toolbar to start the test.
IPv4/UDP Blocks Test
This example will expand on the previous example and show how to change the topology and the number of frame sizes used in the test. Open the configuration file used in the previous example. You may optionally save it under a new name if you want to preserve the original.
Change to the Test Configuration tab. In the Topology and Frame Content subtab set the Topology property to Blocks and the Direction property to Bidirectional.
In the Frame Sizes section ensure that the Custom Sizes property is selected. Enter the frame sizes 128, 512 and 1024 separated by commas in the field next to this property.
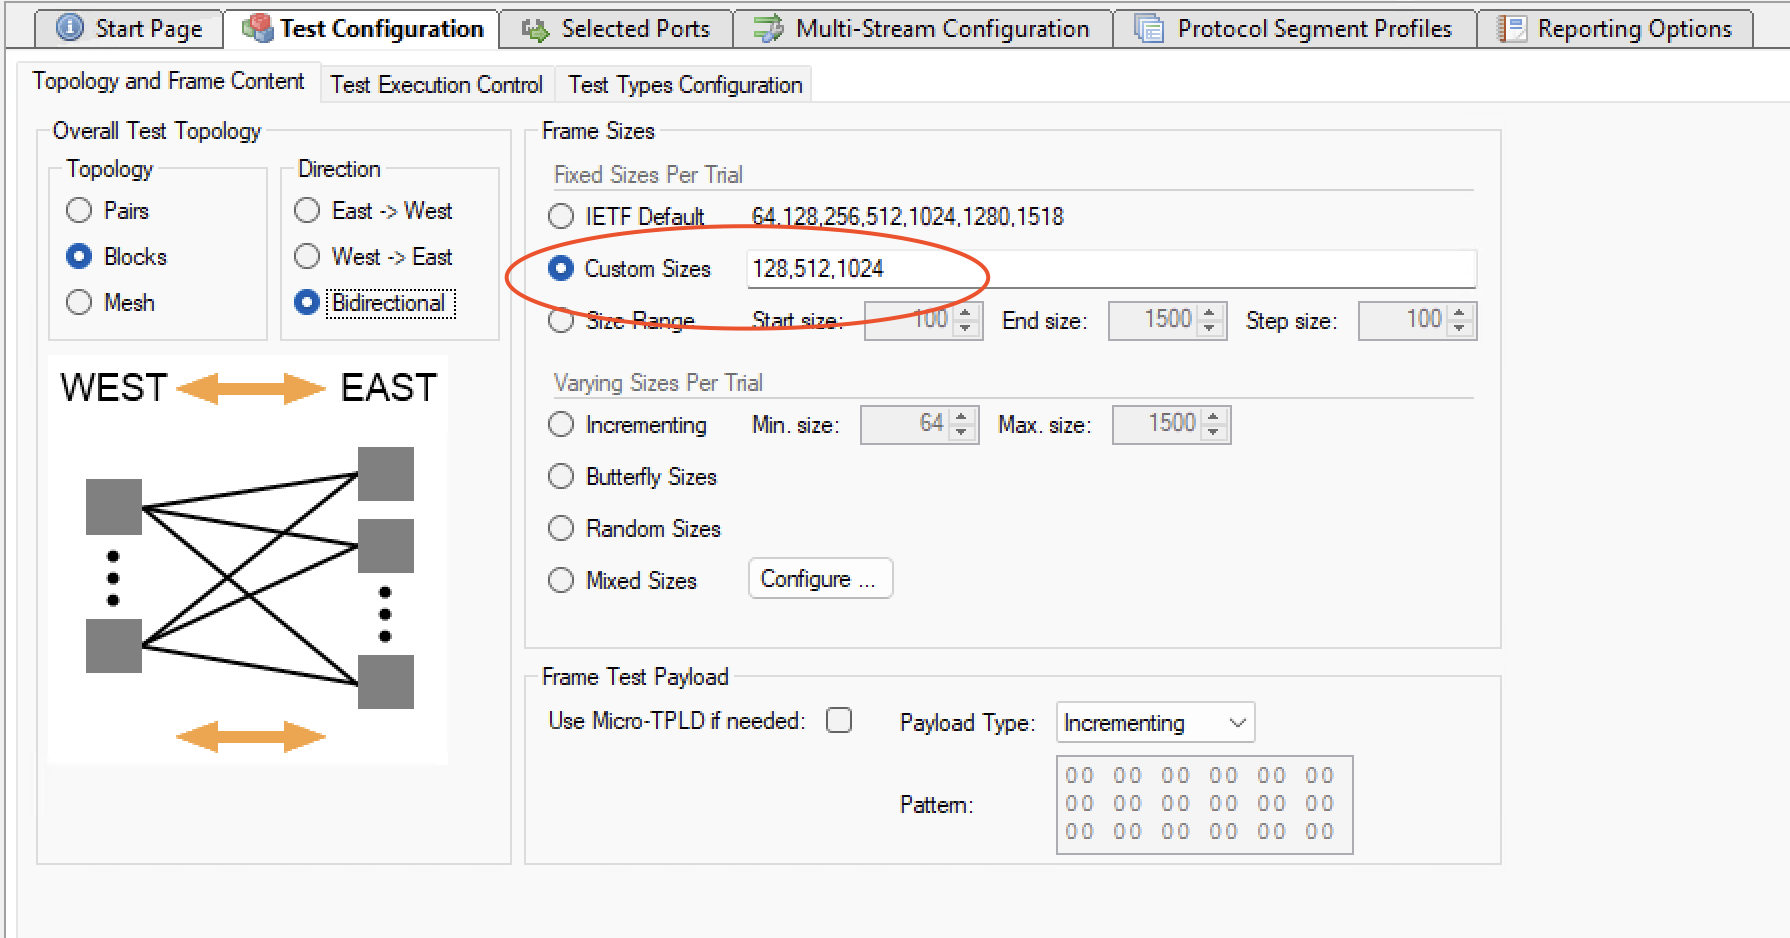
Fig. 4.11 Custom sizes
Change to the Selected Ports tab. Set the Protocol Segment Profile value for each of the two ports to the Ethernet / IPv4 / UDP profile.
Press the Start button in the toolbar to start the test. The tests will now be performed for all the defined frame sizes.
IPv6 Mesh Test
This example will again expand on the previous example and show how to create and configure a new protocol segment profile. Open the configuration file used in the previous example. You may optionally save it under a new name if you want to preserve the original.
Change to the Test Configuration tab. In the Topology and Frame Content subtab set the Topology property to Mesh. The Direction will be forced to Bidirectional as all mesh flows are bidirectional by definition.
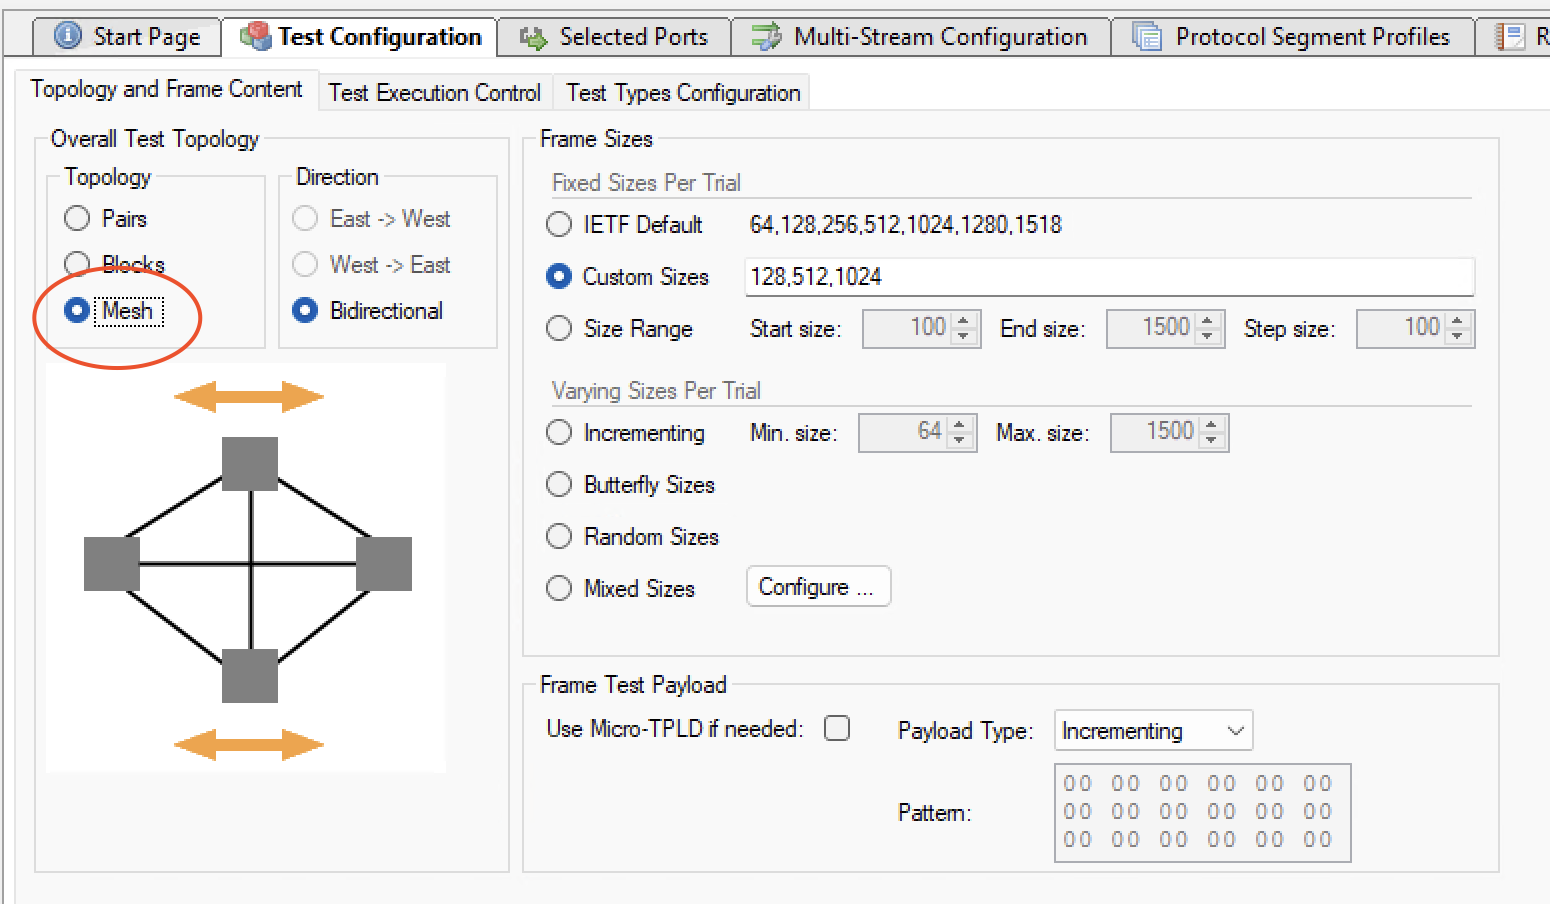
Fig. 4.12 Mesh topology
Change to the Protocol Segment Profiles tab. Press the Add Profile button below the profiles list view. A new profile with an Ethernet segment will be appended to the list view.
Select the new profile and press the Add Segment button in the command panel to the right. A dialog showing all possible segment definitions will be shown. Locate the IPv6 segment definition in the list and press OK.
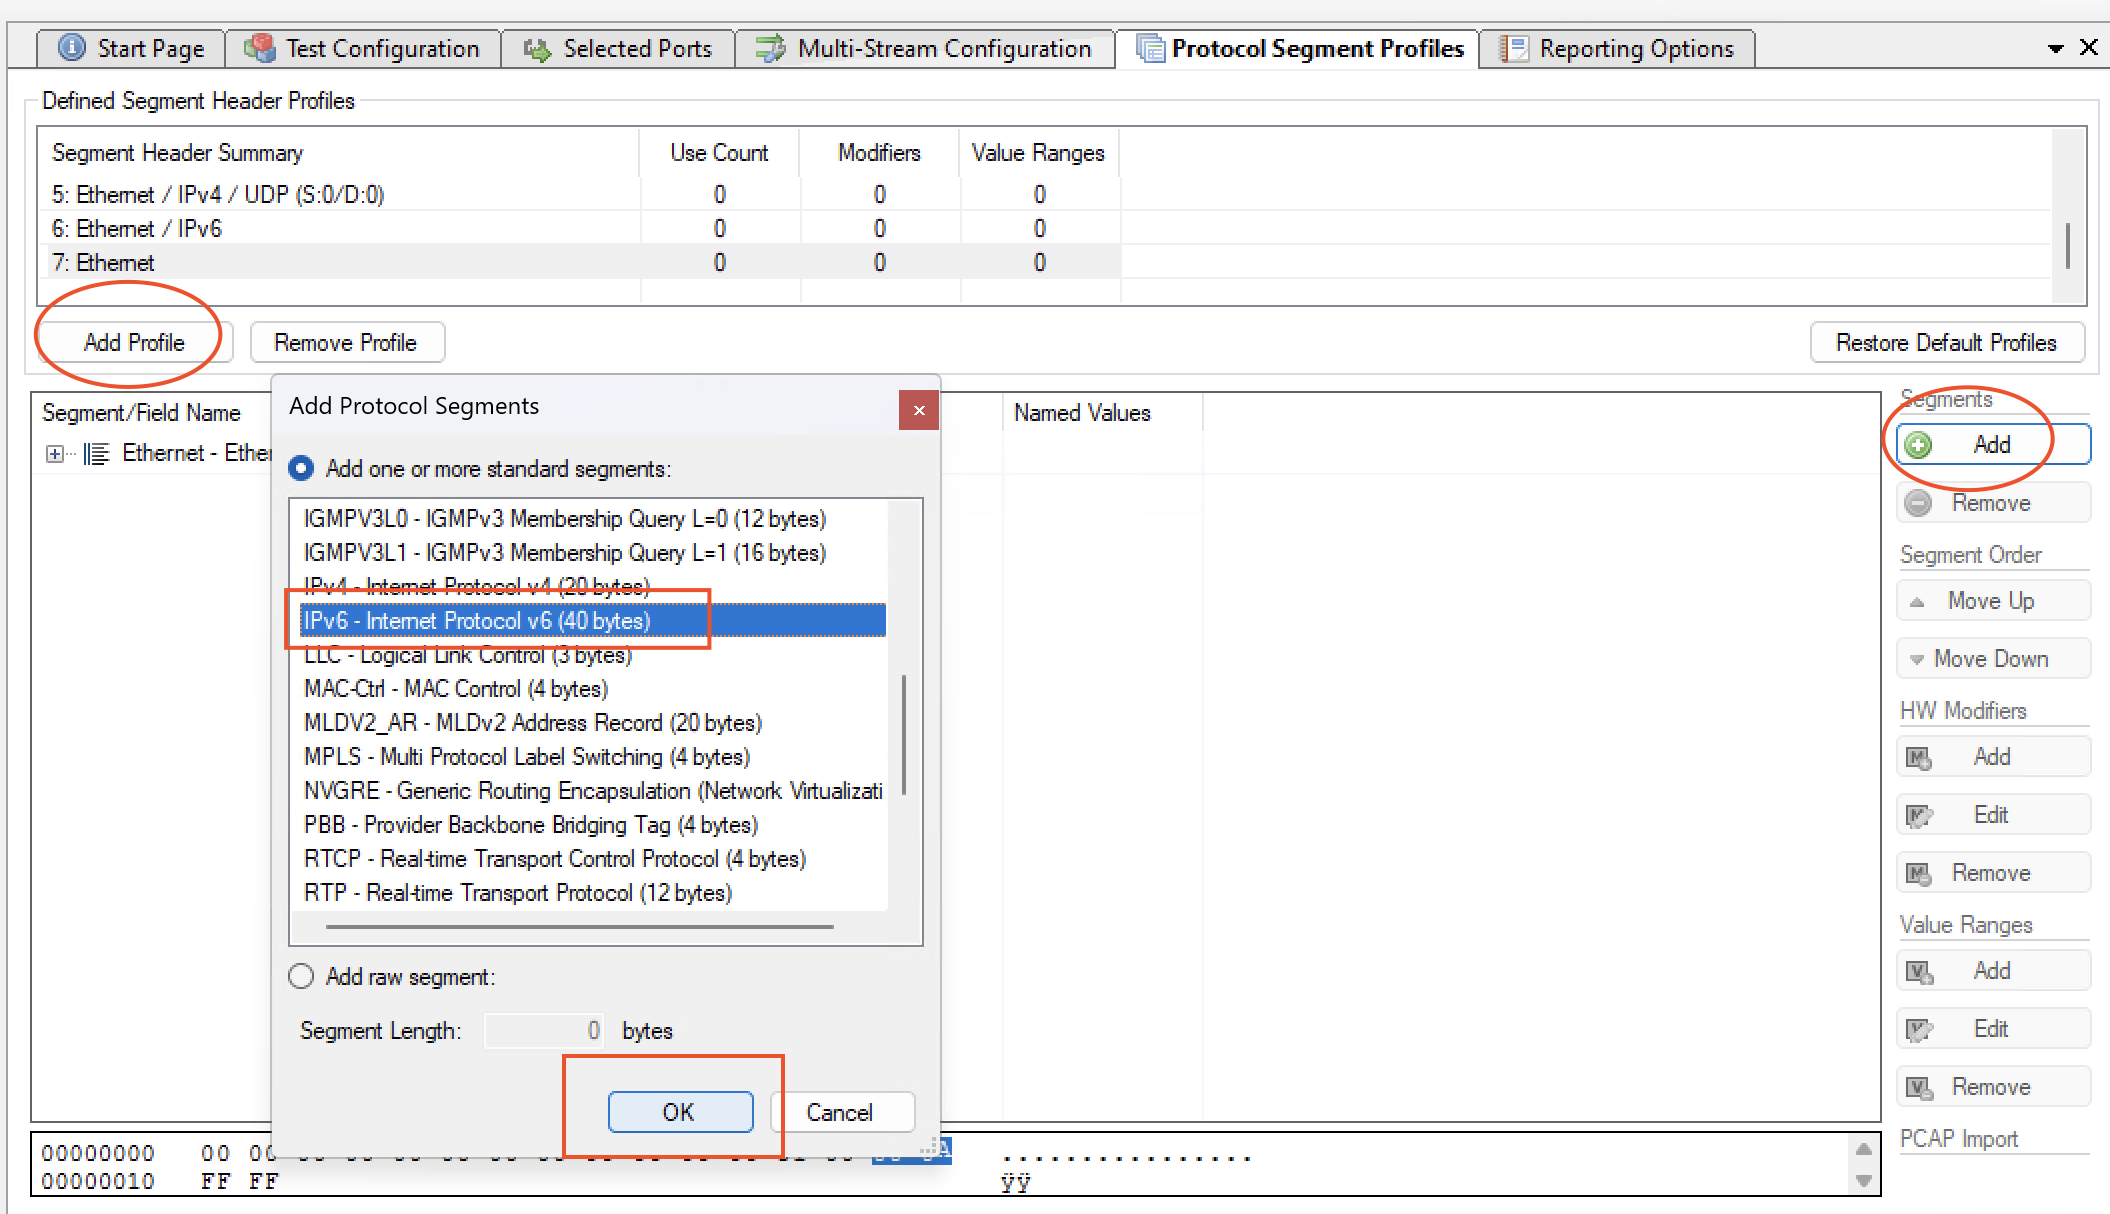
Fig. 4.13 Edit protocol segment profile
Change to the Selected Ports tab. Set the Protocol Segment profile value for each of the two ports to the new Ethernet / IPv6 profile.
Configure each port with an appropriate IP address and prefix. Also add the address of the associated IP gateway if the two ports are located in separate IP subnets.
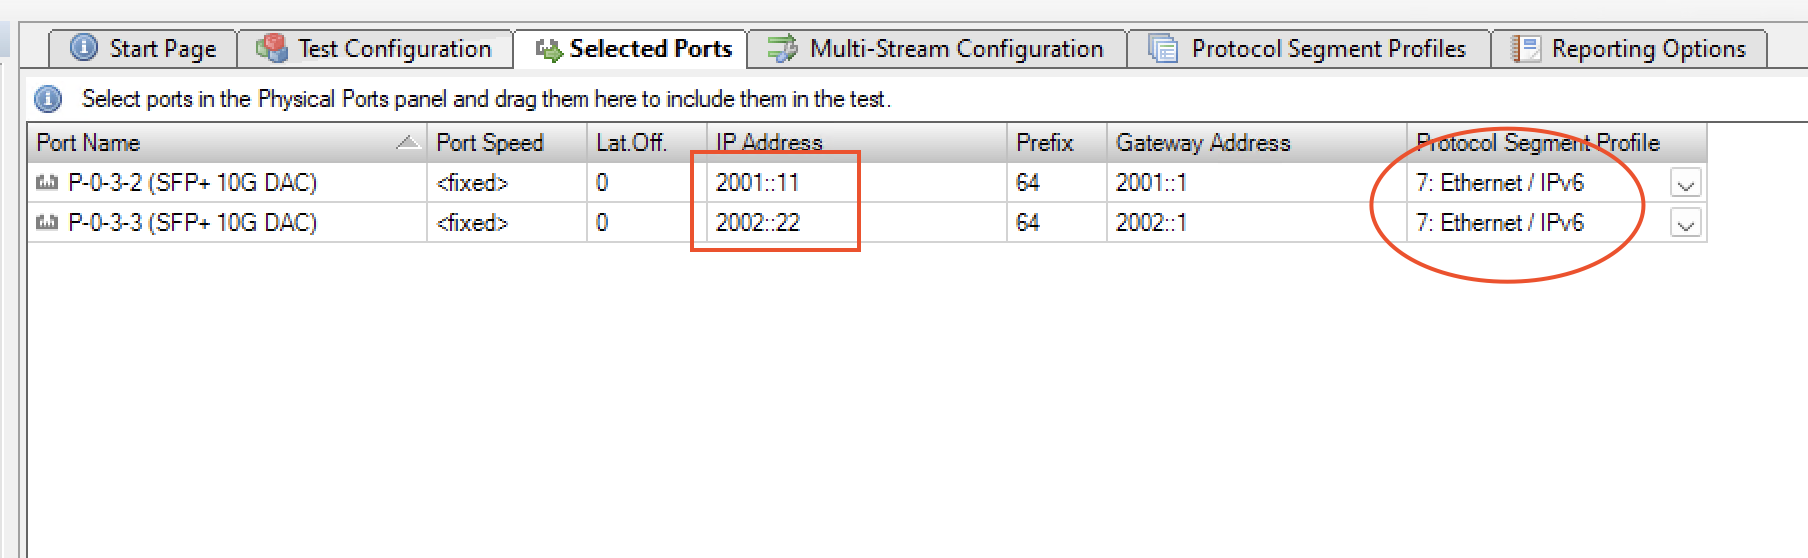
Fig. 4.14 Use IPv6 protocol segment profile
Press the Start button in the toolbar to start the test.