6. Physical Ports Panel
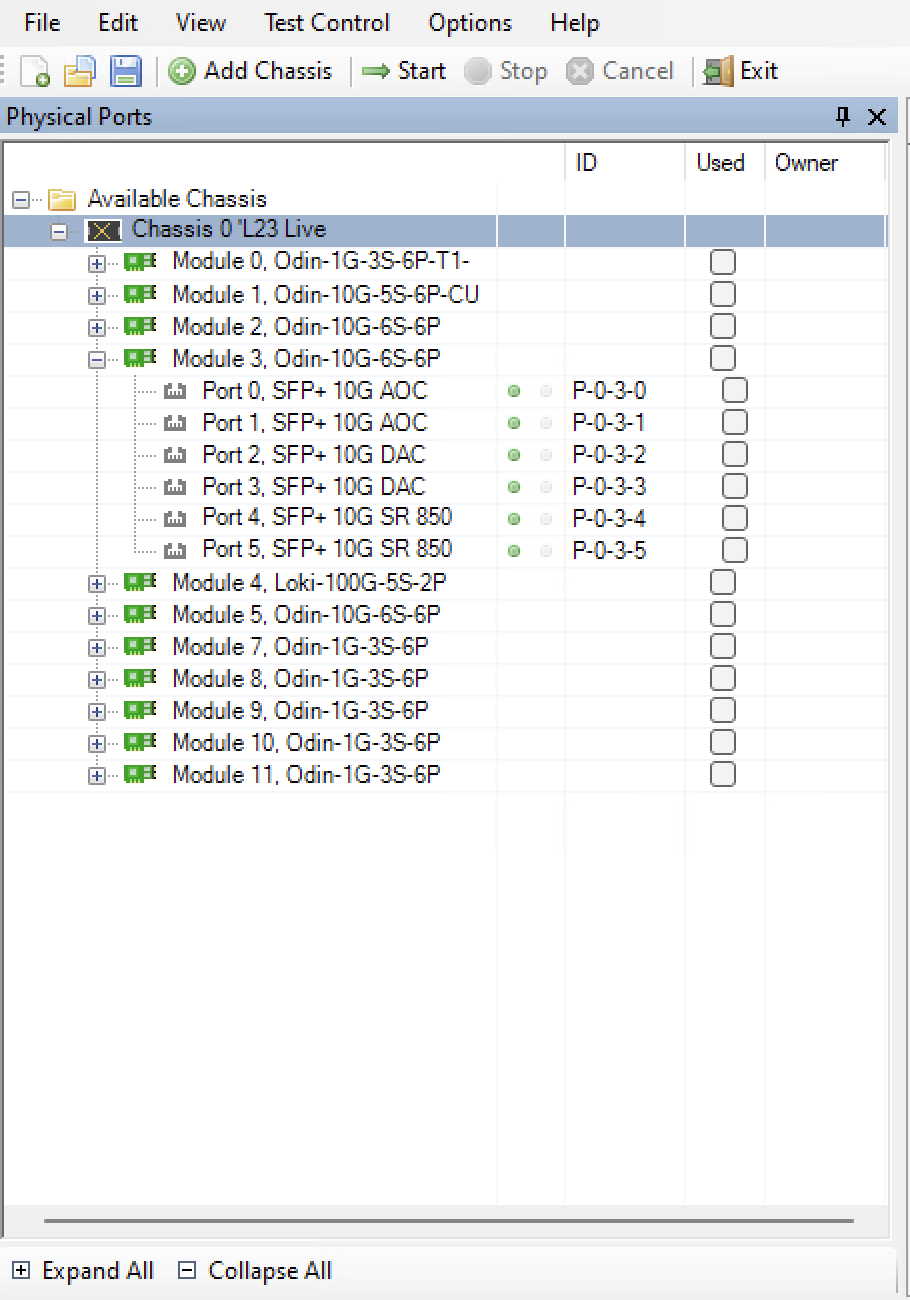
This panel displays all available ports on the currently connected Xena chassis. It is possible to connect to multiple Xena chassis at the same time.

Fig. 6.1 Physical ports panel
It also allows you to perform the following actions:
View the current sync (link) and traffic state of the ports.
View the current ownership of the ports.
Request or relinquish ownership of ports.
Determine which ports are used in the test configuration.
6.1. Port States
The column to the right of the port names contain two state bullet icons.
The first bullet indicate the port sync (link) state. A green bullet means that the port is in sync and a red bullet means that the port has lost sync.
The second bullet indicate the traffic state. A yellow bullet means that traffic is being sent from the port. A gray bullet means that no traffic is active.
6.2. Using Ports in Your Test
Right-clicking on a port allow you to either add or remove the port from the test configuration. If you use either Shift-click or Ctrl-click to select multiple ports it is possible to add or remove multiple ports at the same time. Right-clicking on a module allow you to add/remove all ports on that module.
Instead of right-clicking on ports you can also select and drag the ports to the Selected Ports panel.
6.3. Port Ownership
The right-most column display the username of the current port owner. Ports that are free (i.e,. not owned by anyone) are displayed with a normal font. Ports that are owned by you are displayed with a bold font. Port owned by other users are displayed using a gray font.
You can reserve or relinquish ownership of a port by right-clicking on it and selecting the appropriate action. It is also possible to right-click on a module to perform the same operations on all ports on the module. Note that the Xena2544 will automatically reserve ownership of used ports when a test is started.