8. Selected Ports Panel
This panel allow you to control which ports are used in the test and also to configure the port properties. The most common port properties are available in the top port grid whereas other port properties are available in the tabbed view at the bottom.
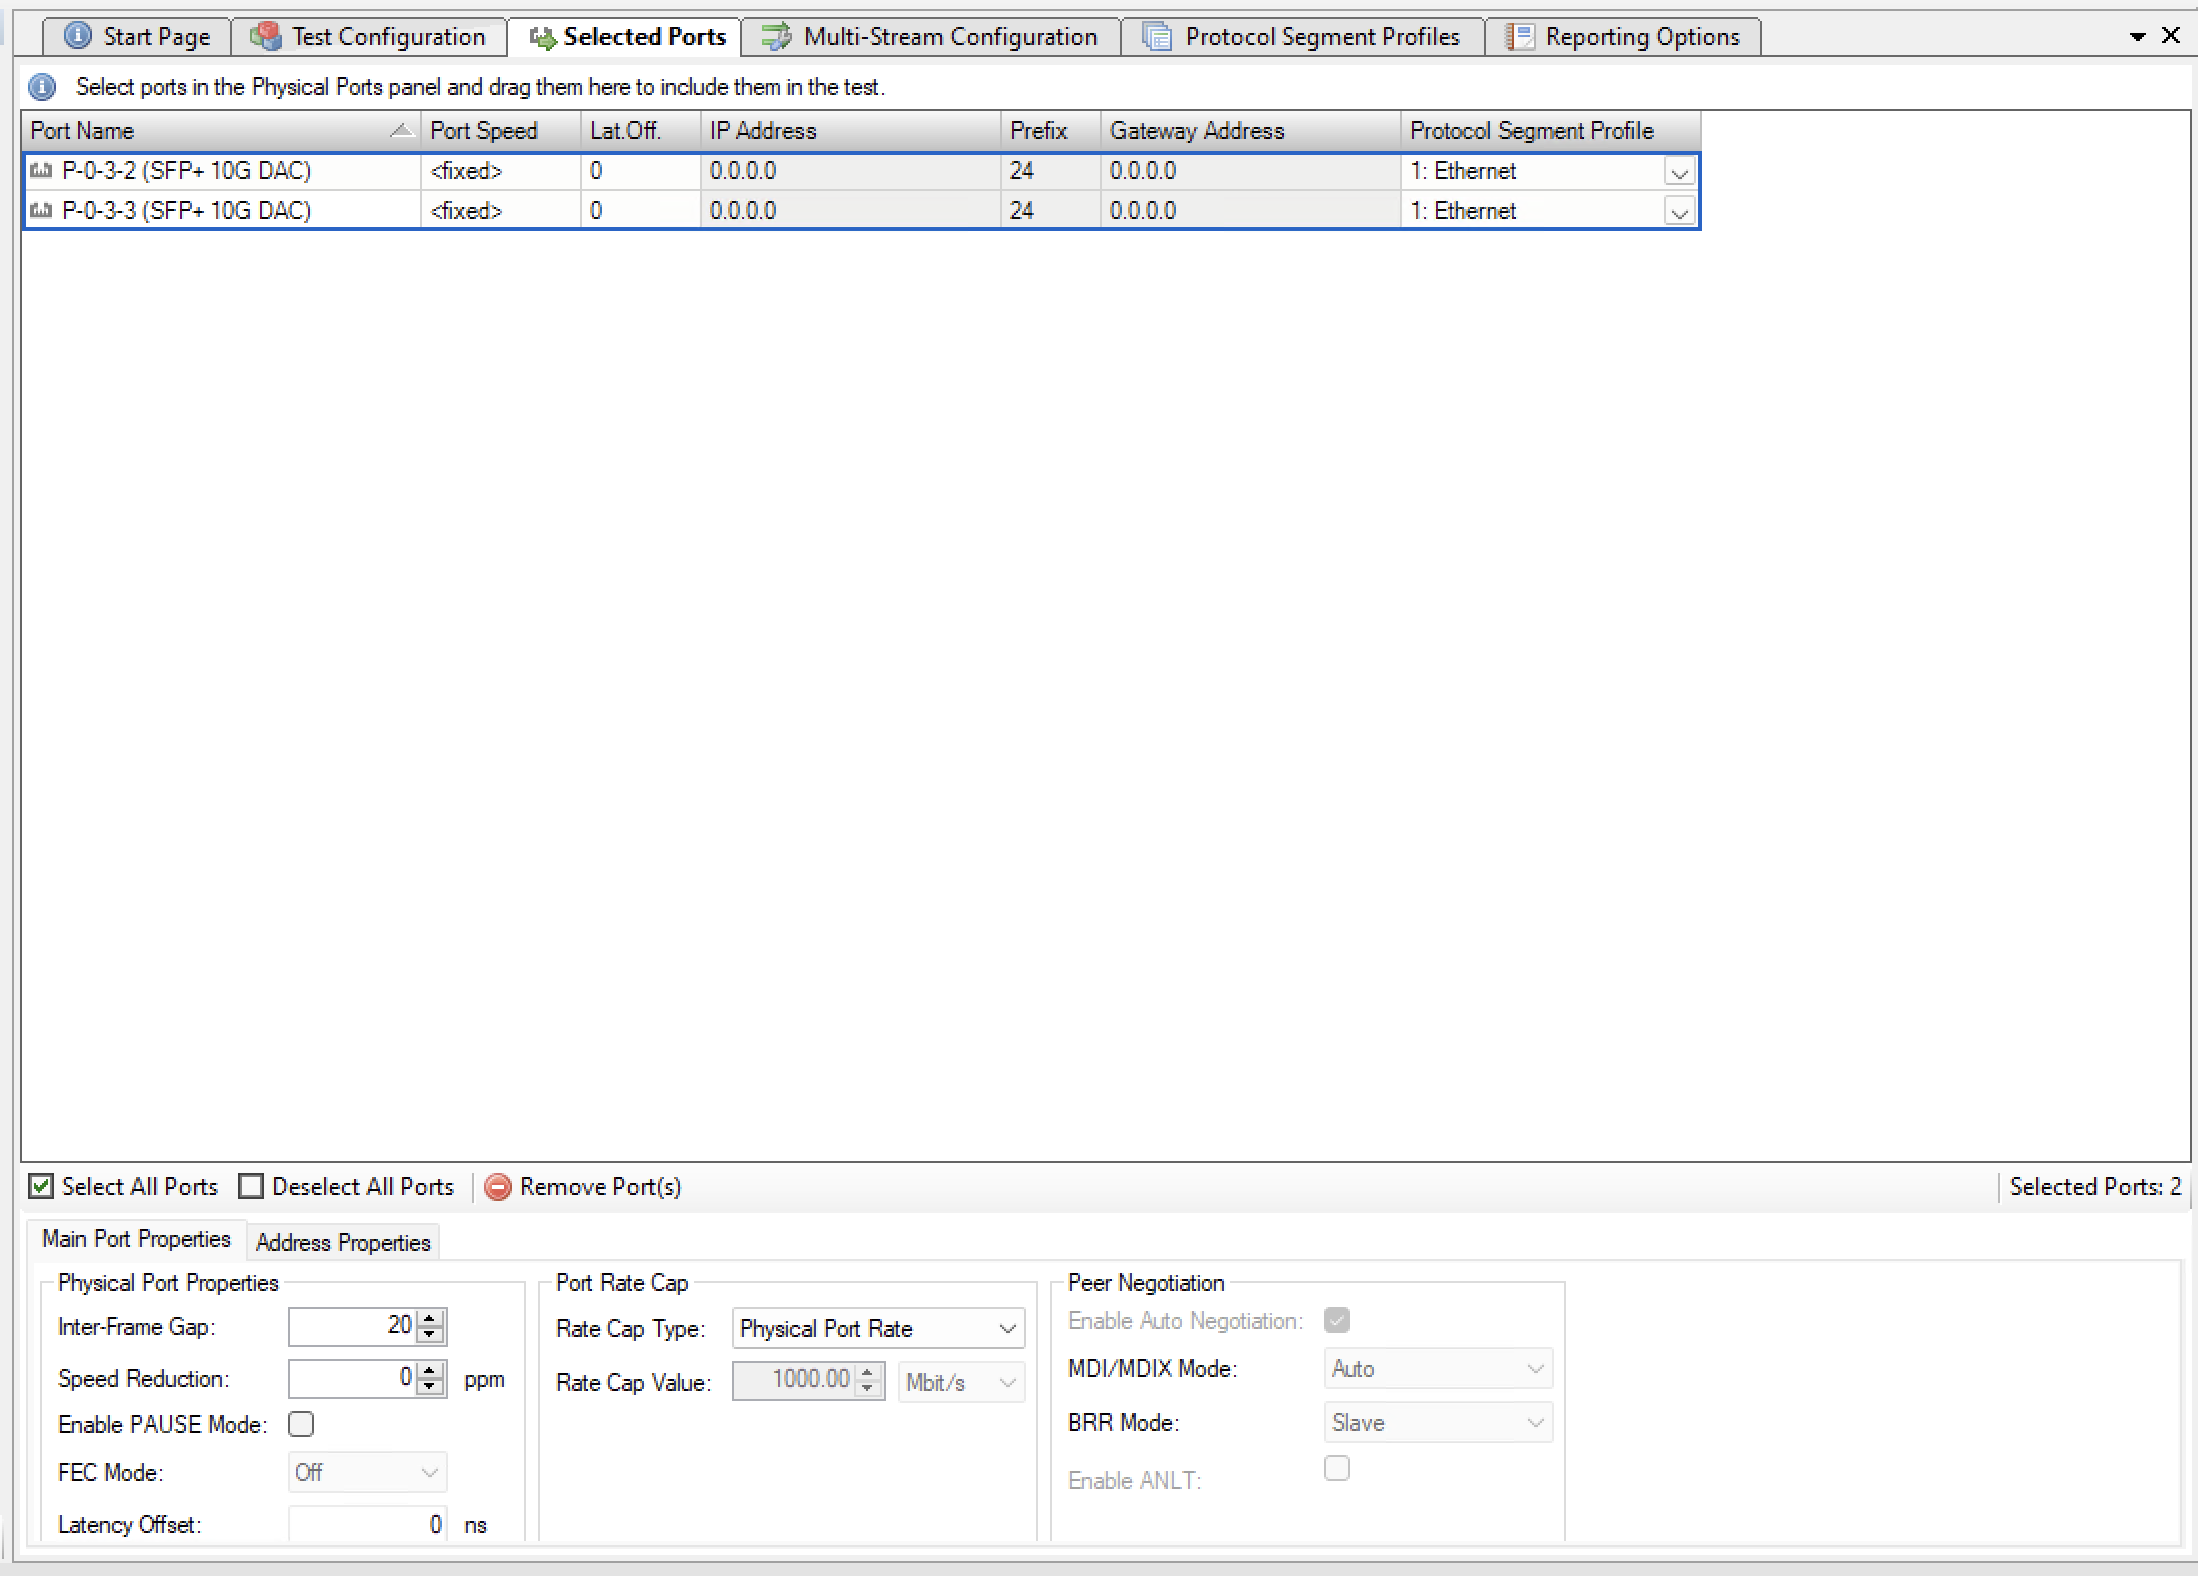
Fig. 8.1 Selected ports panel
8.1. Port Grid
The grid view at the top of the panel show the ports that have been selected for use in the test.
Adding or Removing Ports
You can add ports to the test configuration as described in the Physical Ports Panel section above.
To remove one or more ports form the test configuration select the ports and press the Remove Port(s) button in the toolbar below the grid. Alternatively, you can right-click on the selected ports and select the Remove Port(s) popup menu item.
Port Grid Columns
The grid view contains the following columns:
Port Name
The name (ID and type) of the port.
Port Speed
The physical port speed to use in the test. Normally this should be left at the default AUTO value, but certain DUTs require that the port speed is fixed to a specific rate.
IP Address
The IP address that you want to use for the port [1].
Prefix
The decimal network prefix for the address [1].
Gateway Address
The gateway address for the assigned IP address. This field may be left empty if the ports are located on the same IP subnet [1].
Protocol Segment Profile
The protocol segment profile to use for this port. Profiles can be created, edited and deleted in the separate Protocol Segment Profiles panel.
8.2. Port Properties Panel
Below the grid view you will find a tabbed panel containing less-frequently-used port properties.
Main Port Properties
Physical Port Properties
Inter-Frame Gap
Specifies the minimum gap between frames generated for a port, expressed as a number of bytes.
Speed Reduction
Specifies an optional speed reduction on the transmit side of the port, expressed as a ppm value.
Enable PAUSE Mode
Controls whether the port responds to incoming PAUSE frames.
Enable Auto-Negotiation
Controls whether auto-negotiation for the port is enabled or not.
Latency Offset
An optional offset in nanoseconds for the port which is used for latency measurements. You can measure an appropriate value for this by looping two test ports together and performing a latency test. The resulting average latency of this test should be zero. If this is not the case you can adjust the Latency Offset value until you reach a zero value. Then you can use the calibrated value in other tests.
Port Rate Cap
Rate Cap Type
Allow you to specify a rate cap type for the port. If enabled the port rate will be capped with the value specified. No changes are performed to the port physical rate (use the Port Speed property described above for that). Instead the capped rate is used when calculating the port rates, frames to transmit, etc. It is possible to specify custom rate cap profiles which may show up in this control. See below for instructions.
Rate Cap Value
The port cap value and unit to use if the Rate Cap Type property is set to Custom Rate Cap.
Peer Negotiation
Enable Auto Negotiation
If checked the port will respond to incoming auto-negotiation frames.
MDI/MDIX Mode
Enables control over the port MDI/MDIX mode.
Address Properties
Public Address
Public IP Address
If a port is located behind a NAT firewall/router it may be necessary to provide the public IP address offered by the NAT firewall/router. The Valkyrie2544 will then perform an ARP request for the public IP address before starting the test, in order to avoid packet loss due to an initial ARP phase. The real (internal) IP address of the port must still be configured in the main port grid as this may be used to send Gratuitous ARP packets from the port to the router before starting the test.
Public IP Prefix
The network prefix value for the public IP address.
Remote Loop Address
Remote Loop IP Address
When a port with layer-3 protocol segments (IPv4/IPv6) has been configured as a looped port you must specify the IP address of the remote port so that the Xena tester can perform an ARP request for the MAC address.
Remote Loop MAC Address
When a port with pure layer-2 protocol segments (Ethernet + optional VLAN) has been configured as a looped port you must specify the MAC address of the remote loop port to avoid excessive flooding.
8.3. Changing Settings on Multiple Ports
It is possible to change properties on multiple ports at the same time by selecting multiple ports in the grid view and then changing settings in either the grid view or the detailed settings panel below the grid.
You can select multiple ports using standard Windows Explorer-shortcuts like Shift-click or Ctrl-click.
You can also use the Select All Ports or Deselect All buttons the toolbar below the grid to control the port selection state.
The only setting that does not allow this is the IP address field, as this must always be a unique value.
8.4. Custom Rate Cap Profiles
You can define your own custom rate cap profiles for use with the port configuration panel. This allows you to define convenient shortcuts for commonly used rates.
Profile Location
The custom profiles must be contained in a text file called ratecapprofiles.json, which must be located in the <Valkyrie2544DataDirectory>Profiles directory. To browse the <Valkyrie2544DataDirectory> select the Explore Xena Data Directory in the Xena2544 File menu.
On initial startup the Valkyrie2544 will write a file called ratecapprofiles.json.template to the <Valkyrie2544DataDirectory>Profiles directory. You should make a copy of this file, rename the copy to ratecapprofiles.json and use this copy as the basis for your custom profiles. You can edit the file in any text editor, such as the standard Windows Notepad.
Adding Profiles
Each rate cap profile must look like the following fragment:
Field Explanation
DisplayLabel
A text label that describes your profile. This label must be unique and will be used in the Xena2544 dropdown box that allows you to select between the rate cap profiles.
PortRateCapValue
The rate cap value for the profile in bit/s.
InterFrameGap: The inter-frame gap value used to calculate the corresponding Ethernet layer 1 rate.
All rate cap profiles must be encapsulated in a set of square parentheses.