4.4. Step-By-Step Guide
Add Chassis
Click the Add Chassis button.
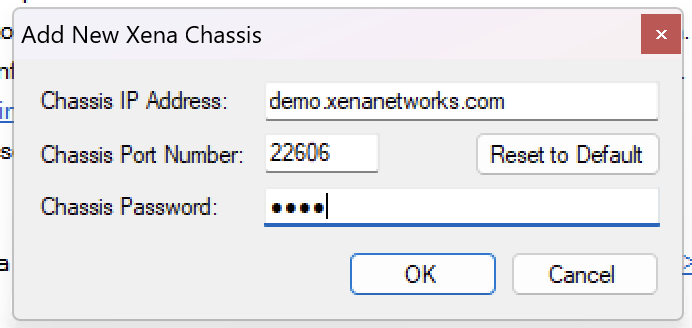
Enter the IP of the Management port under Chassis Address. Use xena as default Chassis Password.
Add/Configure Port/s
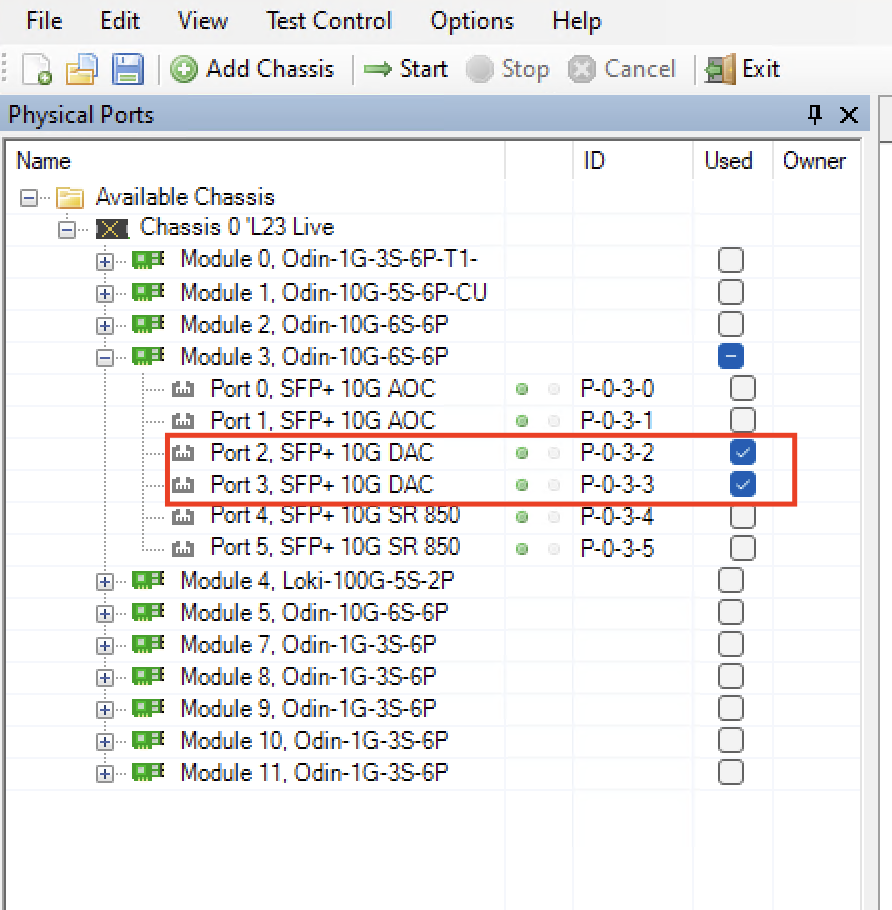
Select the Port(s) you need to use.
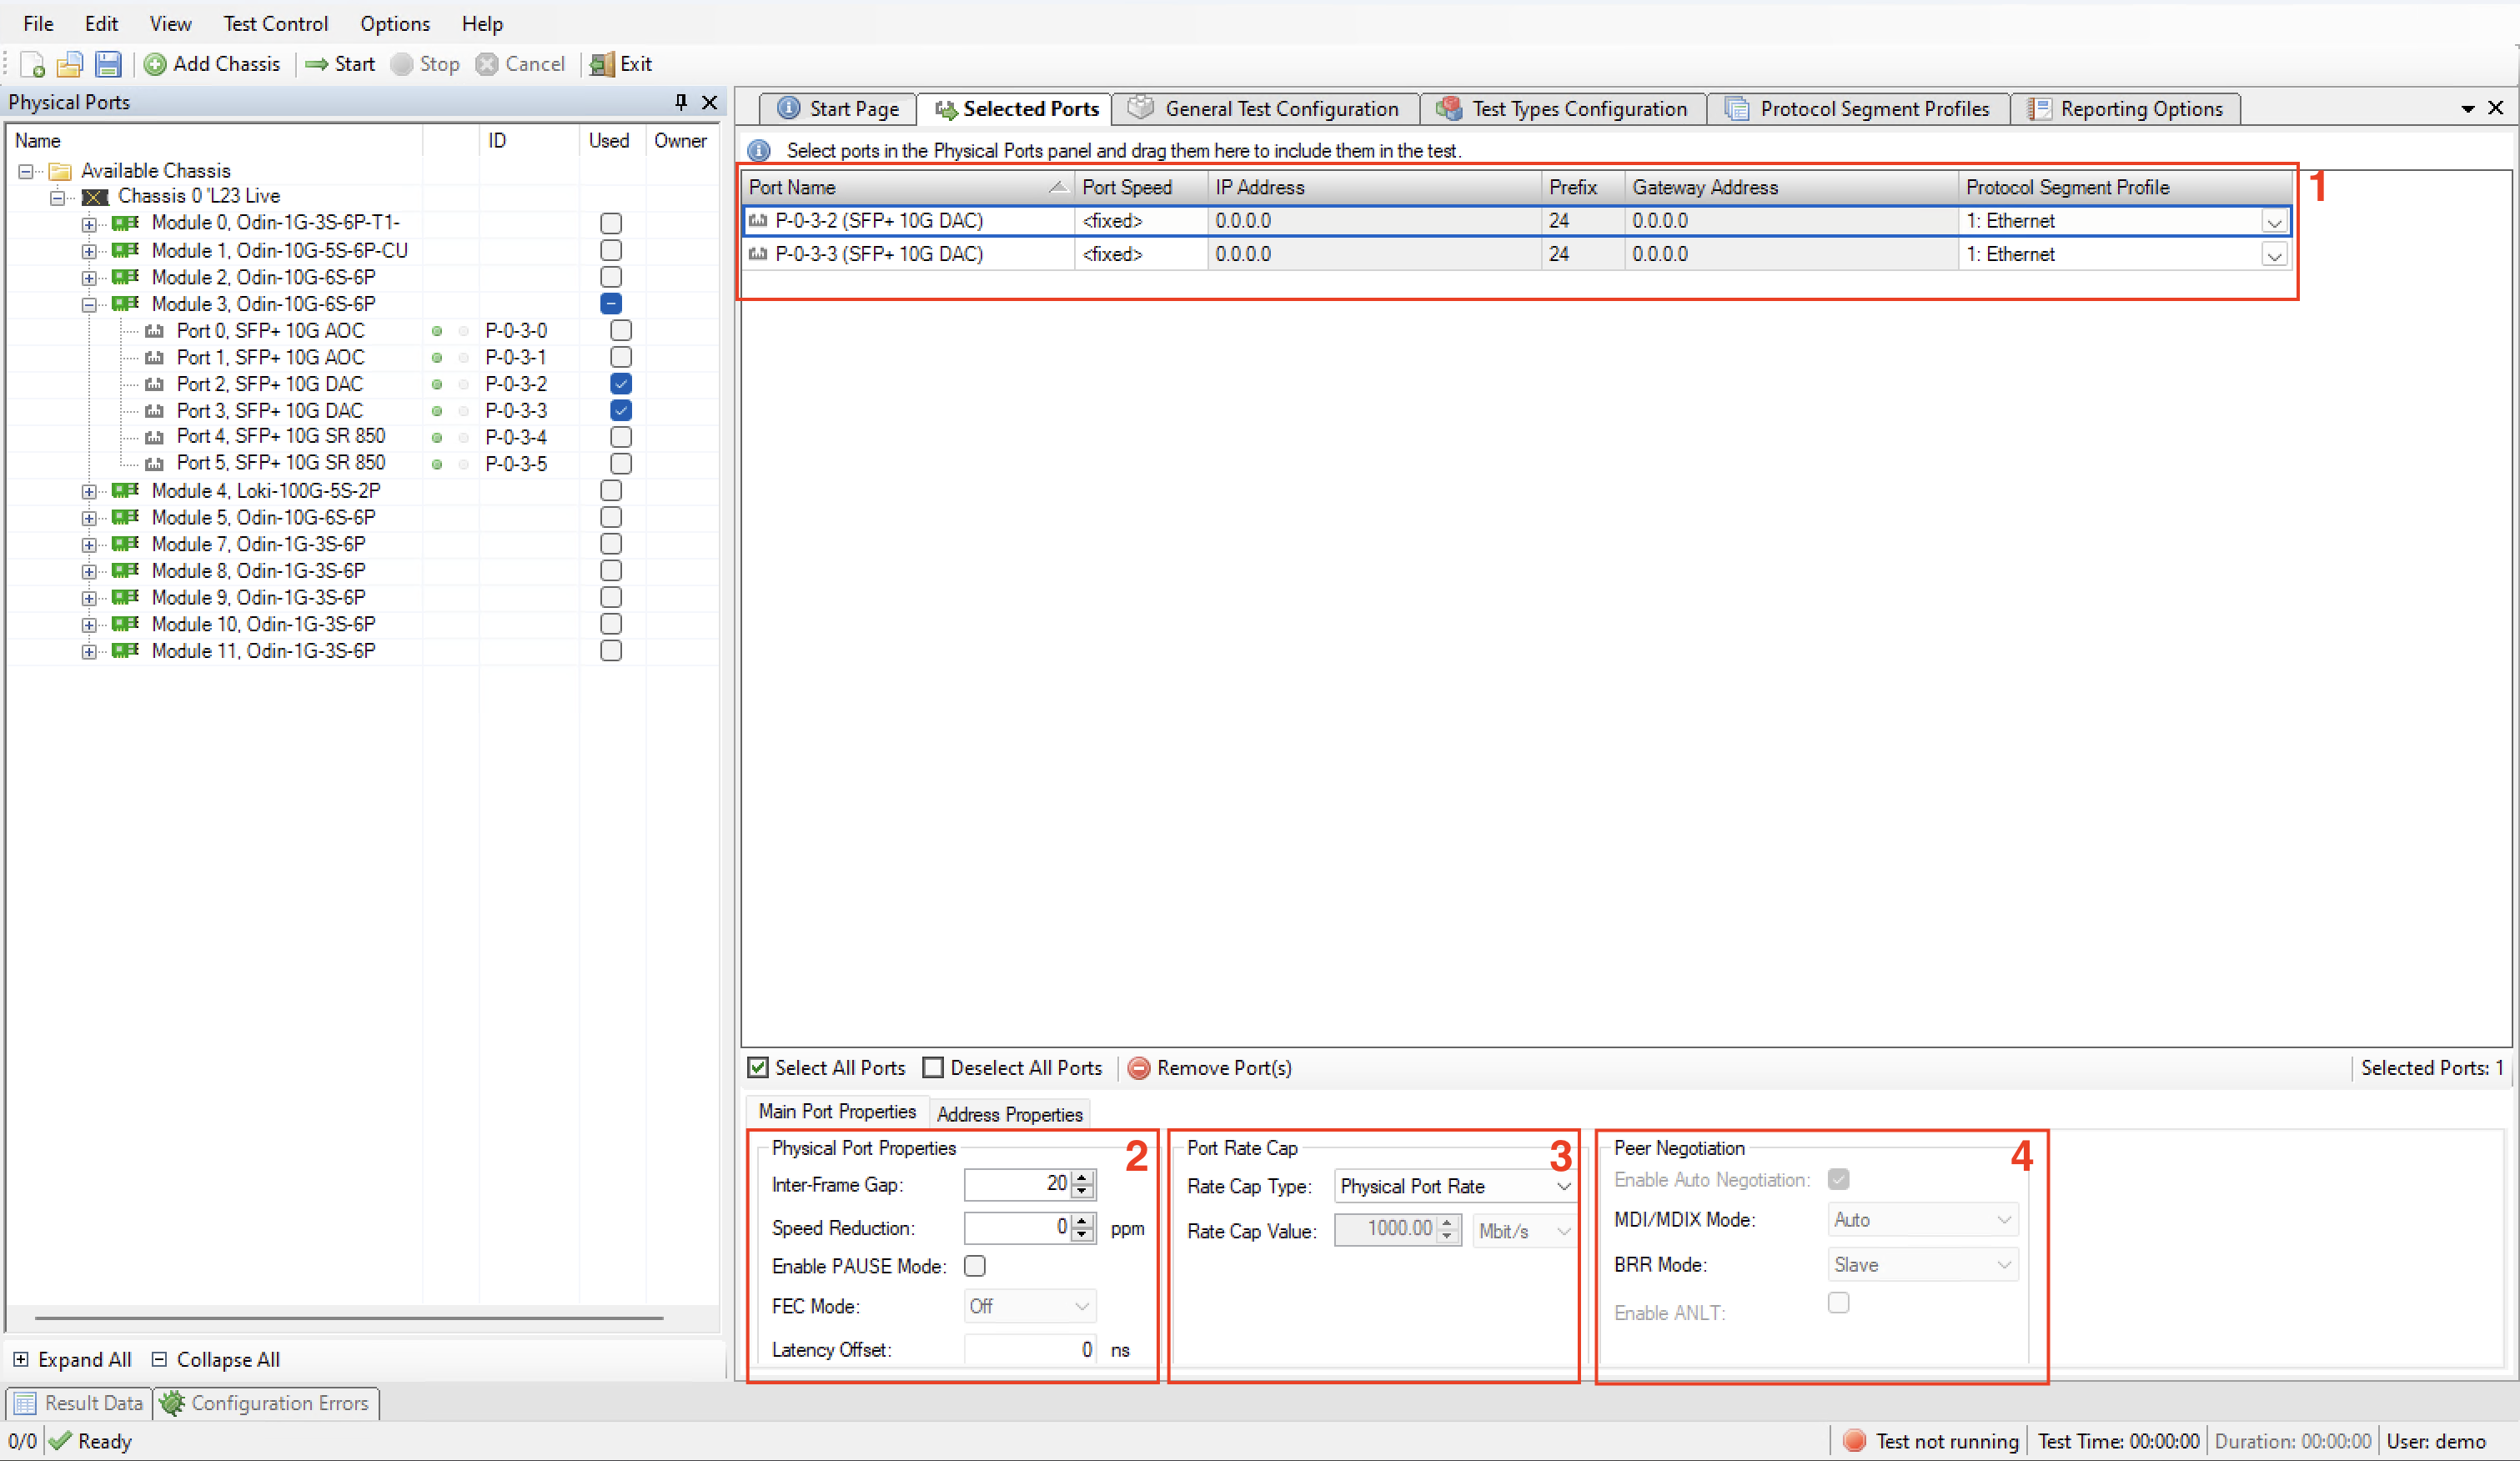
Set port addresses
Configure Physical Port Properties
Choose rate cap
Configure peer negotiation (depending on the module you use, some properties are not applicable.)
See also
Check Selected Ports Panel for details.
Protocol Segment Profiles
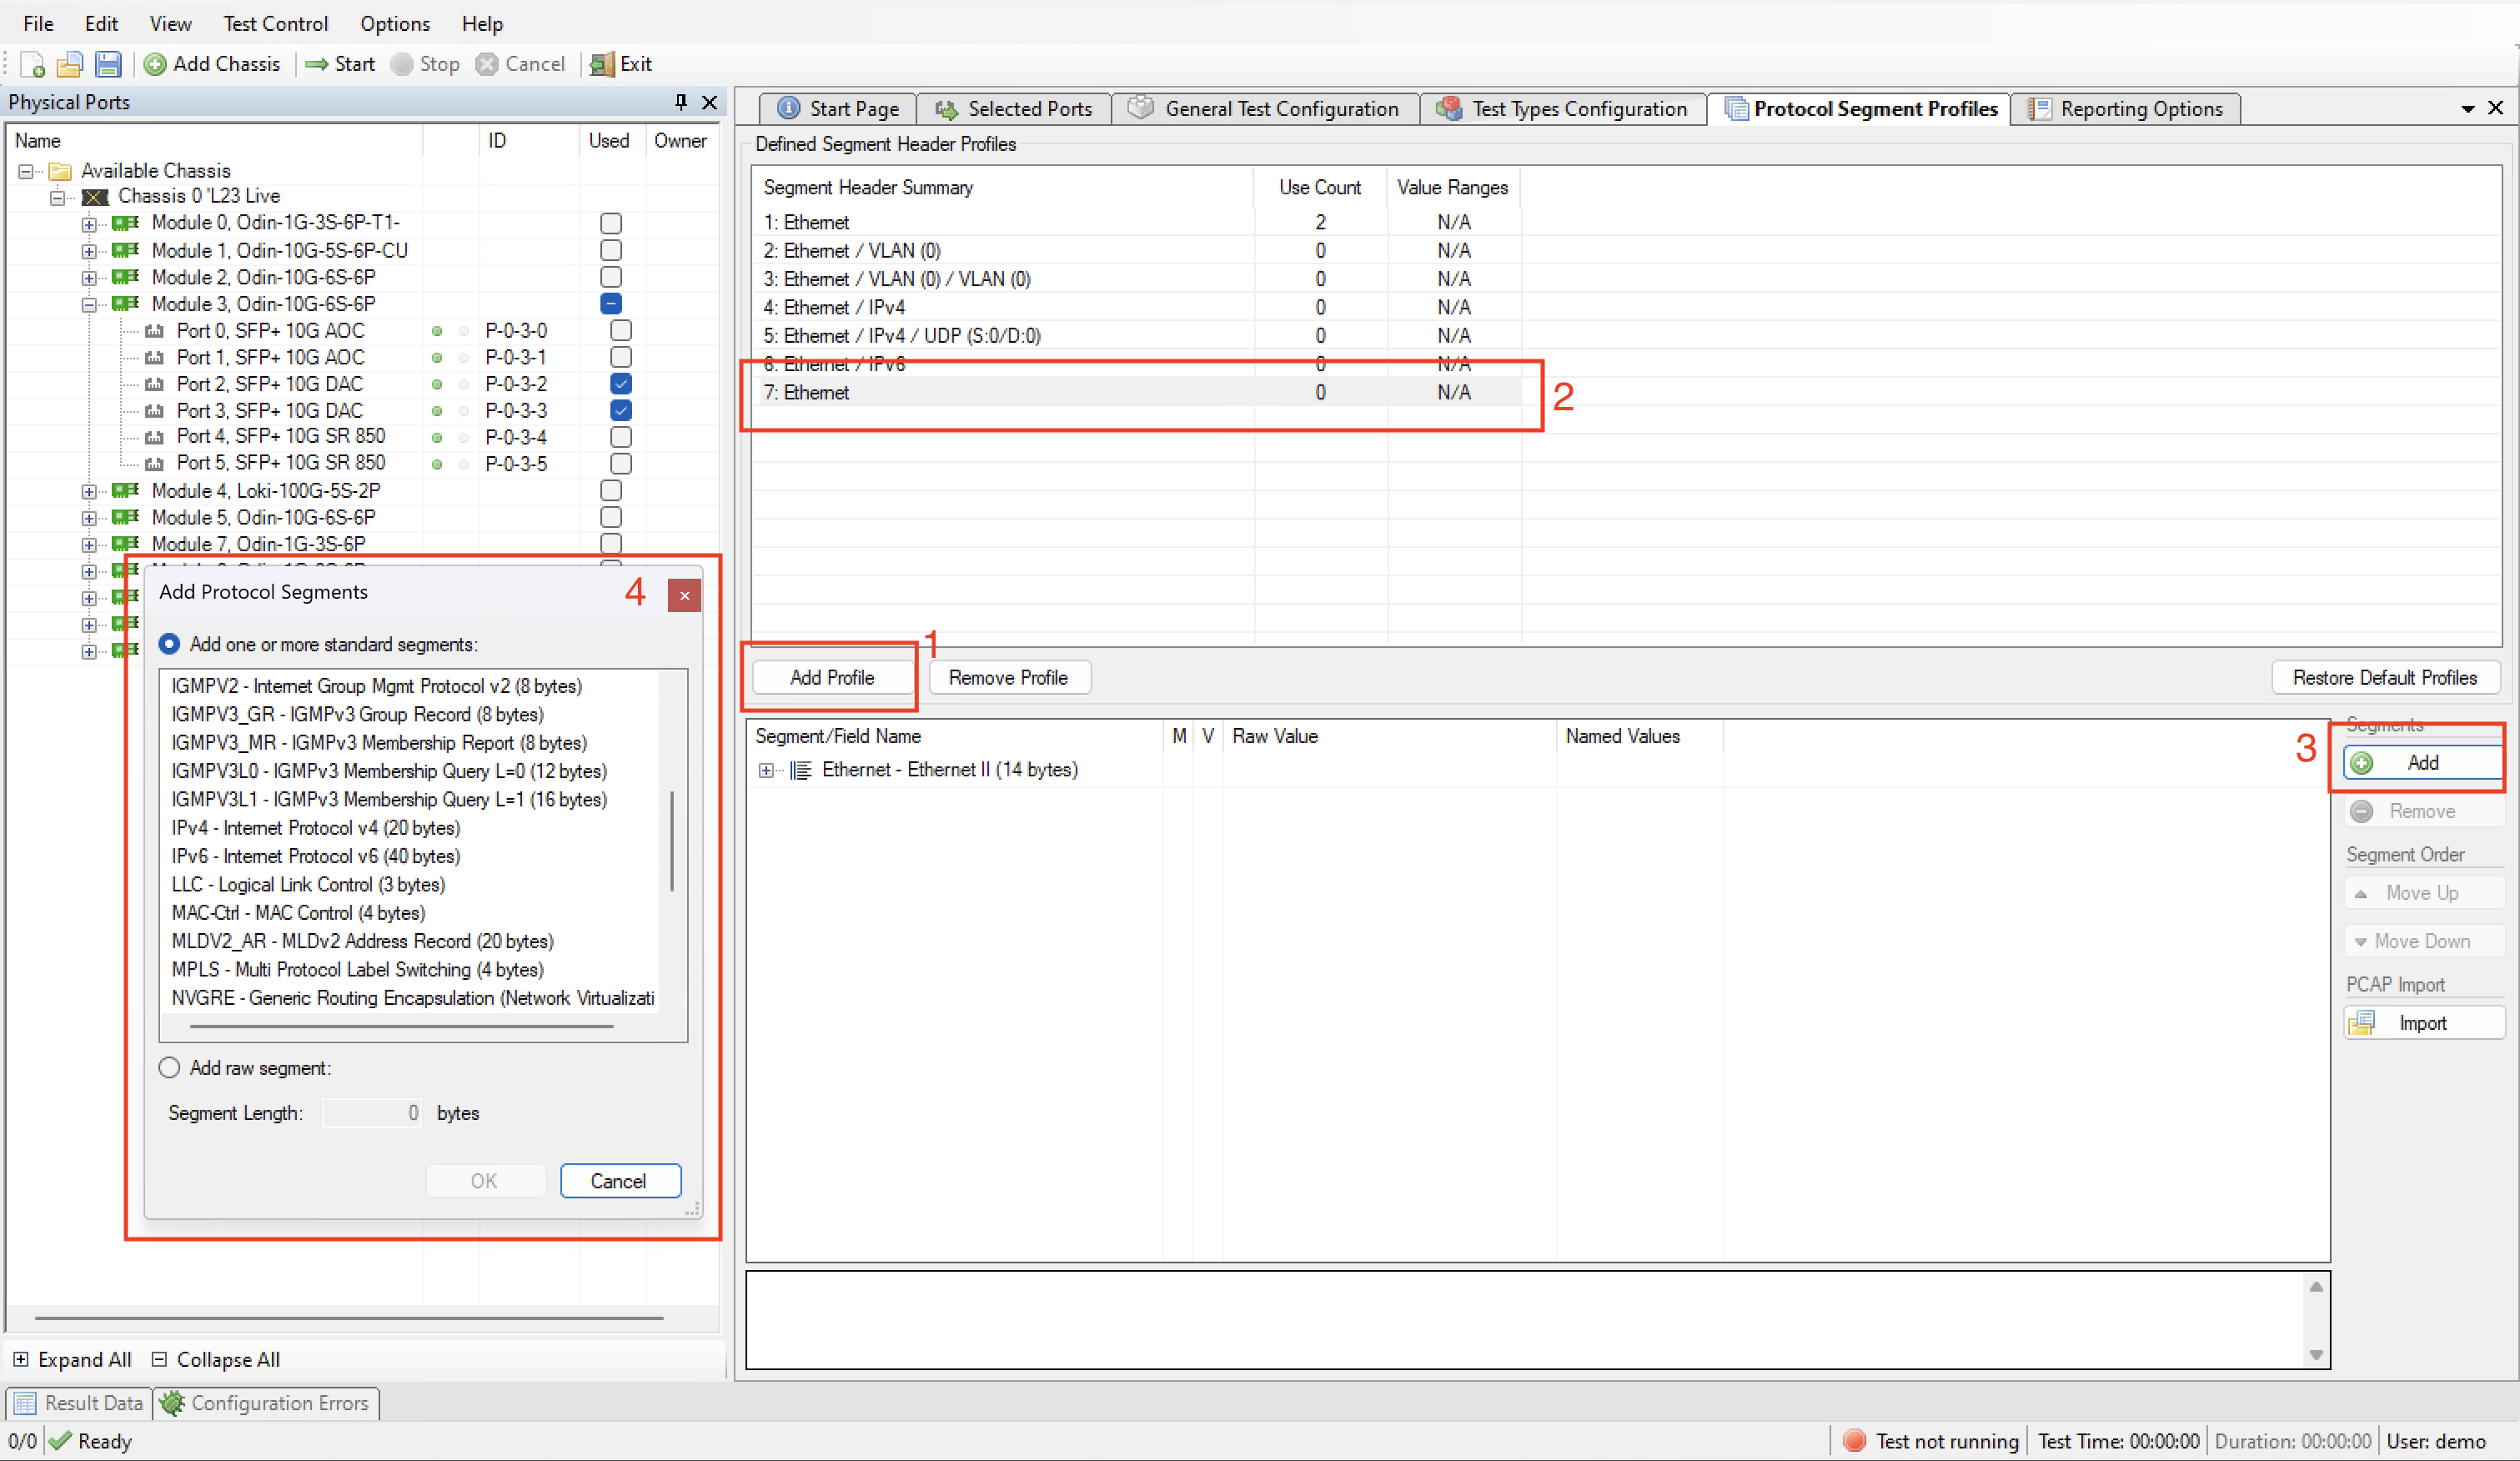
Add new profile.
Select the new profile.
Add additional headers.
Choose Segment.
See also
Check Protocol Segment Profile Panel for details.
General Test Configuration
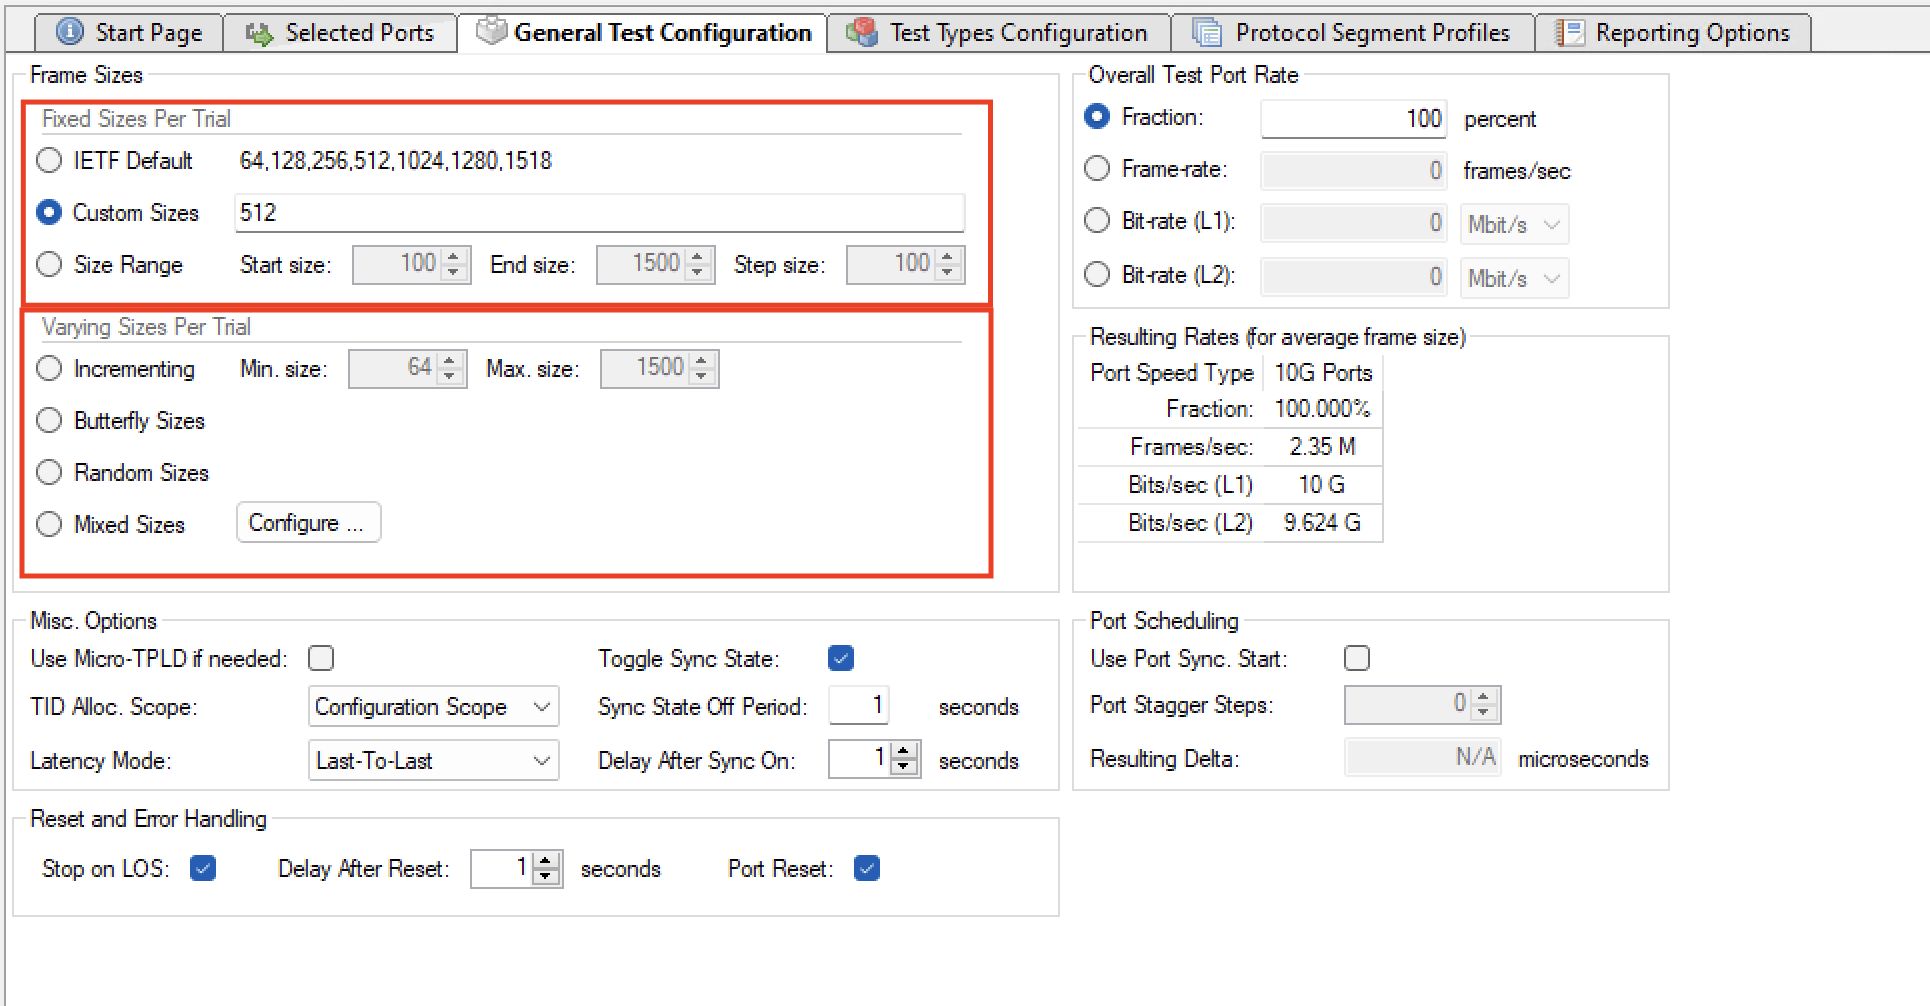
Set frame size
Test Types configuration
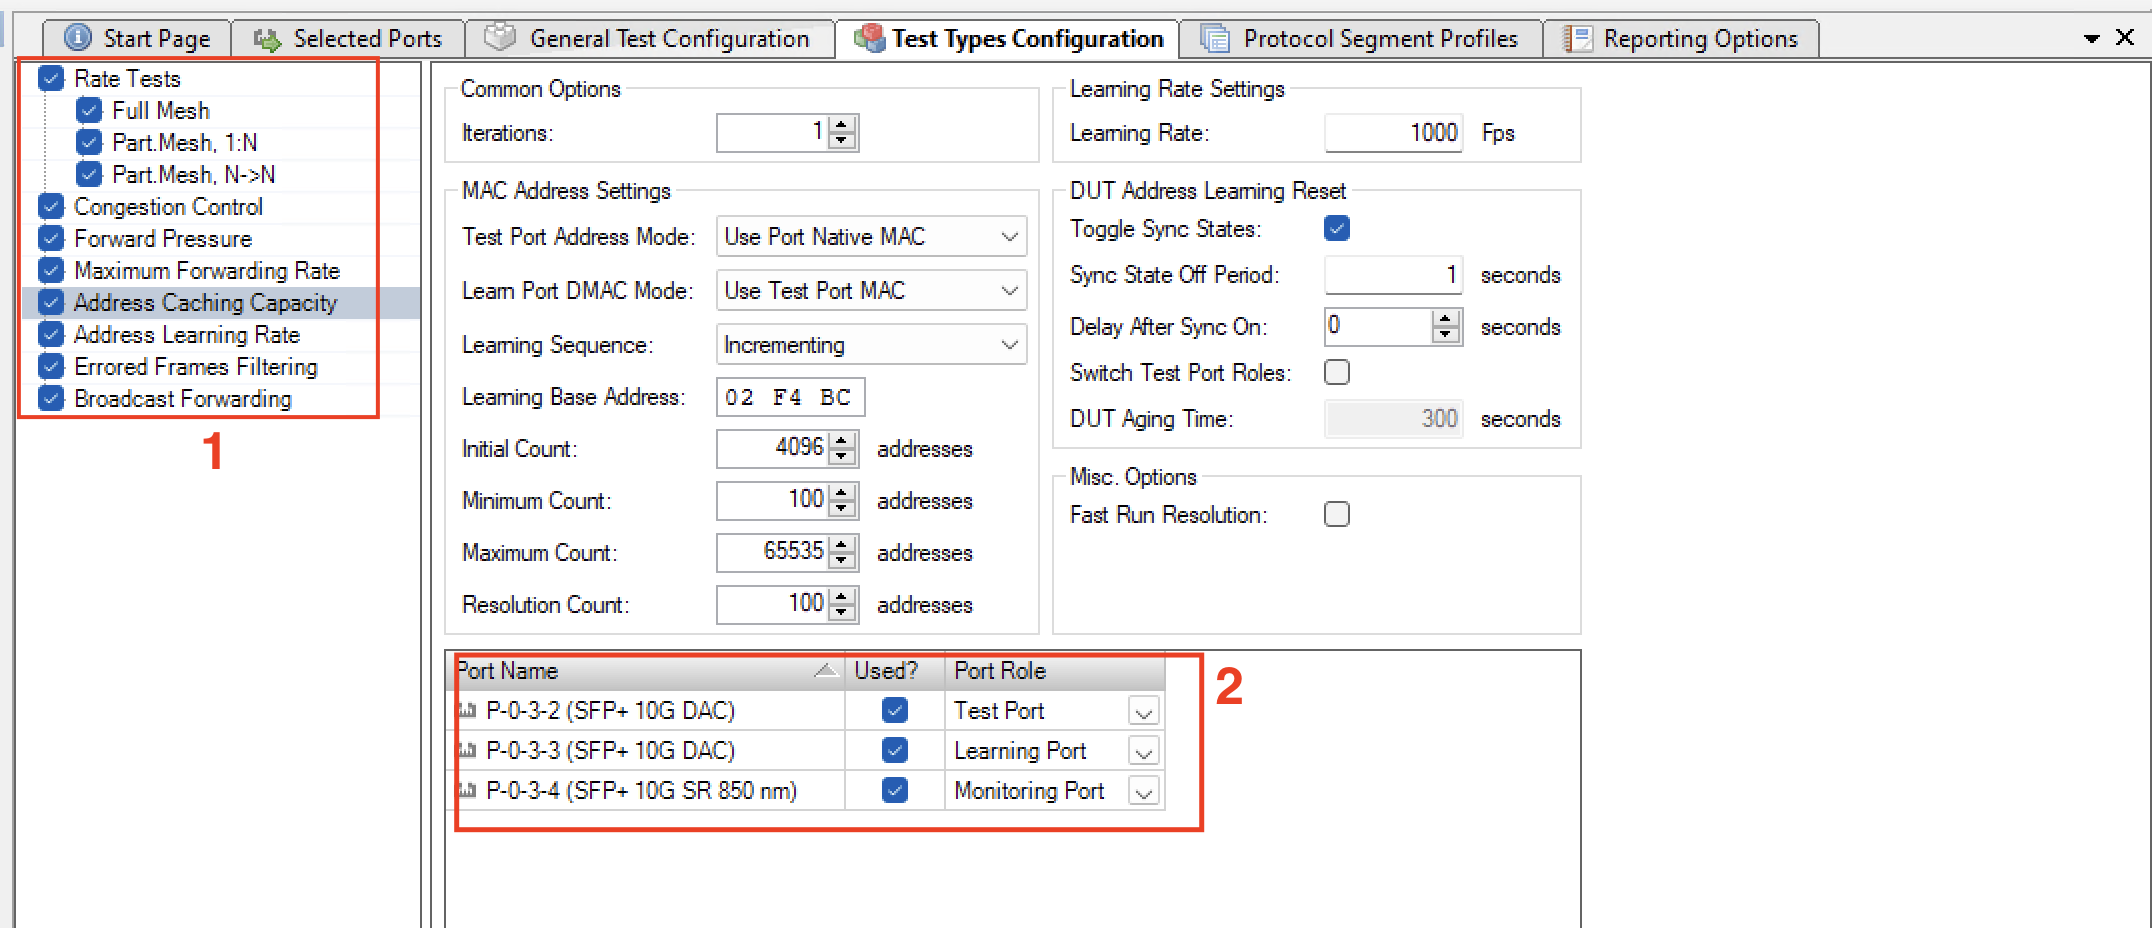
Select the test you want to run
Assign the proper port roles for each test
See also
Check Test Types Configuration Panel for details.
Reporting
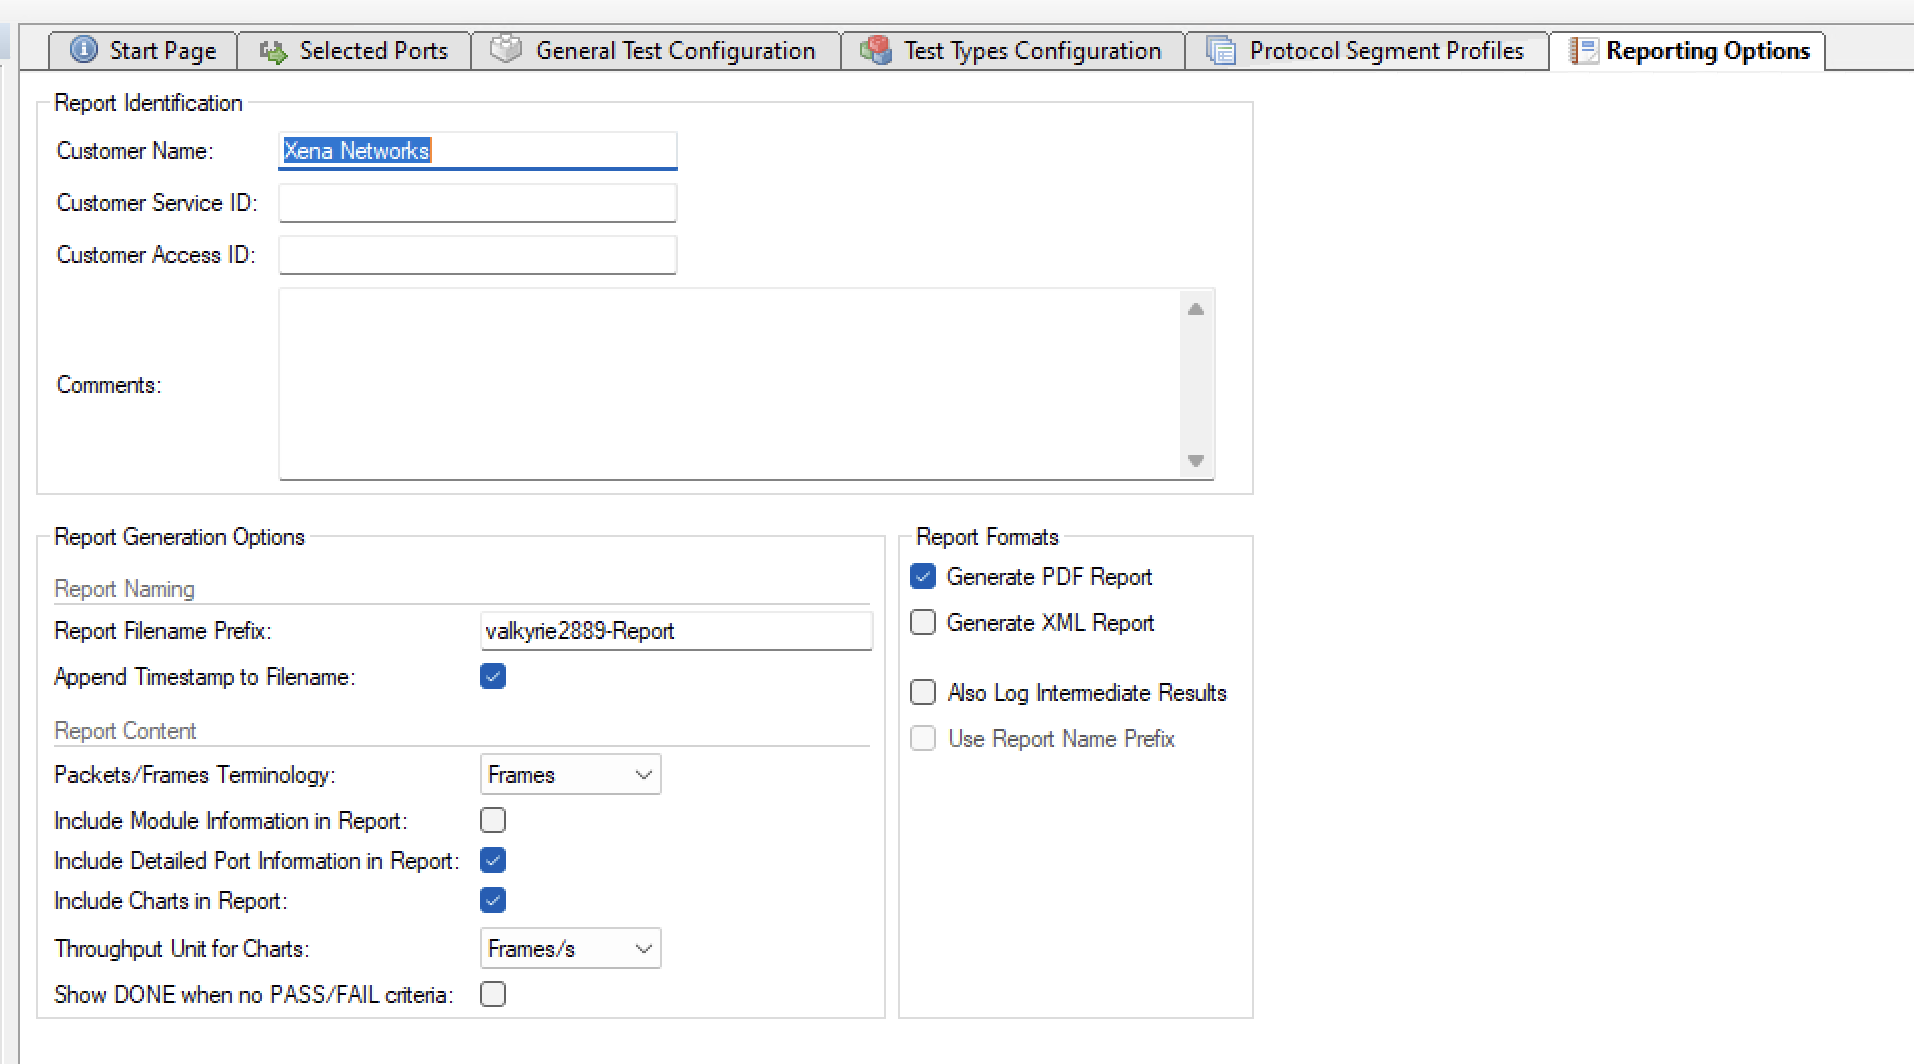
Select the report format you want to generate.
See also
Check Report Options Panel for details.
Save and Start
Start the test. Xena2889 will automatically reserver the ports and ask you to save the test configuration.