4.2. Performing Rate Test (IPv4)
This example will show how to expand the above rate test using IPv4 test traffic. It expands on the previous example so we will only describe the main differences in detail. For the sake of variety we will use a Pairs topology instead of the Full Mesh topology used in the previous example.
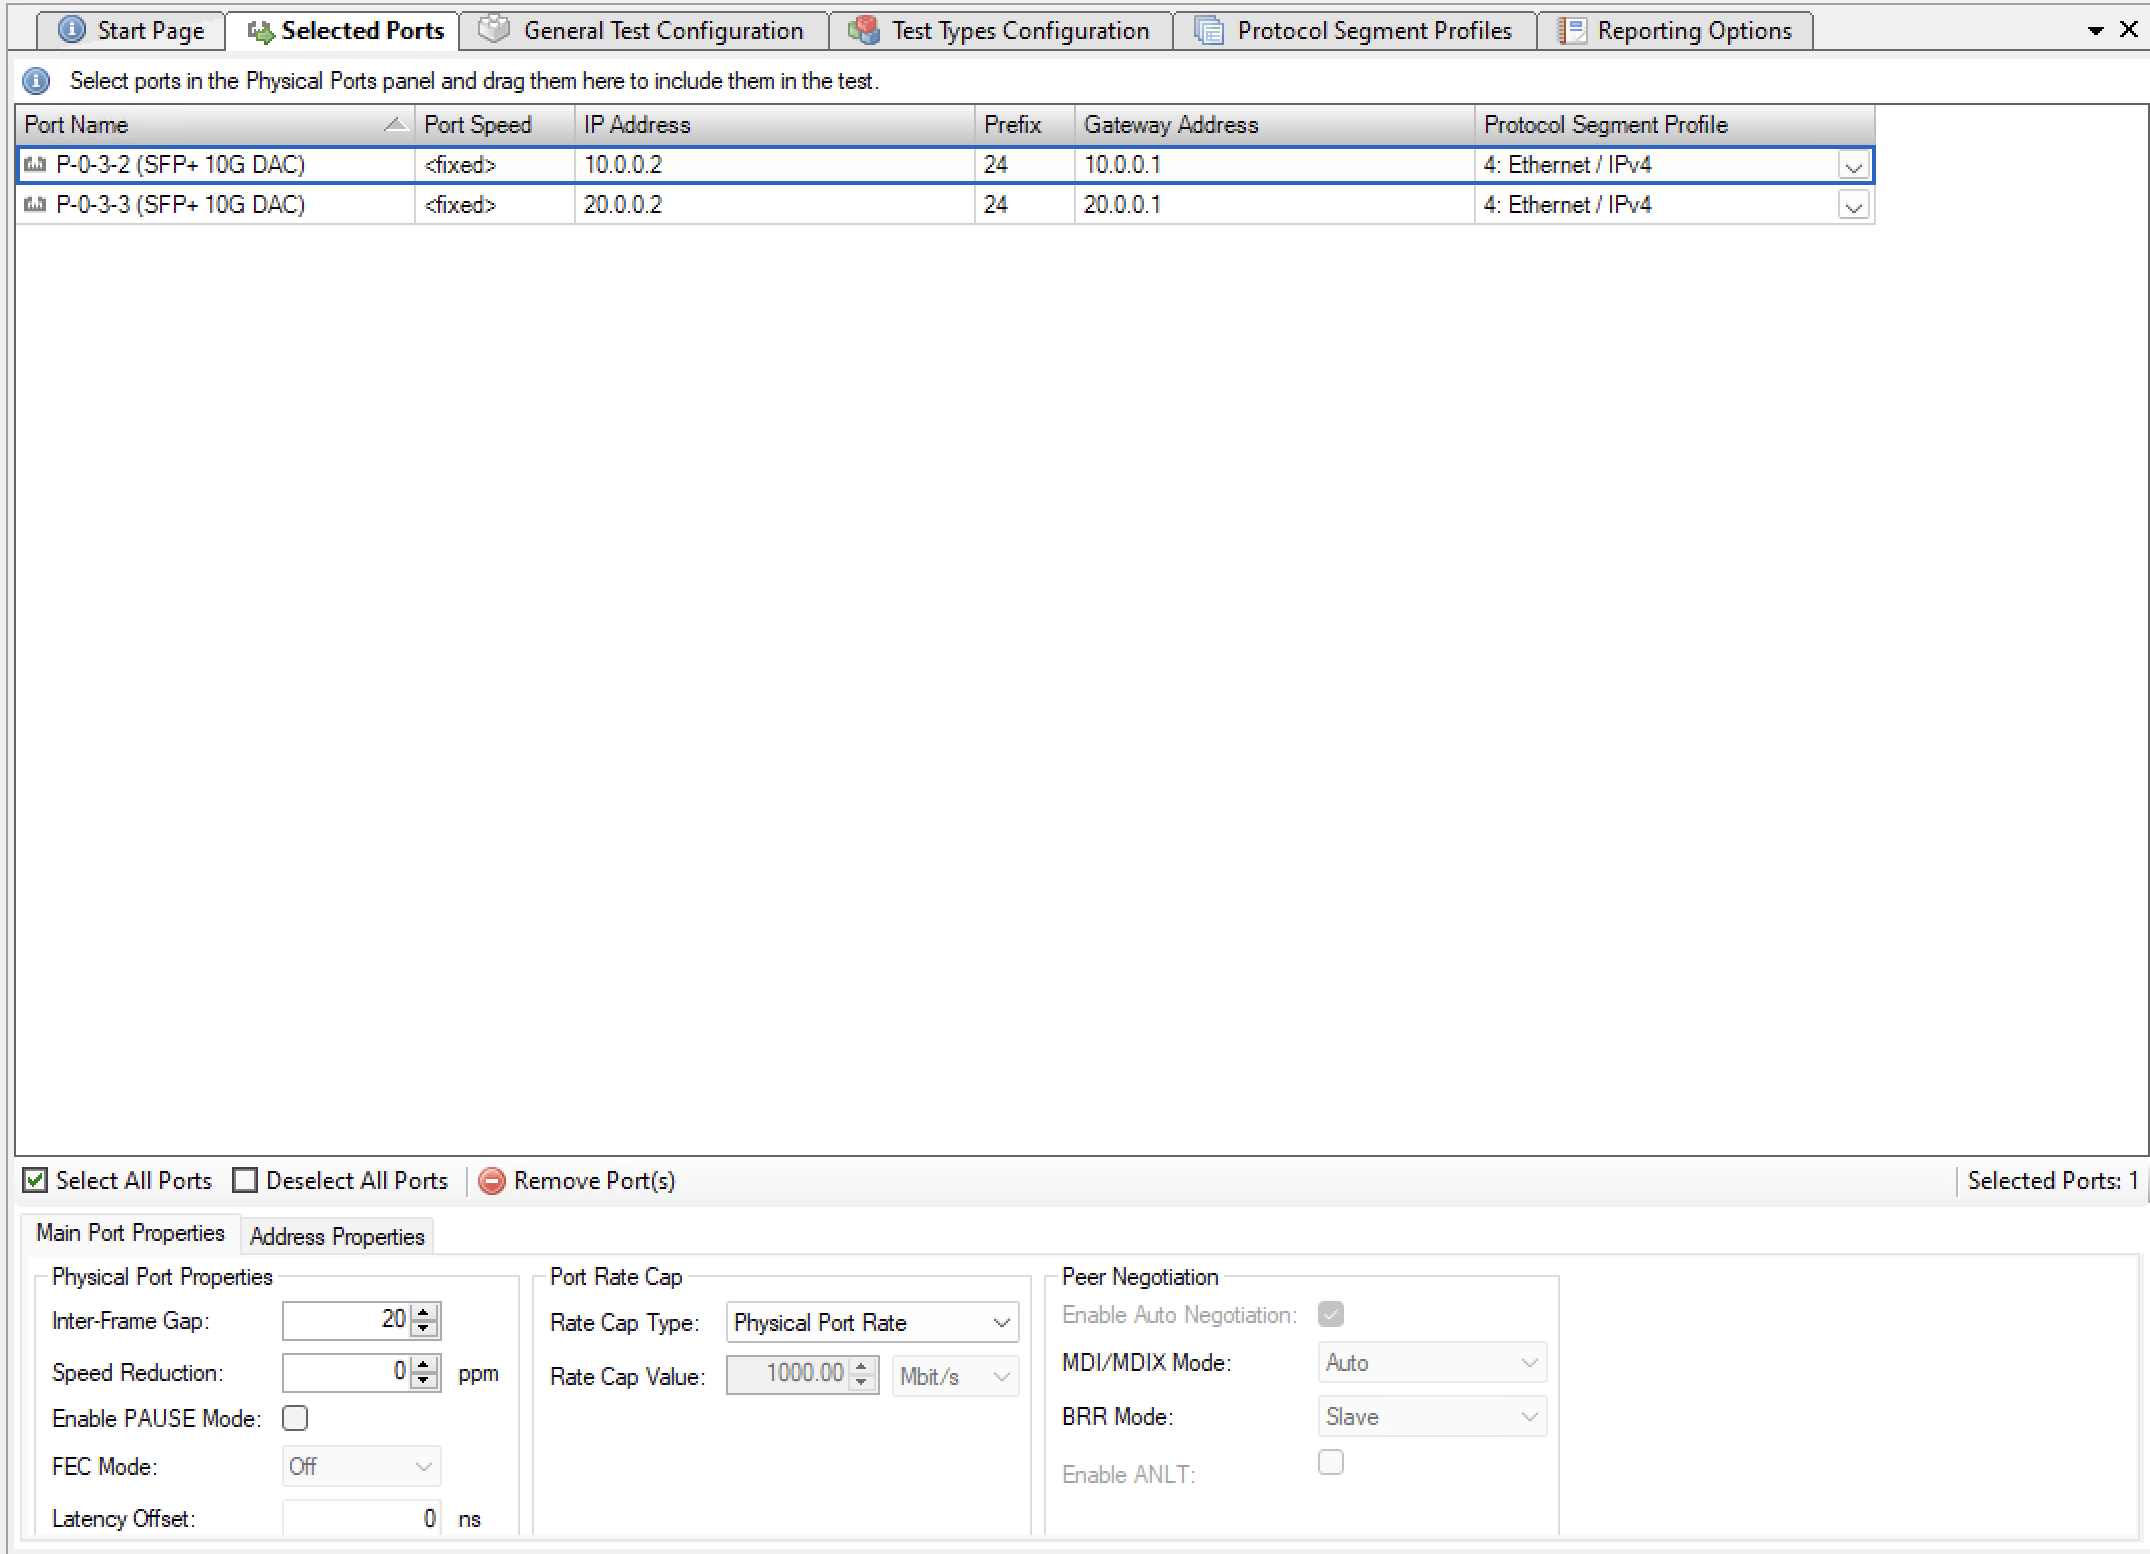
Fig. 4.2 Performing Rate Test (IPv4)
Start the application, and connect to a chassis as before.
Select two test ports that are connected to a DUT that support IPv4 traffic and add them to the Selected Ports panel.
Change to the Selected Ports panel. For each port set the Protocol Segment Profile option to the Ethernet / IPv4 profile.
Select the IP Address cell for the first port. Enter the IP address you want to assign to this port. Note that the Gateway Address cell is automatically initialized using an educated guess for what the gateway address might be. Change the Prefix and/or the Gateway Address cells as needed.
Configure the IP address options for the other port in a similar way.
Change the General Test Configuration options as needed.
Change to the Test Types Configuration panel, and disable all existing tests.
Add a new rate test by clicking on the Add button located at the bottom of the test tree view to the left.The new test will be enabled by default.
Set the topology to Pairs and the direction to Bidirectional.
Set both ports to be used. Set the first port role to East and the other port role to West. Pair the two ports together using the Port Peer column.
Save the configuration and start the test.
The overall result will contain one result for the throughput test and one result for the forwarding test.