4.8. UI Customization
This section describes the general layout and intended usage of the user interface elements in the XenaManager application.
4.8.1. Docking Panels
The XenaManager uses a so-called docking panel framework where each panel can be docked in various positions. The user can thus customize the layout of the application to some extent.
4.8.2. Docking Positions
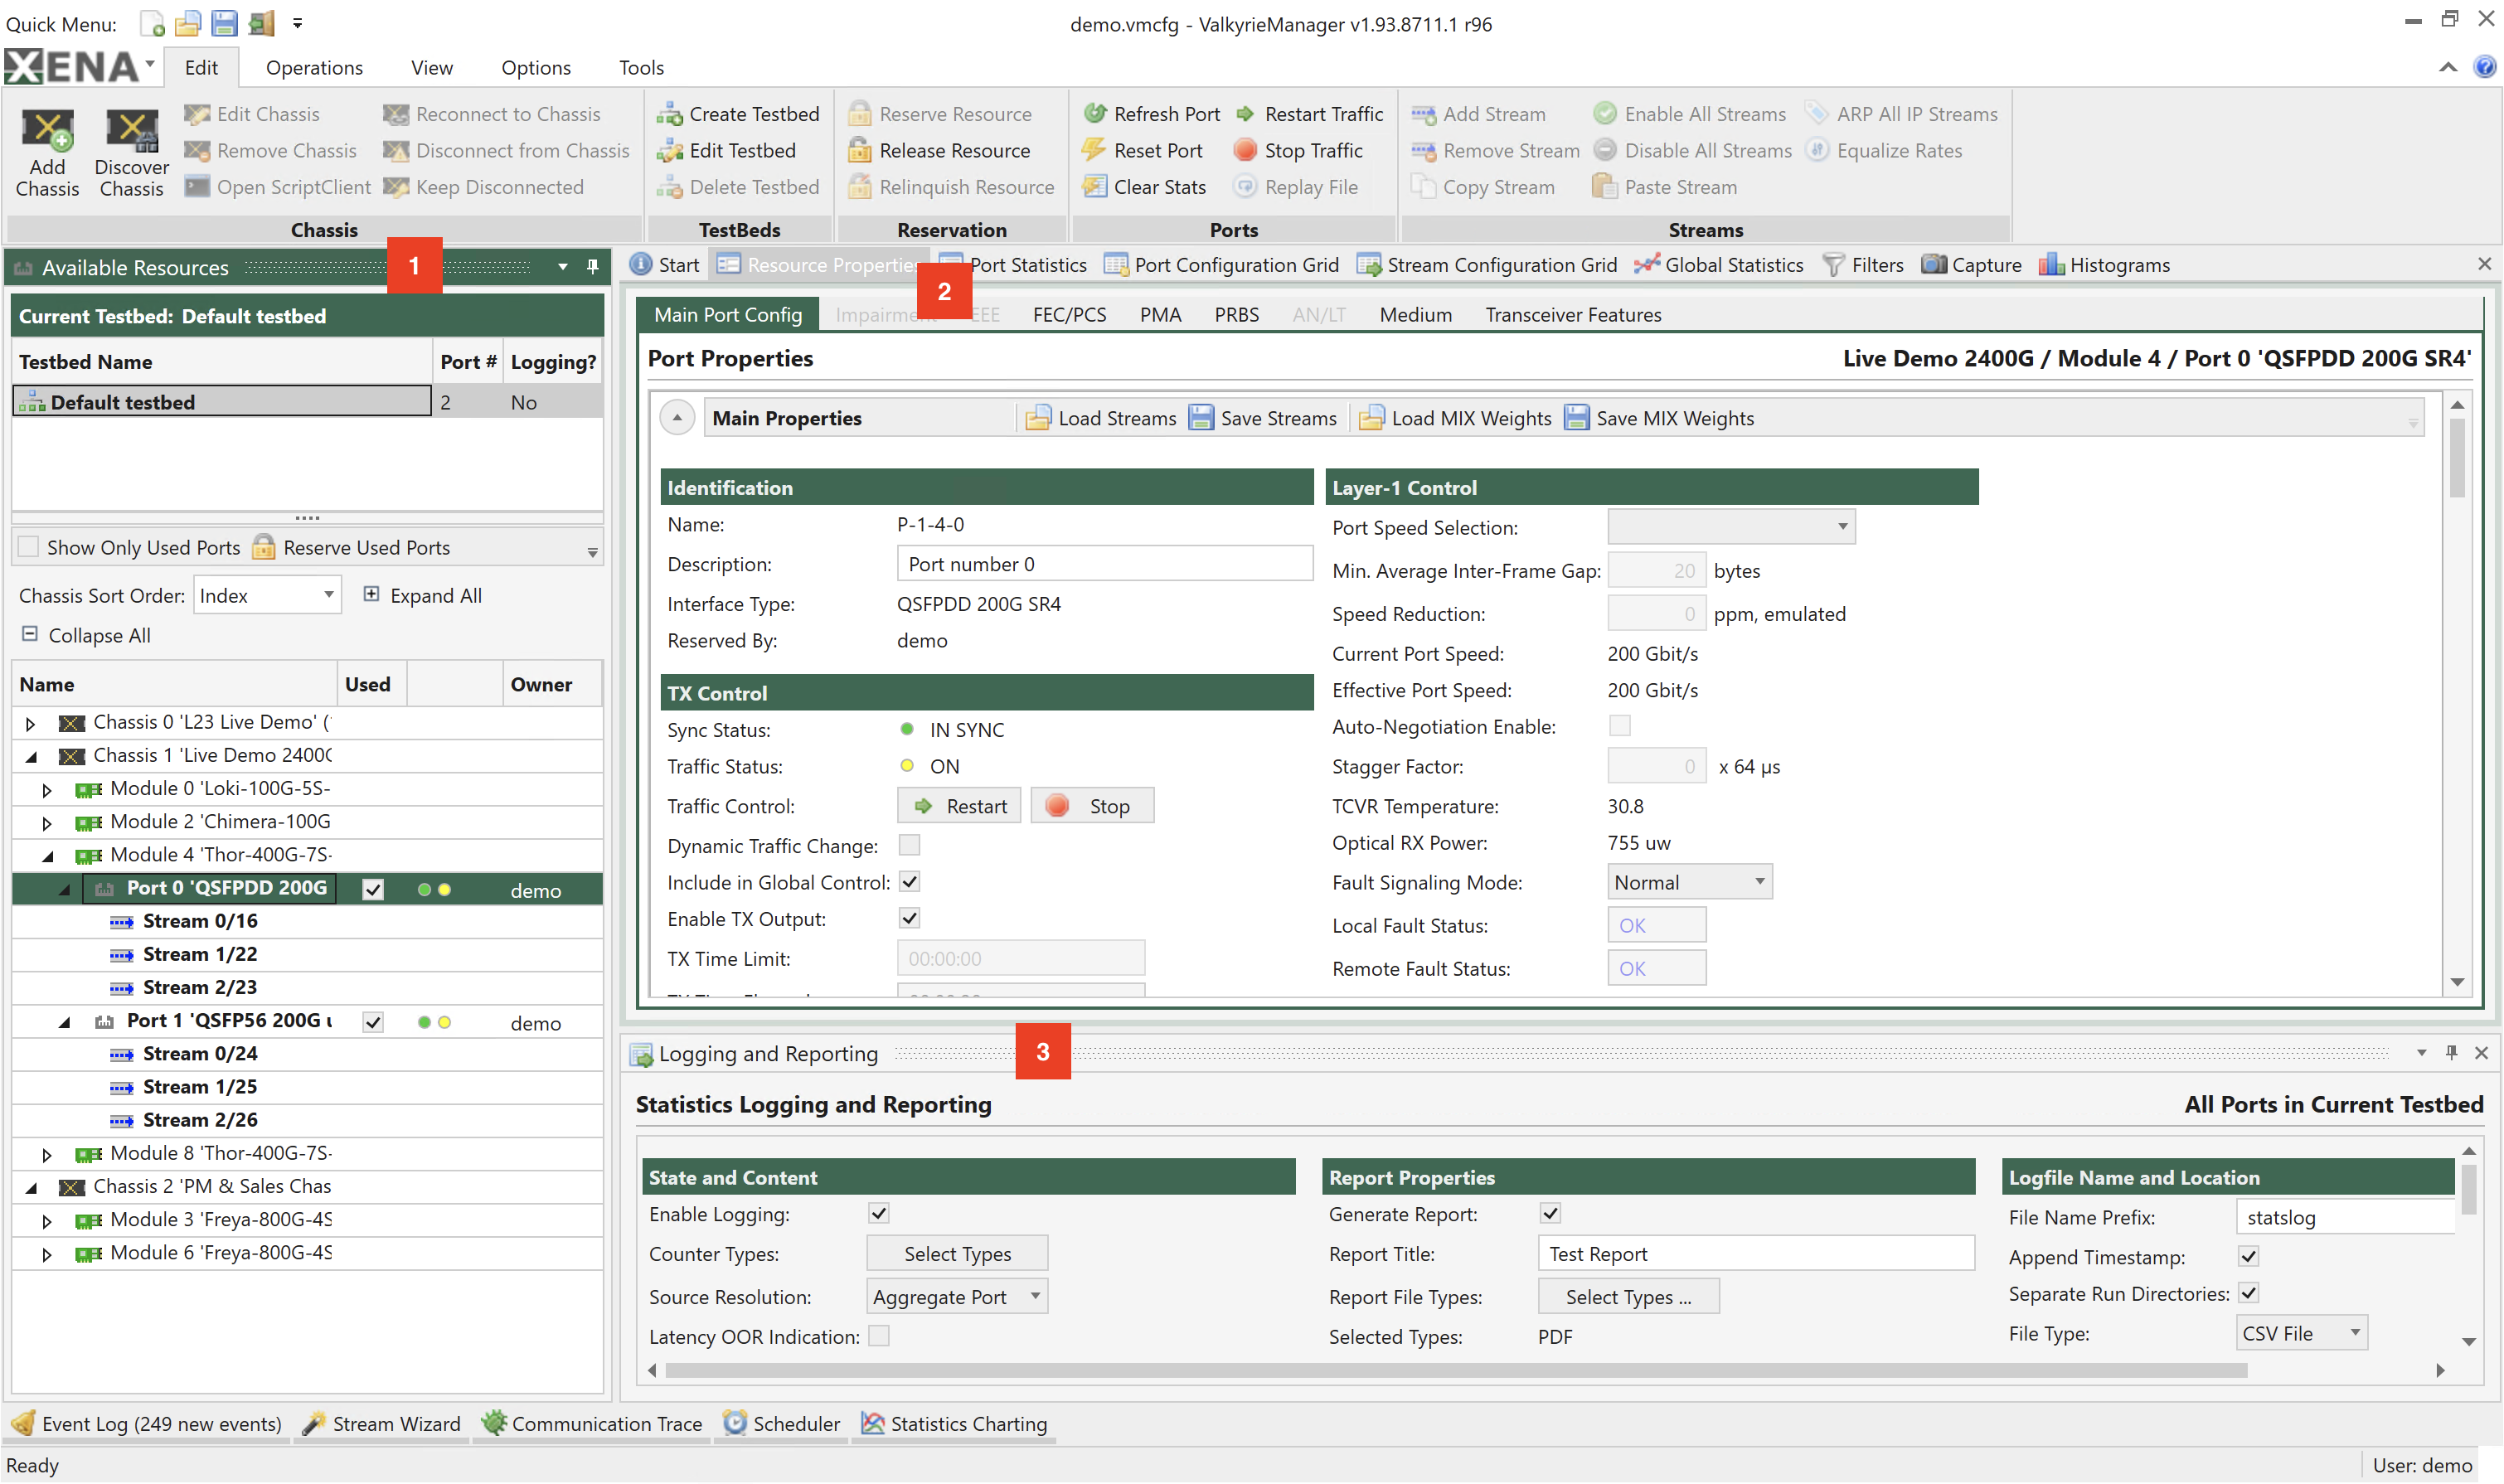
Any panel can be docked in several positions. Fig. 4.28 below shows the three standard positions.

Fig. 4.28 Docking positions
Left
Center
Bottom
Note
It is also possible to dock a panel in these positions:
Right (creating a sidebar similar to the Left position)
Top (above the Document Center tab)
4.8.3. Moving Docking Panels
To move a panel to a new docking position perform the following actions:
Grab the tab header with the mouse and drag it to release it from the present location.
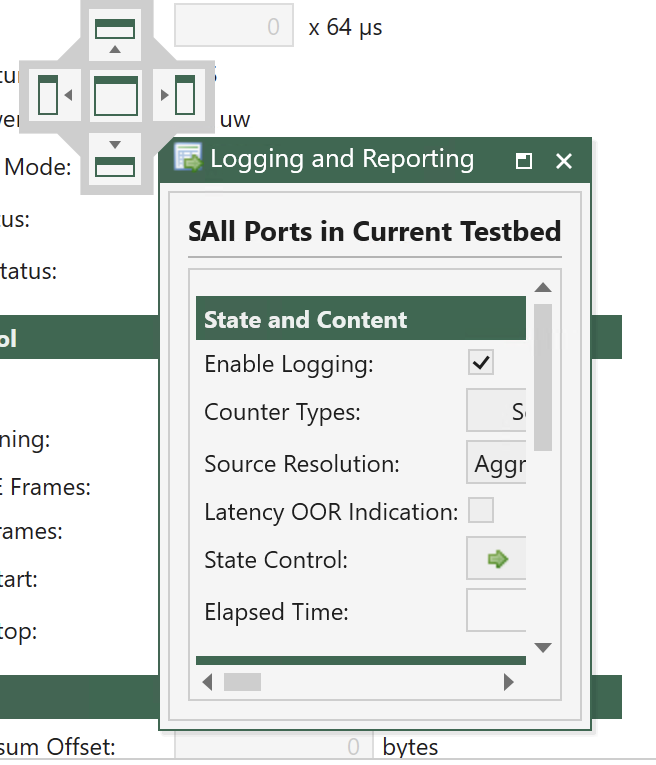
You will now see a compass rose with arrows in all four directions, as shown below.
Hover the mouse over the arrow that represents the position where you want the panel to go and release the mouse.
You can also hover over the center in the compass rose in which case you will target the center position.

Fig. 4.29 Moving docking panel
4.8.4. Positioning Panels
You can change the relative position of a panel by grabbing the panel header with the mouse and drag it left or right within the position tab it is currently located in.
4.8.5. Floating Panels
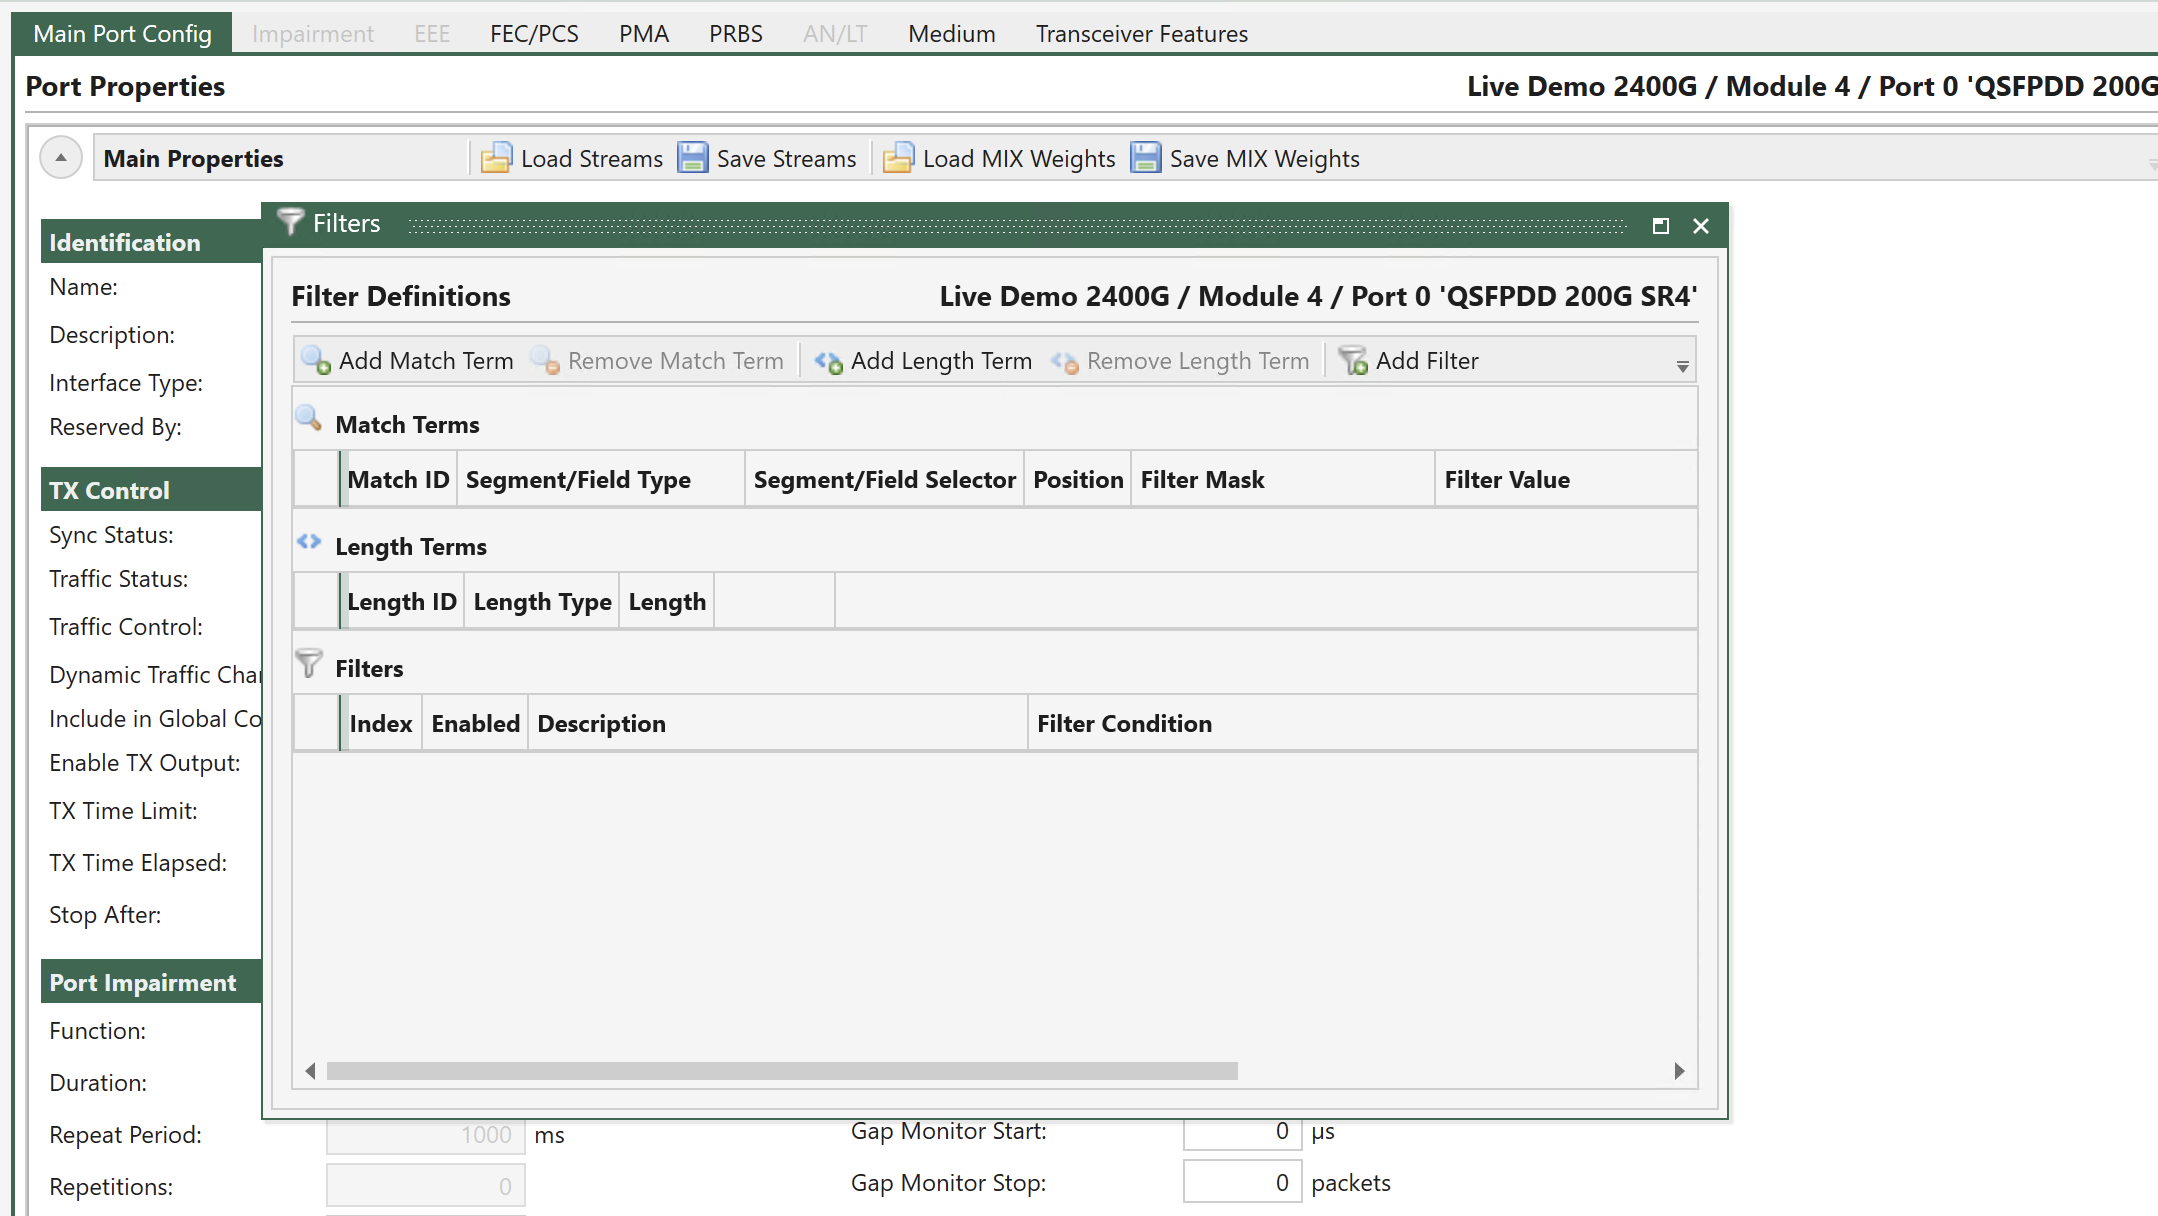
You can also choose to let a panel float outside the docking framework. Just drag it loose from the current position and release it where you want it to be located.

Fig. 4.30 Floating panels
4.8.6. Hiding Panels
You can hide a panel by right-clicking on the corresponding tap and select Hide.
4.8.7. Restoring Default Layout
If your layout gets messed up, you can easily revert to the default layout via the View menu and clicking the Reset Layout to Default button.