4.5. Resource Management
4.5.1. Chassis Resources
A chassis resource can encompass the chassis itself, a test module residing within the chassis, or a test port situated on a module.
Xena testers have the capability to facilitate multiple concurrent connections from various Xena clients, including XenaManager, scripting clients, Xena2544, and so on. Once a client has successfully established a connection with the chassis, they can inspect any chassis resource. However, in order to modify the resource configuration, the client must initially reserve the resource.
4.5.2. Reservation Mechanism
At any given time, a specific resource can only be reserved by a single client. This reservation persists even in the event of a client disconnection. If the client later reconnects and authenticates itself with the same username, any previously pending reservations will seamlessly transfer to the new connection.
The reservation is linked to a combination of the connection ID within the chassis and the provided username. The username functions as a tag for the reserved resource, with the chassis having no concept of actual user accounts. Multiple connections can use the same username, but each resource can only be reserved by a single connection simultaneously.
By default, the username for XenaManager is derived from the Windows username of the current user. You have the option to modify the username for XenaManager in the Options menu, with a maximum of 8 characters allowed for the username.
4.5.3. Reservation Hierarchy
Reservations operate on a hierarchical exclusive basis, which means that if a user like Albert has reserved a specific test module, then another user like Bertha will be unable to reserve any port on that module. The same principle applies to chassis-level reservations. It’s important to note, however, that user Albert does not reserve individual ports on the test module by reserving the test module itself.
In typical traffic generation operations, there is usually no need to reserve entire modules or chassis. Port reservations are typically sufficient for regular operations. Reserving modules and chassis becomes necessary primarily when conducting tasks like system maintenance, software upgrades, or changing port types on specific modules.
4.5.4. Reserving Resource
To reserve a chassis resource, you can choose the resource in the tree view and then either click the corresponding button in the ribbon menu or right-click the resource and select the appropriate menu item.
Once the resource is reserved, all configuration options for that resource will become accessible.
For a swift reservation of all ports within your current testbed, you can simply click the Reserve Used Ports button located just below the testbed selector.
4.5.5. Releasing Resource
To release any resource that you have previously reserved, follow these steps:
Select the resource in the tree view.
Click the Release Resource button in the ribbon menu.
Alternatively, you can right-click the resource and choose the corresponding menu item to release it.
4.5.6. Relinquish Resource
To forcibly take a resource away from another user, you can choose the Relinquish Resource option. However, please note that you will be prompted to confirm this action before it is executed to ensure you intend to proceed with this action.
Before deciding to relinquish resources reserved by another user, it is advisable to confirm if that user has an active connection on the chassis. This precaution can help maintain good relationships with your co-workers.
To check for active connections on a chassis, follow these steps:
Select the chassis in the Available Resources tree view.
Activate the Resource Properties tab.
Look at the bottom of the chassis properties panel, where active connections are listed. This will allow you to verify if another user is actively connected to the chassis before proceeding.
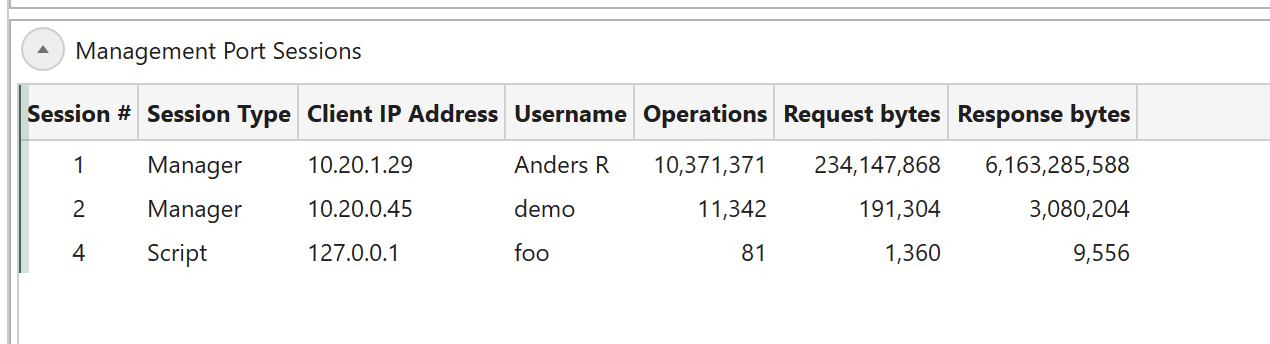
Fig. 4.16 Chassis session panel
4.5.7. Handling Multiple Resources
It is possible to operate on multiple resources in the tree view using the standard Windows Shift+Click or Ctrl+Click mouse operations.