3.3. EPL With C-Tag
This example also expands on the first example and shows how to add service multiplexing using a Customer VLAN tag (C-TAG) and also how to enable per-CoS bandwidth profiles. We will create an EVPL service with a C-TAG value of 10, using bandwidth profiles for CoS value 1 and 5.
Add a Xena chassis to the configuration (or re-use the one you already have).
Create a new Ethernet service. Set the Service Type to EPL and check the Is Virtual checkbox.
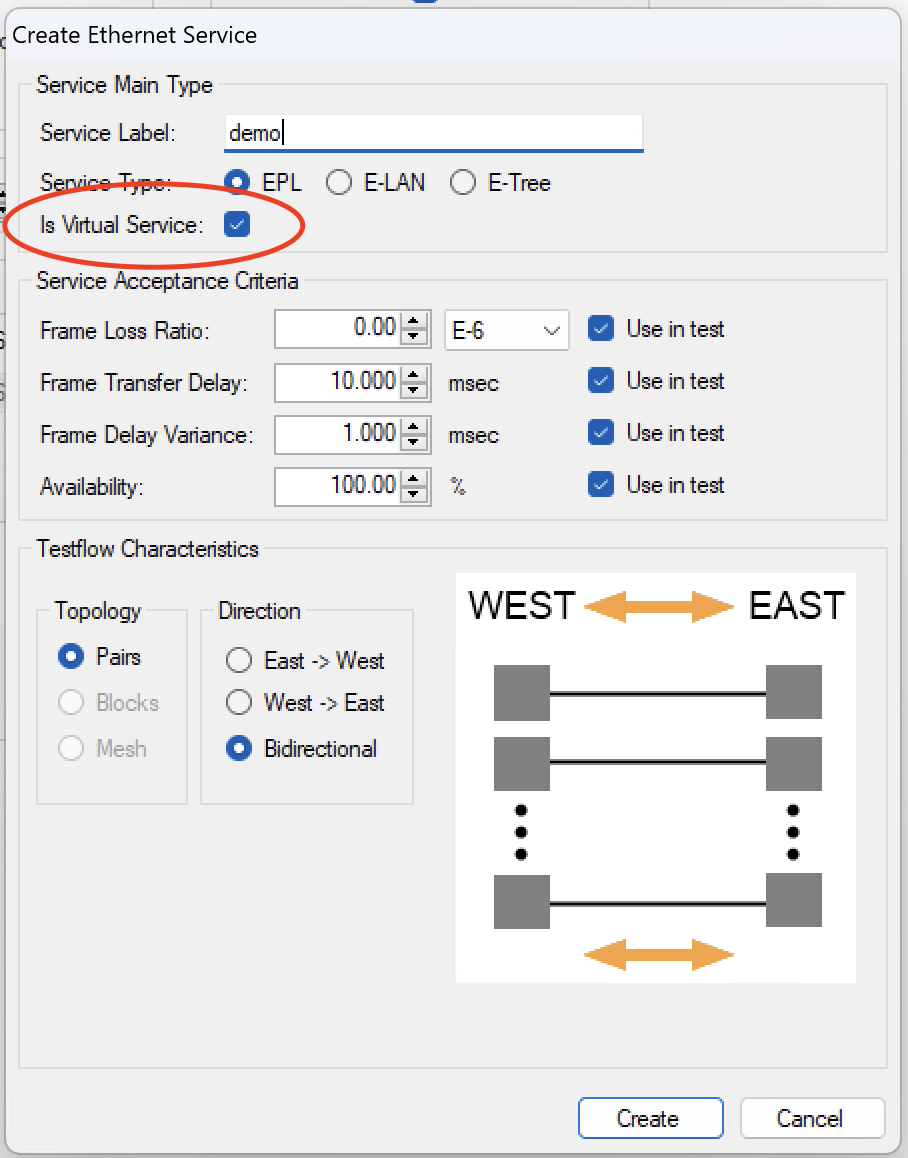
Fig. 3.14 Create Service dialog - EPL (is virtual)
Go to the Bandwidth Profiles panel and create and configure two new profiles, one for each CoS value we want to use. The CIR/EIR values should preferably be different so that you can see a difference when you run the test.
Add two suitable ports to the service. Assign each of the ports to a different direction group (EAST or WEST).
Select both UNIs in the tree view and change to the Service/UNI Configuration panel. Check the VLAN: Customer Tag checkbox and set the C-tag value in the Frame Editor to 10.
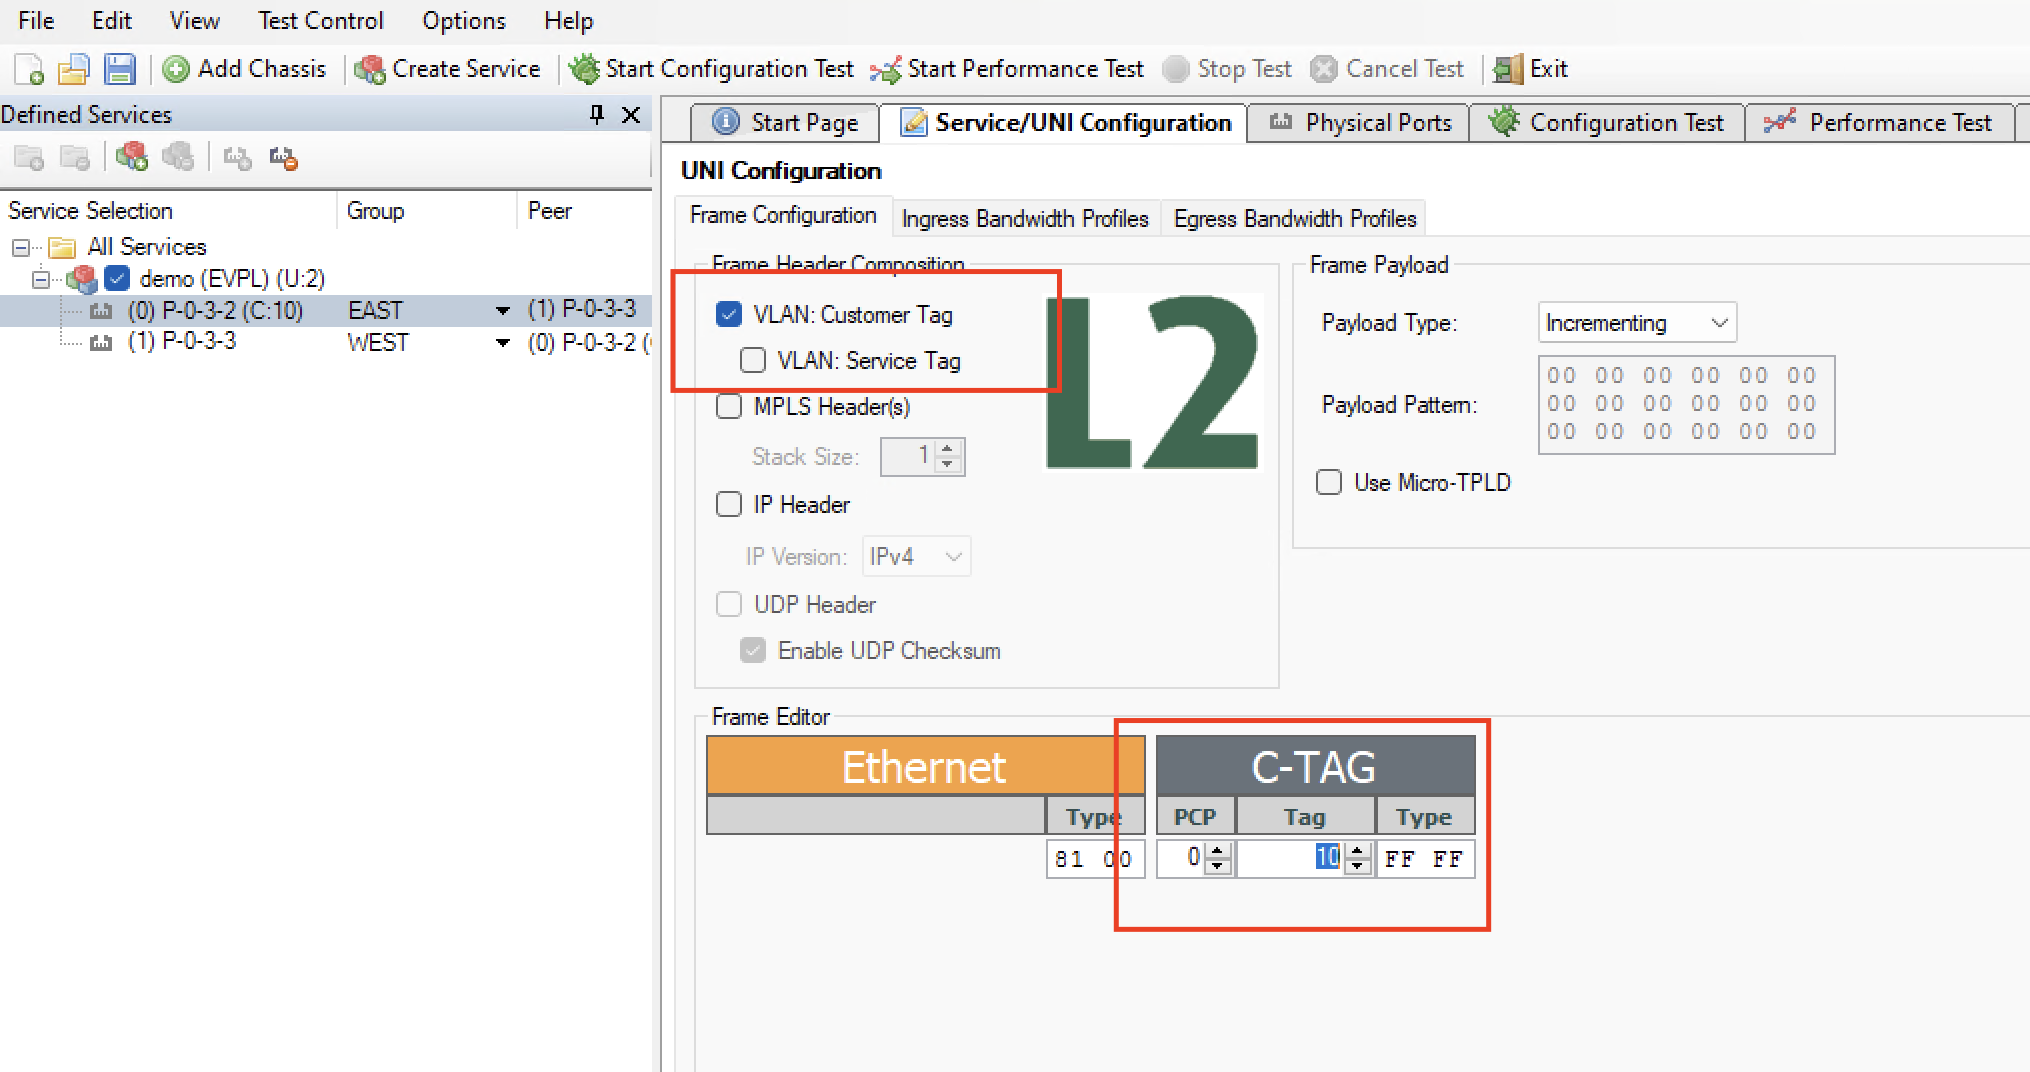
Fig. 3.15 Add C-Tag 10 to UNI
Change to the Ingress Bandwidth Profiles tab. Select the Use Per-CoS Bandwidth Profiles option.
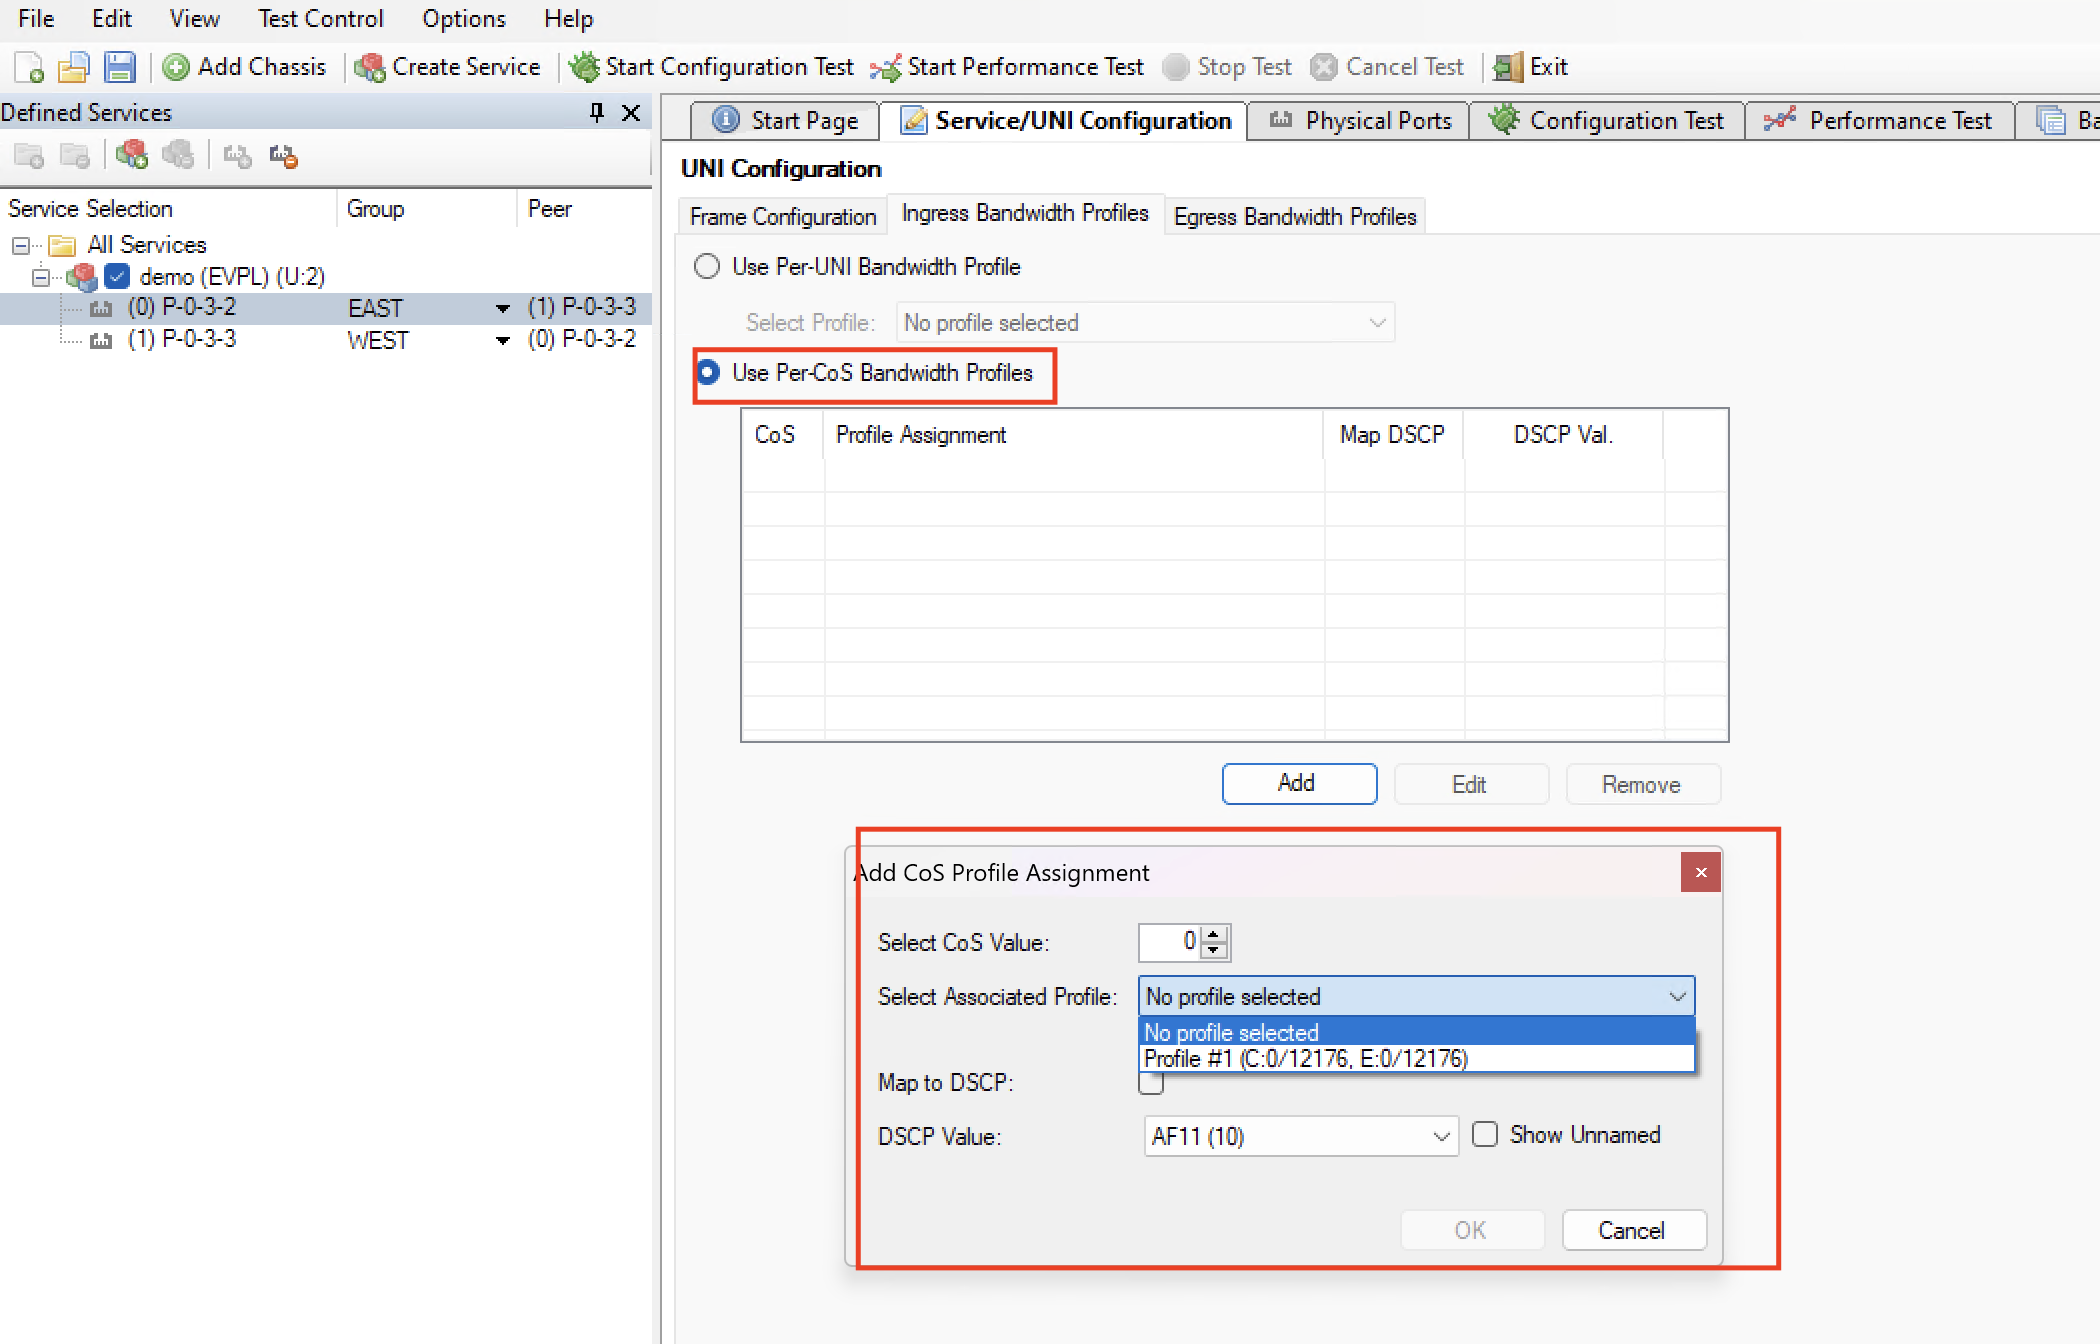
Fig. 3.16 Use Per-CoS Bandwidth Profile
Press the Add button. Set the CoS value to 1 and select the first profile you created above. Ignore the DSCP settings and press OK.
Add another CoS-profile mapping for CoS value 5.
Save your configuration.
Right-click on the service you just created in the Defined Services tree view and select the Run Configuration Test (for this service only) item.