Performing Firmware Upgrade#
Attention
Upgrading your existing Freya modules to Release 97 requires enabling Allow Upgrade to Same Version. If you don’t enable this option, you won’t bve able to upgrade your existing Freya modules.
Select and Upgrade#
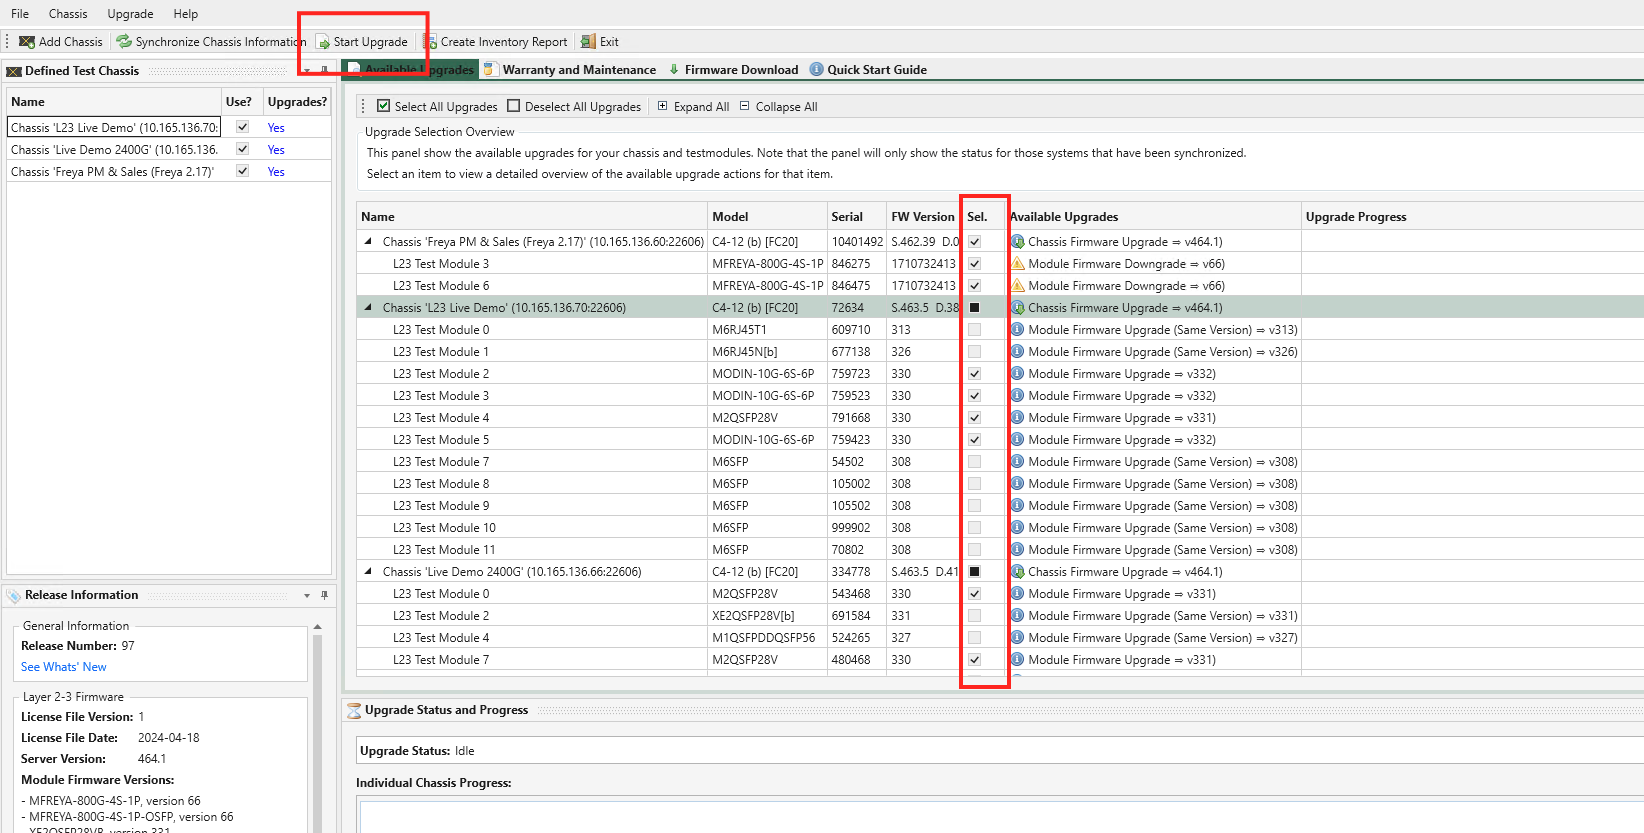
Fig. 9 Start Upgrade#
In the Available Upgrades panel, you can select what parts of the chassis you want to upgrade.
When you select a chassis for upgrade, ChassisUpgrader will automatically select those test modules on the chassis, which has older firmware versions than the ones in the ChassisUpgrader. You can however manually select or deselect test modules if you need to do so.
Note
In almost all situations you will want to upgrade both chassis and all test modules to the latest firmware versions, but it is possible to only upgrade certain parts of the chassis. Manually deselecting one or more modules that was otherwise eligible for an upgrade is thus generally not recommended.
Attention
Keeping modules and chassis on different software versions is highly not recommended and it may cause the system to malfunction. You should only do this if you have been instructed to do so by Teledyne LeCroy Xena support.
Once you have made your selection, press the Start Upgrade button. The upgrade process will now initiate and will inform you when it is complete and if you need to perform additional steps with regards to rebooting the chassis.
Upgrade Only Chassis Firmware#
If you’re only updating the main chassis firmware, it will automatically reboot upon completing the upload. The chassis will seamlessly reconnect to the network without requiring any manual intervention.
Important
It’s important to note that if the software release you’re upgrading to includes a firmware update for both the chassis and modules, it’s crucial to update both components. Operating with different software versions for modules and chassis is not supported and could lead to system malfunctions. Only consider this if you’ve received specific instructions from Teledyne LeCroy Xena support.
Upgrade Test Module Firmware#
When upgrading one or more test modules, manual interaction is required to complete the chassis reboot. Here’s the step-by-step process for rebooting the chassis after a module firmware upgrade:
Initiate the upgrade progress in ChassisUpgrader.
Wait for the ChassisUpgrader to prompt you to power-cycle the chassis.
Remove power from the chassis completely - then wait at least 10 seconds - and plug in power again.
Wait until the ChassisUpgrader informs you that the chassis is back online.
Important
It’s crucial to leave the chassis unplugged for at least 10 seconds because the power supply’s internal capacity may keep the chassis and test modules active for a few seconds after power is disconnected. Failing to complete this phase may result in the chassis still using the old firmware for one or more test modules.
Additionally, keep in mind that if the software release you are upgrading includes a firmware update for both your chassis and modules, it’s essential to update both components. Operating with different software versions for modules and chassis is not supported and could lead to system malfunctions. Only proceed with this if you have received explicit instructions from Teledyne LeCroy Xena support.
Upgrade Status Monitoring#
The progress of the upgrade can be monitored in the status panel in the lower part of the application. The overall status messages are shown in the box marked Upgrade Status whereas the progress for each individual chassis is shown in separate tabs in the box marked Individual Chassis Progress. The progress for each individual entity is also shown in the Available Upgrades panel.
In general, a chassis upgrade consists of a firmware erase-upload-verify phase and a chassis reboot phase. The process for a chassis firmware-only upgrade is slightly different from when you also upgrade test modules.
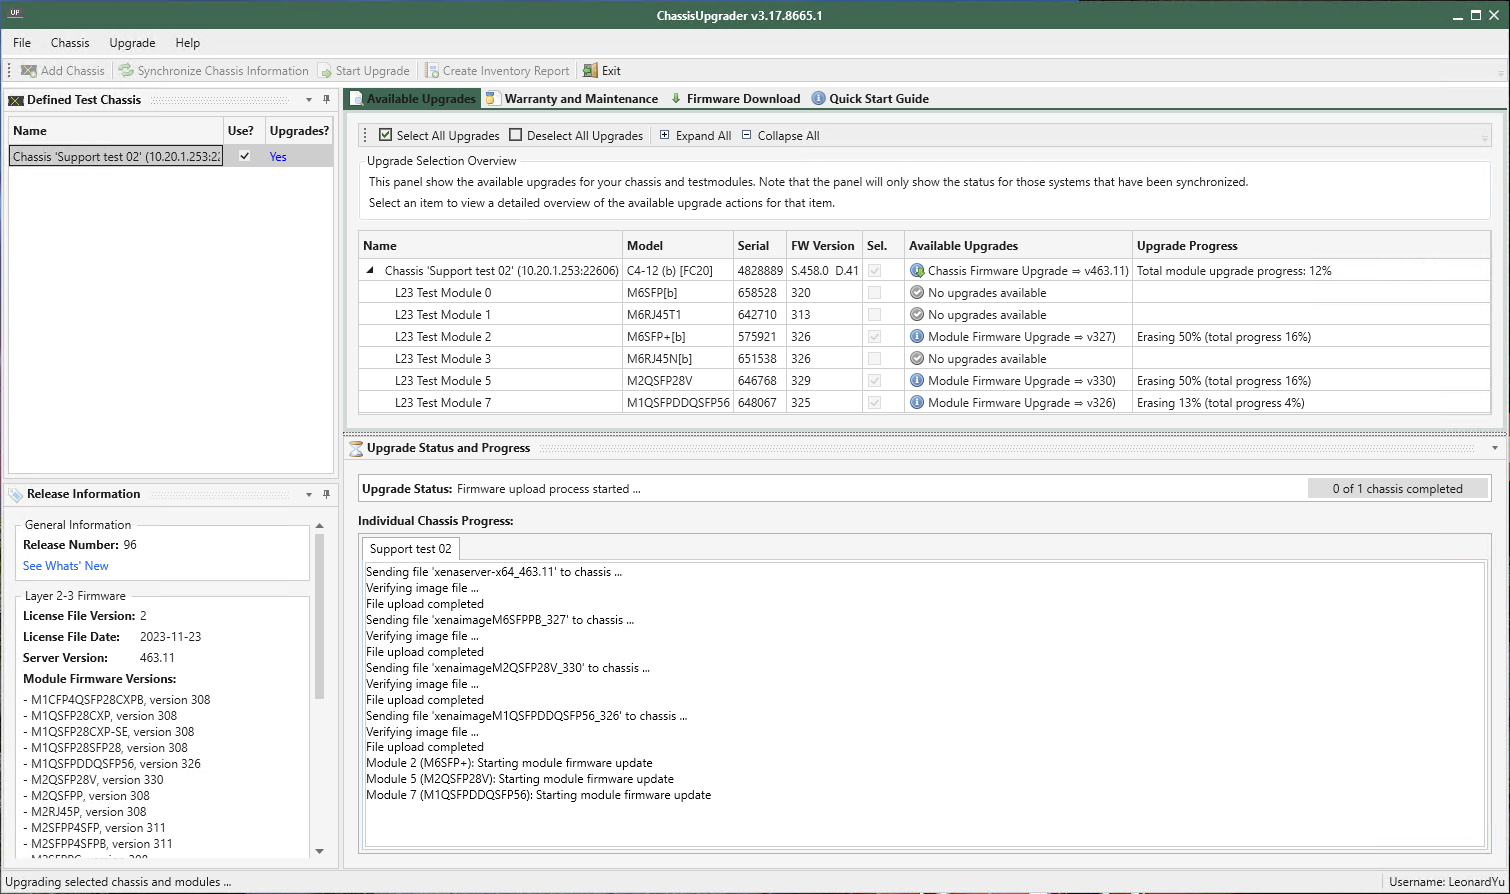
Fig. 10 Upgrade Status#
Power Cycle Chassis#
After the upgrade is completed, the chassis will automatically shut down. You will need to power it up, as instructed in Fig. 11.

Fig. 11 Chassis waiting to be powered up#
After being powered up, the ChassisUpgrader will automatically detect and connect to the chassis as shown in Fig. 12.
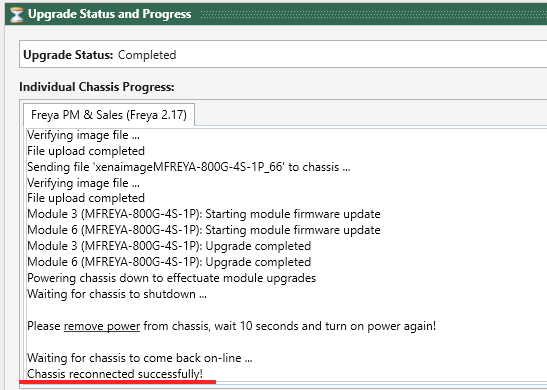
Fig. 12 Chassis powered up and reconnected#