Synchronize Chassis Information#
Select and Synchronize#
Once you have added the chassis, select the checkbox in the Use? column and press the Synchronize Chassis Information button in the toolbar as shown in Fig. 4. This will connect to the defined (and Used) chassis and read information about the current firmware versions of the chassis and installed test modules.
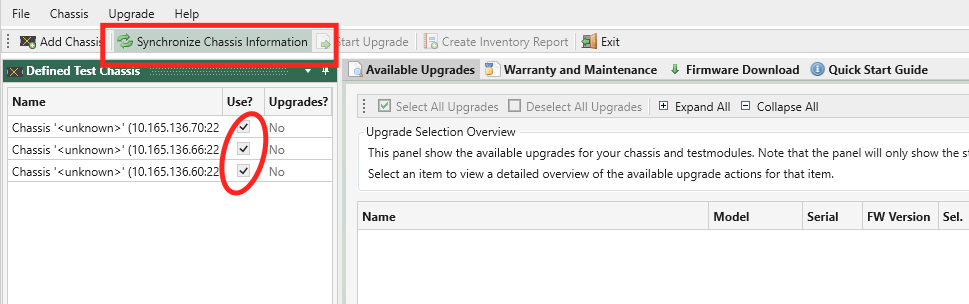
Fig. 4 Synchronize Chassis Information#
Download Required Firmware#
Firmware updates can either be included in the software distribution package and/or be available for download via a cloud repository managed by Teledyne LeCroy Xena. The ChassisUpgrader will inform you if there are available updates for download from the cloud repository.
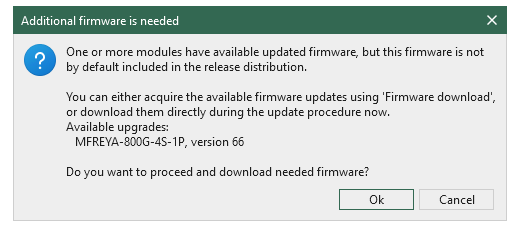
Fig. 5 Available updates for downloading#
With Internet Connection#
If the management computer running the ChassisUpgrader is connected to the Internet, you can initiate the download instantly by clicking OK as shown in Fig. 6.
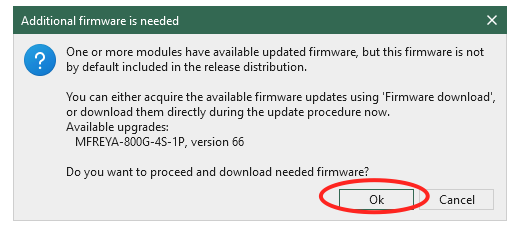
Fig. 6 Click OK to initiate firmware download from cloud repository#
As shown in Fig. 7, you can also go to , select the firmware images you want to download from the cloud repository and click Download selected images. The firmware images are download to [user folder]\Documents\Xena\ChassisUpgrader\FirmwareCache. You can quickly open the folder by clicking Explore download folder.
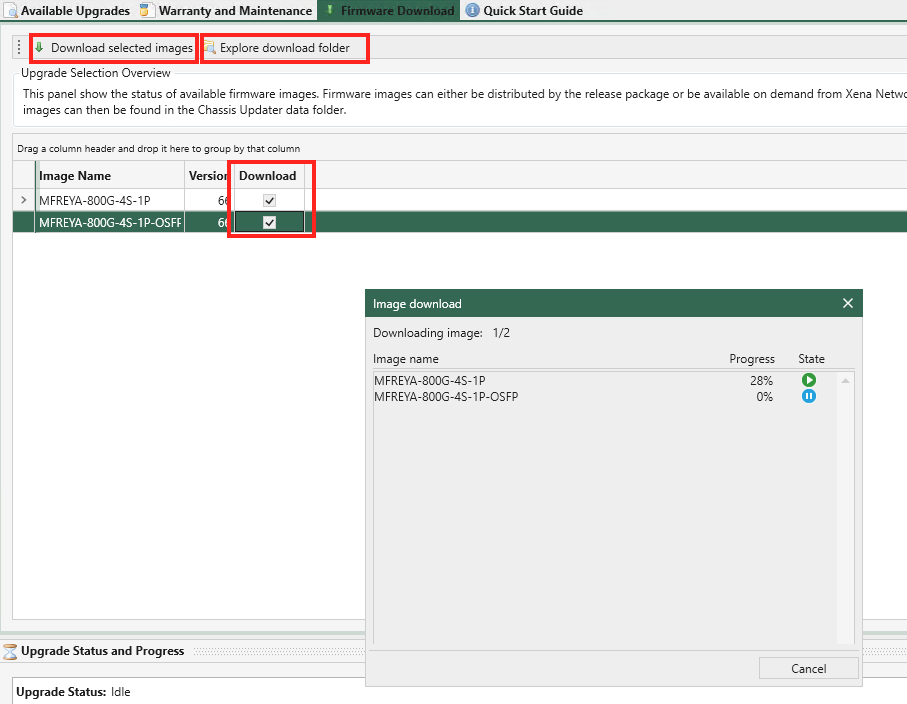
Fig. 7 Select needed firmware images and download from cloud repository#
Without Internet Connection#
If the management computer is NOT connected to the Internet, you must copy the firmware images manually to your management computer. You could use USB to copy the firmware images from a computer that is connected to the Internet to your management computer.
The download computer must be running the same version of the ChassisUpgrader as the management computer. After the download, find the firmware files in [user folder]\Documents\Xena\ChassisUpgrader\FirmwareCache.
These firmware(s) files must be copied to the management computer, in the same directory: [user folder]\Documents\Xena\ChassisUpgrader\FirmwareCache.
Note
Since the download computer does not have a repository for the chassis and module(s) connected to the management computer, it’s recommended to download all available firmware files to the download computer, so they will be available for the management computer when upgrading.
After copying firmware files to management computer, you can start ChassisUpgrader on the management computer, and upgrade system software.
Check Available Upgrades#
As shown in Fig. 8, available upgrade information is shown in the Available Upgrades panel. If you don’t see the information, click Synchronize Chassis Information again. You will find the following information:
Name: The name and type label for the entity (chassis or test module).
Model: Model of hardware (product number incl. version).
FW Version: Chassis or module firmware version number.
Sel: Checkbox selector for including the entity in the upgrade process.
Available Upgrades: Displays an overview of any available upgrades for the item.
Upgrade Progress: Displays the upgrade progress for the item when the upgrade process is started.
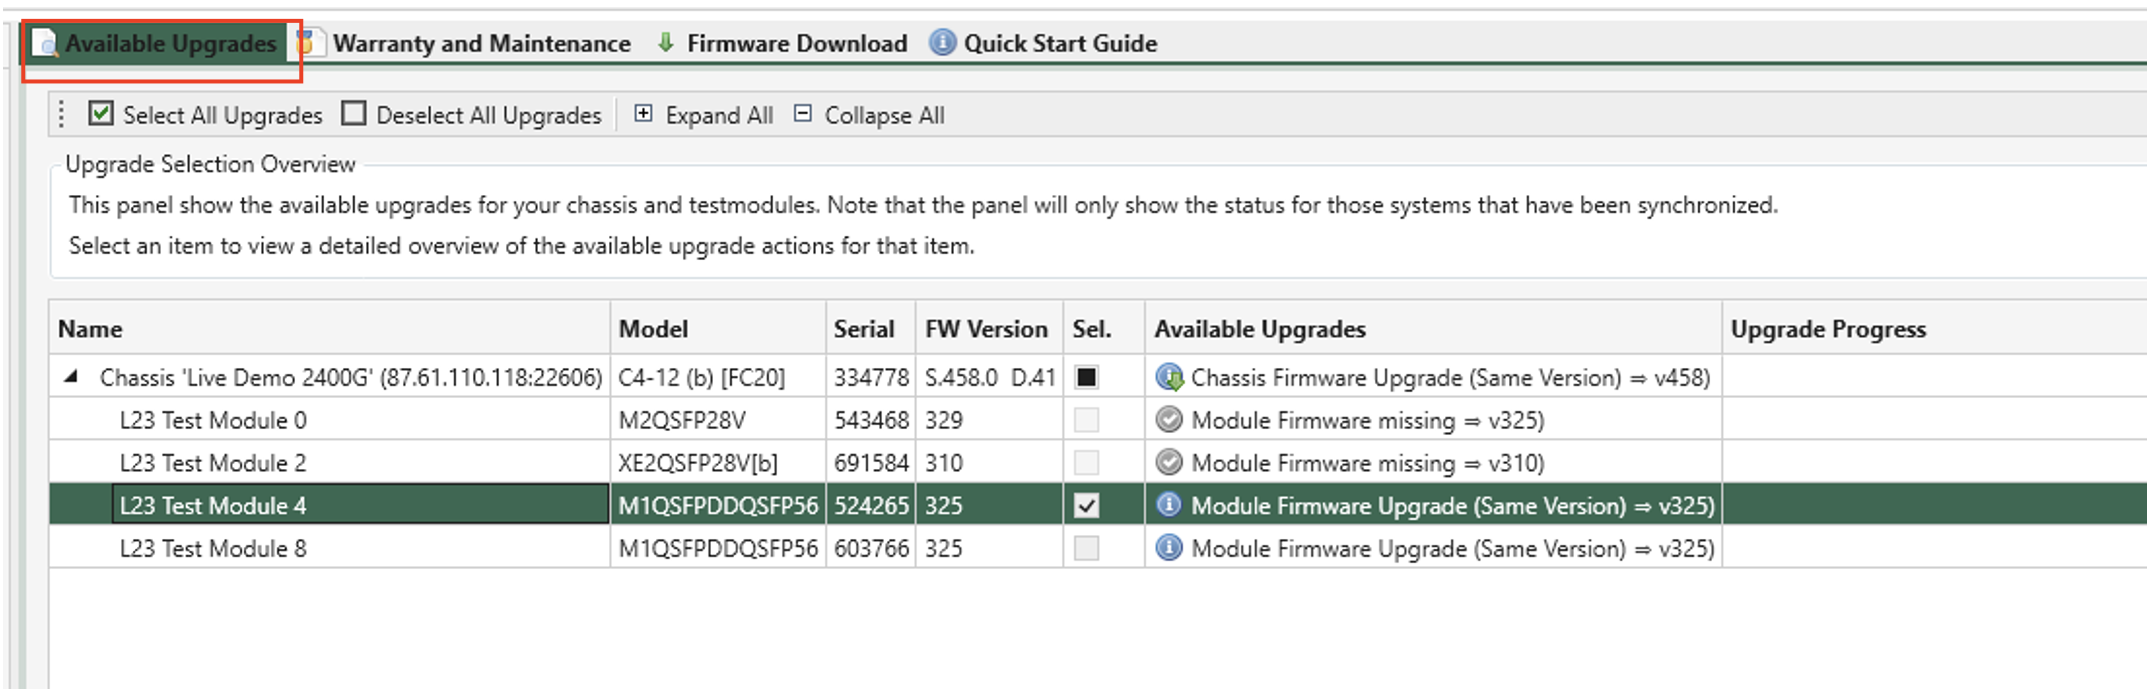
Fig. 8 Available firmware upgrades are shown in a tree view#