Adding Chassis#
ChassisUpgrader offers the flexibility to upgrade multiple chassis, whether you choose to perform upgrades in parallel or individually. To get started, it is assumed that you have properly configured and connected your Xena chassis and management computer, following the guidelines outlined in the Chassis Management - ValkyrieManager User Manual.
Once you’ve ensured that your setup aligns with the manual’s instructions, you can proceed with the following steps:
Press the Add Chassis button located to the left in the toolbar at the top of the application:

Fig. 1 Add chassis#
Fill in the IP address, alternatively you can enter the hostname of the chassis.
Optionally change the port number.
Enter the password and click OK button.
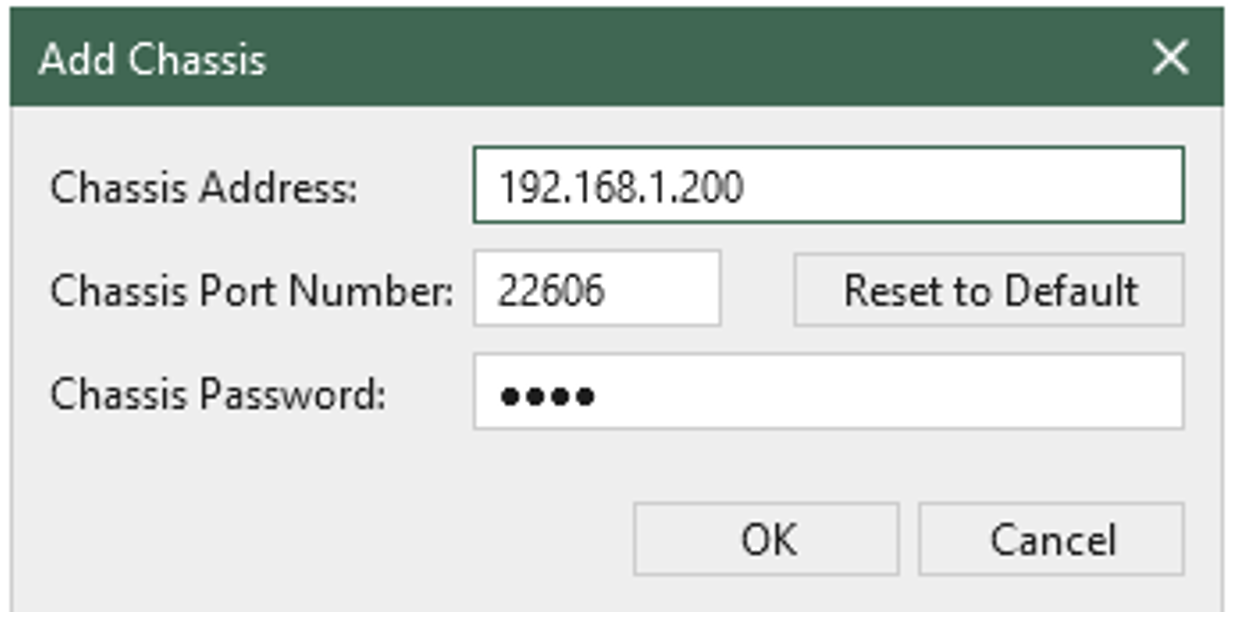
Fig. 2 Add chassis dialog#
Upon completion of these steps, you will see the newly added chassis displayed in the Defined Test Chassis panel located in the upper left corner of the application. This panel will serve as a reference for your upgraded chassis.

Fig. 3 Defined Test Chassis panel#
Please note that the application will not display detailed data until it is synchronized with the respective chassis. You have the flexibility to add or remove chassis definitions within the application. These added chassis definitions will be saved, ensuring that they are available the next time you launch the application. A chassis definition typically includes the chassis display label, IP address, port number, and password for each chassis.
ChassisUpgrader also provides information about the installed release in the panel situated in the lower right corner of the application, allowing you to stay informed about your current configuration and upgrade status.