Module Properties
This section describes the settings that will affect the entire module, as opposed to port level or flow level settings.
SyncE
Chimera implements a single clock domain for clocking all Tx ports. The source clock can be configured to be an internally generated clock or a recovered clock from one of the active Rx ports.
To successfully synchronize the Tx ports to a recovered Rx clock, the internal circuitry must be able to lock on the configured Rx clock. Chimera implements a locking signal which indicates whether Chimera is currently locked to a Rx port. This “Rx lock” signal MUST be ON before you can trust that the Tx ports are running of the configured Rx port.
If the Rx lock signal returns NOVALIDTXCLK, it implies that Chimera could not lock to the configured Rx port clock, in which case it will fall back to running off the internally generated clock.
Notice that when configured to run off the internal clock (Module Local Clock), the Rx lock signal will always return NOVALIDTXCLK.
Parameter |
Legal values |
Comments |
Step size |
Clk source |
0 to 9 |
0 (=MODULELOCALCLOCK) 1 Not supported 2 (=P0RXCLK) - All speeds 3 (=P1RXCLK) - All speeds 4 (=P2RXCLK) - 50G / 25G / 10G 5 (=P3RXCLK) - 50G / 25G / 10G 6 (=P4RXCLK) - 25G / 10G 7 (=P5RXCLK) - 25G / 10G 8 (=P6RXCLK) - 25G / 10G 9 (=P7RXCLK) - 25G / 10G |
1 |
Value = 1 is not supported and if so configured, the status will return: NOVALIDTXCLK.
You can only configure one of the available ports as clock source. The number of available ports depends on the selected speed mode. See Table 1 for valid ports depending on port speed.
Selecting a port which does not exist for the selected speed mode will cause the internally generated clock to be selected as Tx clock source.
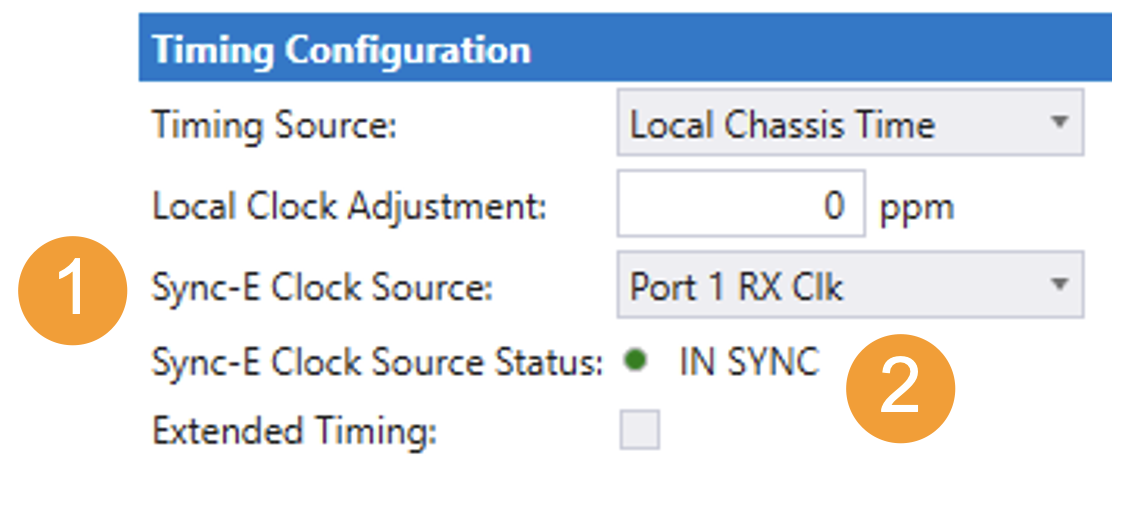
Fig. 197 illustrates how to configure SyncE in the UI (Select tab).

Fig. 197 Configuring SyncE
To configure SyncE:
Select the required clock source from the dropdown menu.
IN SYNC indicates if Chimera was able to lock to the selected input Rx port. (IN SYNC is not valid when selecting module local clock.)
The example above illustrates how to lock Tx output to the recovered clock from Rx port 1. Further the green light, indicates that the module was able to recover the configured clock.
Note
The example below illustrates how to configure the same example using script commands.
M_TXCLOCKSOURCE P1RXCLK
The example below illustrates how to query if Chimera successfully locked to the configured Rx clock.
M_TXCLOCKSTATUS ?
Note
Notice, that the SyncE implementation described above, implies that Chimera is not Ethernet Synchronization Message Channel (ESMC) message aware and that all ESMC messages will pass transparently through Chimera if not explicitly configured for impairment using a flow filter.
Emulator Bypass
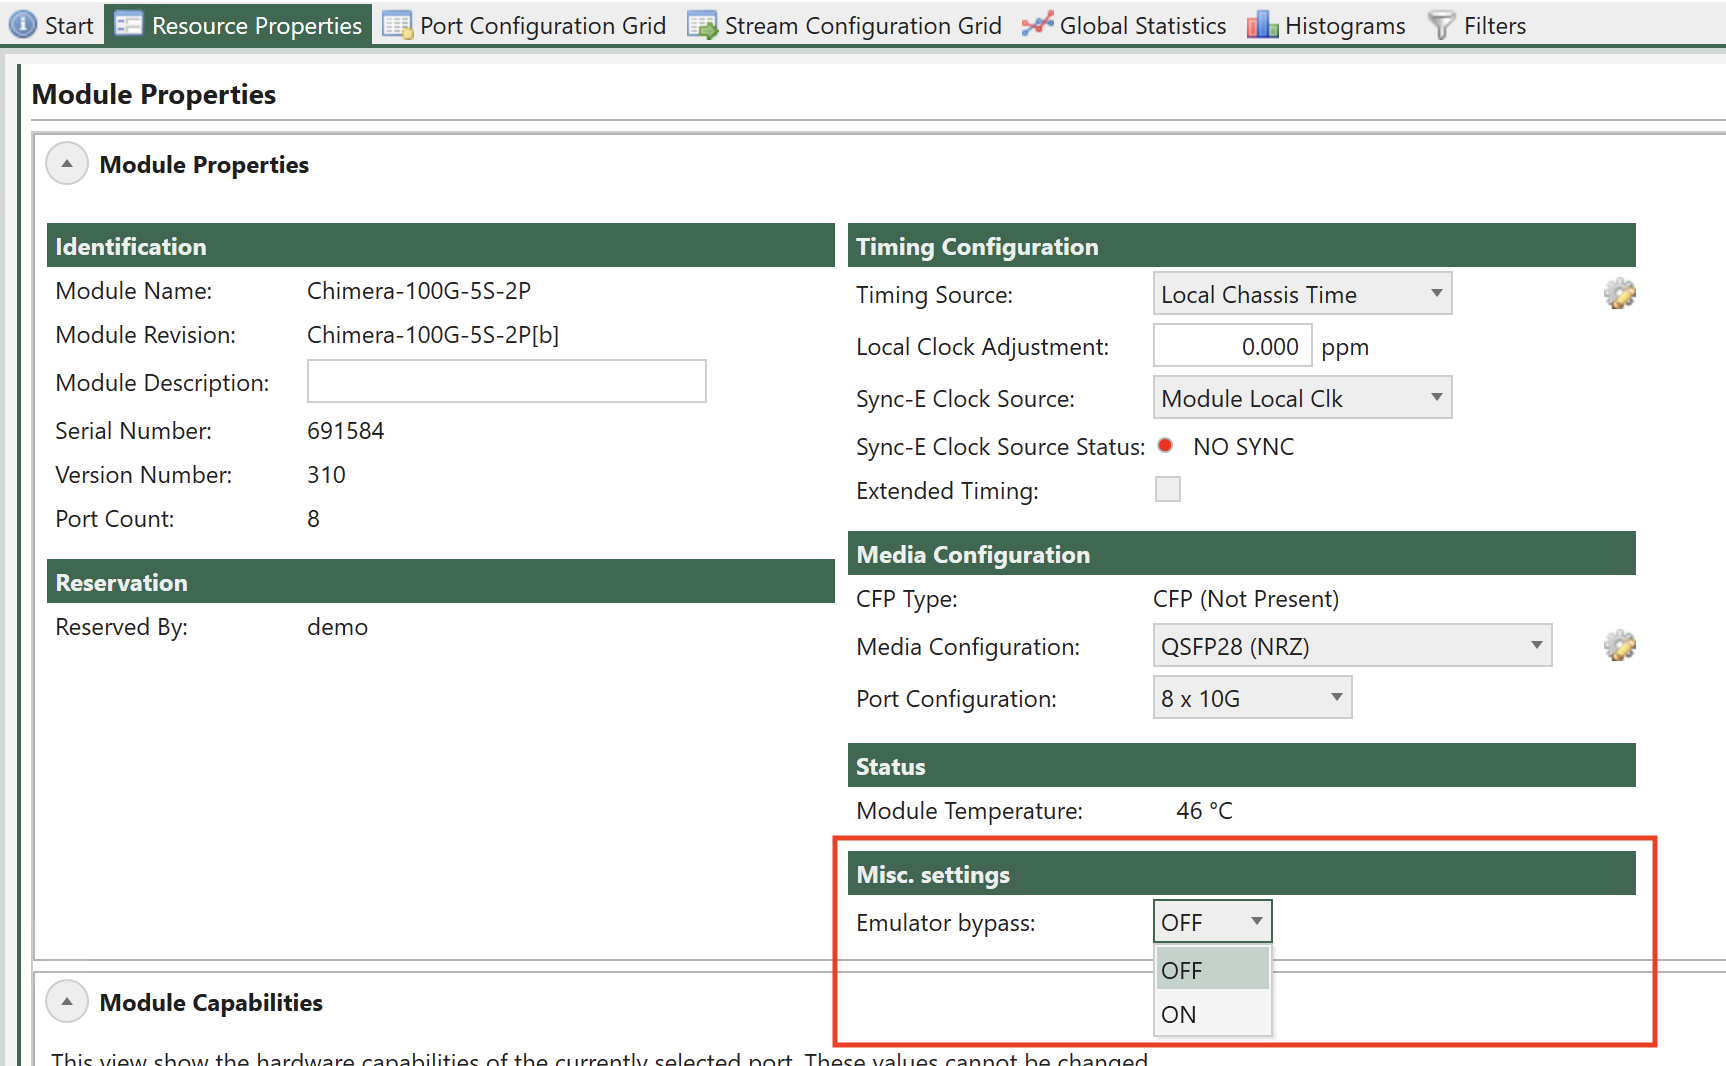
It is possible to completely bypass the emulator core by directly connecting the input ports to the output ports for minimum latency. Setting the bypass mode, will affect all the ports of the module.
The emulator bypass mode is a convenient way of inactivating Chimera in the test setup, without physically removing the cables.
While in bypass mode, Chimera can be configured and statistics are updated, but this will have no effect on the output traffic. I.e. Chimera settings / statistics must be completely disregarded for the duration of the bypass.
The constant latency introduced by Chimera when in bypass mode, is listed in Table 70, for different port speeds and FEC settings. In addition to the constant latency listed in Table 70, Chimera will introduce a jitter of ± 50 ns.
10G |
25G |
25G (FEC) |
40G |
50G |
100G |
100G (FEC) |
|
|---|---|---|---|---|---|---|---|
Latency (ns) |
1150 |
600 |
1250 |
1000 |
550 |
600 |
1400 |
Fig. 198 illustrates how to configure emulator bypass mode in the UI (Select tab).

Fig. 198 Configuring emulator bypass mode
Note
Corresponding CLI command: M_EMULBYPASS