Step-by-Step
Prerequisite
Python: >= 3.11.
Download prooject: Get`latest release <https://github.com/xenanetworks/cable-perf-test-suite/releases>`_.
Install dependencies using pip:
pip install -r requirements.txt # For Windows
pip3 install -r requirements.txt # For Linux/macOS
The required packages are listed in the requirements.txt file.
Note
tdl-xoa-driver is developed by Teledyne LeCroy Xena. You can read more about this package in XOA Driver Documentation.
Change Test Configuration
Go to test/ directory, change the test_config.yml to meet your test setup and requirements.
test_config:
  chassis_ip: "10.165.136.60"
  username: "CPOM"
  password: "xena"
  tcp_port: 22606
  log_filename: "xena_cpom.log"
  csv_report_filename: "xena_cpom_report.csv
  tcvr_rx_output_eq_test_config:
    port_pair_list:
      - tx: "3/0"
        rx: "6/0"
    module_media: "QSFPDD800"
    port_speed: "1x800G"
    lane: [1]
    delay_after_reset: 2
    prbs_config:
      polynomial: "PRBS31"
      duration: 2
    rx_output_eq_range:
      amp_min: 0
      amp_max: 3
      pre_min: 0
      pre_max: 7
      post_min: 0
      post_max: 7
    delay_after_eq_write: 2
  tcvr_tx_input_eq_test_config:
    port_pair_list:
      - tx: "3/0"
        rx: "6/0"
    module_media: "QSFPDD800"
    port_speed: "1x800G"
    lane: [1]
    delay_after_reset: 2
    prbs_config:
      polynomial: "PRBS31"
      duration: 2
    tx_input_eq_range:
      min: 0
      max: 12
    delay_after_eq_write: 2
  host_tx_eq_test_config: # This is the test configuration for RX output equalization (optional)
    port_pair_list:
      - tx: "0/0"
        rx: "0/0"
    module_media: "OSFP_1600"
    port_speed: "1x1600G"
    lane: [3]
    delay_after_reset: 2
    prbs_config:
      polynomial: "PRBS31"
      duration: 10
    delay_after_eq_write: 2
    target_ber: 1e-10
    start_txeq:
      pre3: 0
      pre2: 0
      pre1: 0
      main: 100
      post1: 0
      post2: 10
    optimize_mode: "exhaustive"  # "heuristic" or "exhaustive"
    optimize_txeq_ids: [0, -1, 1, -2, -3, 2]
chassis_ip: the IP address of the chassisusername: the name used to connect to the chassis and reserve portspassword: the password used to connect to the chassistcp_port: the port number used to connect to the chassislog_filename: the log filenamecsv_report_filename: the CSV report filenametcvr_rx_output_eq_test_config: the test configuration of RX output equalization optimizationport_pair_list: a list of port pairstx: the ID (module/port) of the port that transmits PRBSrx: the ID (module/port) of the port that measures PRBS BER
module_media: the module media mode to applyport_speed: the port speed mode in the format of <port count>x<port speed>lane: the lane index you want to test, from 1 to 8.delay_after_reset: waiting time in seconds after port resetprbs_configpolynomial: the PRBS polynomial to useduration: PRBS BER measurement duration in seconds
rx_output_eq_range:amp_min: the minimum amplitude cursor code valueamp_max: the maximum amplitude cursor code valuepre_min: the minimum pre-cursor code valuepre_max: the maximum pre-cursor code valuepost_min: the minimum post-cursor code valuepost_max: the maximum post-cursor code value
delay_after_eq_write: waiting time in seconds after writing the cursor values
tcvr_tx_input_eq_test_config: the test configuration of TX input equalization optimizationport_pair_list: a list of port pairstx: the ID (module/port) of the port that transmits PRBSrx: the ID (module/port) of the port that measures PRBS BER
module_media: the module media mode to applyport_speed: the port speed mode in the format of <port count>x<port speed>lane: the lane index you want to test, from 1 to 8.delay_after_reset: waiting time in seconds after port resetprbs_configpolynomial: the PRBS polynomial to useduration: PRBS BER measurement duration in seconds
tx_input_eq_range:min: the minimum code valuemax: the maximum code value
delay_after_eq_write: waiting time in seconds after writing the cursor values
host_tx_eq_test_config: the test configuration of host TX equalization optimization (optional)port_pair_list: a list of port pairstx: the ID (module/port) of the port that transmits PRBSrx: the ID (module/port) of the port that measures PRBS BER
module_media: the module media mode to applyport_speed: the port speed mode in the format of <port count>x<port speed>lane: the lane index you want to test, from 1 to 8.delay_after_reset: waiting time in seconds after port resetprbs_configpolynomial: the PRBS polynomial to useduration: PRBS BER measurement duration in seconds
target_ber: the target BER to achievestart_txeq: the preset EQ tap values before starting the testpre3: pre-cursor 3 valuepre2: pre-cursor 2 valuepre1: pre-cursor 1 valuemain: main cursor valuepost1: post-cursor 1 valuepost2: post-cursor 2 value
delay_after_eq_write: waiting time in seconds after writing the cursor valuesoptimize_mode: the search mode, can be either “heuristic” or “exhaustive”. When exhaustive mode is selected, the target BER will be ignored. All possible combinations of EQ settings within the specified range will be tested to find the optimal settings. This mode is more time-consuming but guarantees finding the best settings. In heuristic mode, a more efficient algorithm is used to find good settings quickly, but it may not find the absolute best settings.optimize_txeq_ids: a list of EQ taps to be adjusted during the test. 0 = main, -1 = pre1, -2 = pre2, -3 = pre3, 1 = post1, 2 = post2. The order of the taps in the list determines the sequence in which they are adjusted during the test.
Run the Test
To start the test, run:
Windows:
python test.pyLinux/macOS:
python3 test.py
The test log and results will be saved in a different folder each time you run the test, and will also be printed on the console.
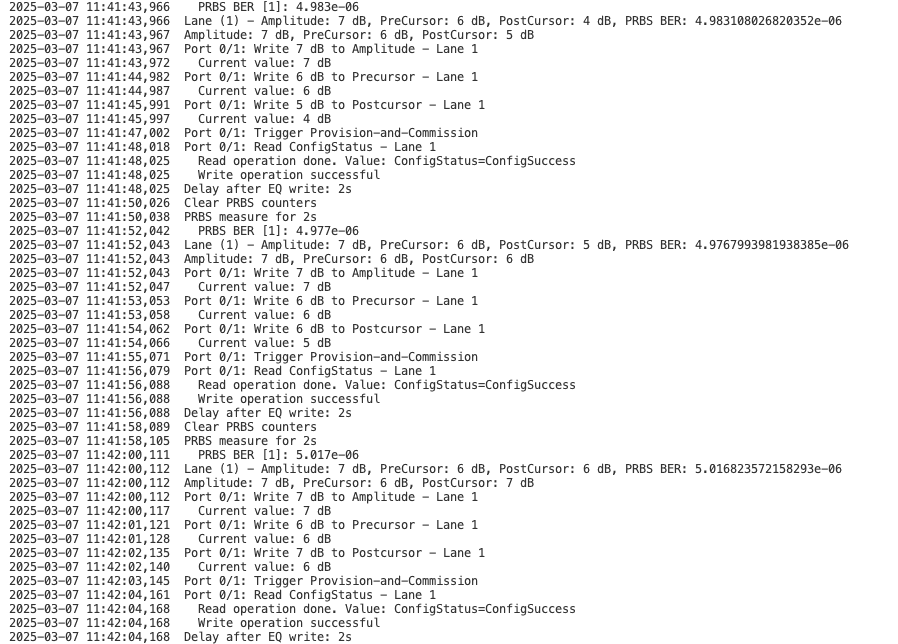
Fig. 1 Test in process
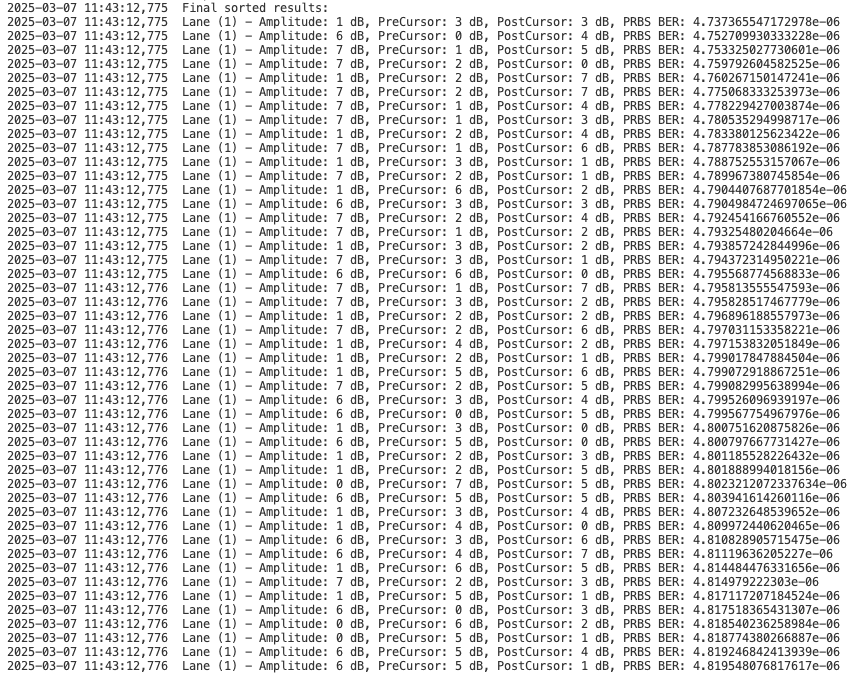
Fig. 2 Test results